TEST
Test the remote control operation at various locations within your
home for convenience and range. The remote control range will vary
depending on your house and wiring construction. The range may be
reduced by metal lath, foil-backed insulation or aluminum siding.
Press the remote control button. The light should turn on.
Press again and the light should turn off.
PROGRAMMING
2
3
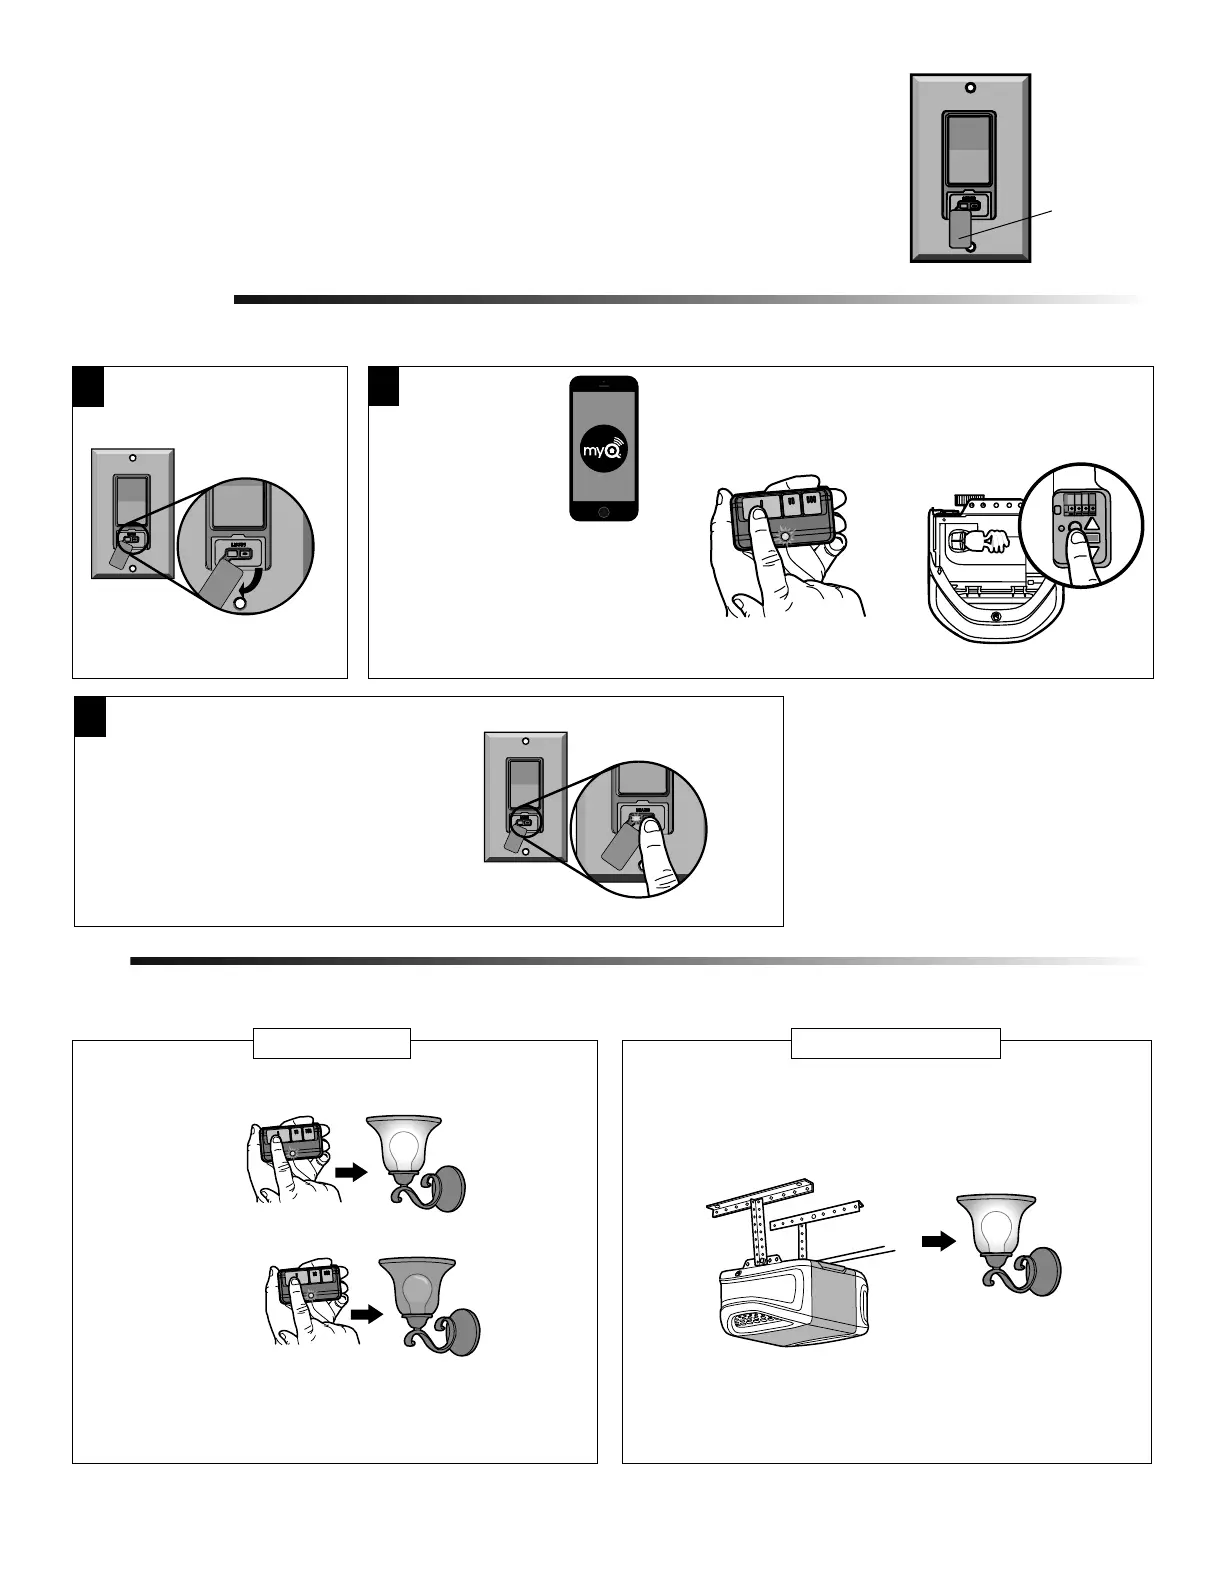
Then press and release the “LEARN”
button. Both the LED on the Smart Light
Switch and the light will flash once
indicating the programming is complete.
NOTE: If needed, press and release the
“LEARN” button with a narrow
instrument.
IMPORTANT NOTE: When the LED has stopped flashing (up to 10 minutes), proceed to Programming.
Press and release the
Learn button on the
garage door opener.
Press and HOLD the
remote control button.
OROR
1
Lift the cover on the Smart
Light Switch to access the
“LEARN” button.
3
Figure 4
Cover
3. Open the cover on the light switch so you can view the LED (Figure 4).
4. Allow up to 10 minutes for Smart Light Switch to power up properly, when the LED stops
flashing proceed to Programming.
INSTALLATION (CONTINUED)
Testing the Smart Light Switch will vary depending on your application.
REMOTE CONTROL
Activate the garage door opener. The light should turn on. The light
will stay on for the same length of time as your garage door opener
lights.
GARAGE DOOR OPENER
NOTE: If the light does not turn on and off, repeat programming steps.
• Download the
Chamberlain
MyQ
®
App*.
• Create or sign-in
to your account
and follow the
in-app
instructions to
add the Smart Light Switch
to your MyQ
®
account.
* Smartphone control requires a
MyQ
®
Garage, Smart Garage
Hub, MyQ
®
Internet Gateway,
or Wi-Fi
®
Garage Door Opener.
 Loading...