Do you have a question about the Champ XODA FS 898A and is the answer not in the manual?
Maintain 15cm space from wall, avoid sunlight, heat, and wetness. Use correct power voltage.
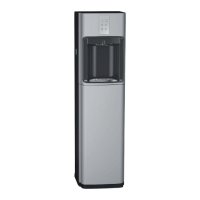
The XODA FS 898A (CW-898A) is a free-standing water dispenser designed to provide hot, cold, and sparkling water. This manual outlines its operation, installation, and maintenance, ensuring safe and efficient use.
The primary function of the XODA FS 898A is to dispense various types of water: cold, hot, and sparkling. It connects directly to a water supply, filtering and treating the water to provide different temperature options and carbonation. The dispenser features an IC Board Control Panel for easy operation and includes a hidden cup holder for convenience. A CO2 cylinder is integrated for sparkling water production, and the unit is equipped with safety features to prevent common issues like dry-heat and leakage.
The installation process begins by disassembling the original water tap and installing a tri-way socket and an inlet ball valve. A 1/4" PE water pipe then connects the inlet ball valve to the dispenser's water-in connector. It is crucial to ensure the inlet water is clean; otherwise, an optional water filtration system (not included) is required.
The dispenser includes a hidden cup holder for easy access to cups. To load cups, push the clip on top of the lid, then lift the lid. Cups should be loaded bottoms up, pushing them all the way down until no more fit. Cups can be gently pulled out when needed.
For sparkling water, a CO2 cylinder, pressure regulator, and adapter are required. The pressure regulator connects to the CO2 bottle via the adapter. A PE pipe (CO2 refill tube) then connects the pressure regulator to the soda machine. The recommended pressure setting is under 4 bar / 4 KG. The CO2 refill tube connects to the CO2 connector at the back of the machine.
To dispense cold water, first ensure the power switches at the rear panel are OFF. Plug in the power cord and connect the inlet water. Press the ambient or cold water button to flush the filters, which is important for ensuring water quality. Then, touch and hold the cold water button until water dispenses, which may take 1-2 minutes. Finally, turn on the cold power switch at the back. The machine will begin chilling immediately, a process that can take up to 40 minutes. For safety, dispensing is limited to 60 seconds; if more water is needed, the button must be touched again.
Similar to cold water, ensure the power switches at the rear panel are OFF, plug in the power cord, and connect the inlet water. Press the ambient or cold water button to flush filters, ensuring drinking water quality. Crucially, press and hold the hot water button until water comes out to prevent hot tank dry-heat. For safety, after pressing the unlock button, the hot water button must be pressed for 3 seconds to dispense hot water. Subsequent dispenses within the same unlocking period can be immediate. Turn on the hot power switch at the back to initiate heating. The machine will automatically reheat when the hot water temperature drops. Dispensing is limited to 60 seconds for safety. The control panel features indicators for Energy Saving, Hot Power, Cold Power, Heating System, and Chilling System, along with a Safety Lock.
Begin by pressing the ambient or cold water button to flush filters, ensuring water quality. Turn on the soda power switch at the back, then press any button to allow mains water to fill the soda tank. Push the soda water button to drain out the primary soda water in the tank. The newly produced soda water is then ready to drink. Dispensing is limited to 60 seconds for safety.
The dispenser should be placed with at least 15cm of space between it and the wall. Keep the machine away from direct sunlight, heat sources, and wetness. Always use a single outlet socket with the correct power voltage, plugging the power cord directly into the electrical socket.
The drain container is equipped with an alarm system that beeps when it is full. To empty it, remove the drain container from the machine. After emptying, place it back into the machine.
This appliance is not intended for use by persons with reduced physical, sensory, or mental capabilities, or lack of experience and knowledge, unless supervised or instructed. Children aged 8 years and above can use it if supervised and instructed on safe use and hazards. Cleaning and user maintenance should not be performed by children unless they are over 8 and supervised. Keep the appliance and its cord out of reach of children under 8 years. Never allow children near the water dispenser or spill water on the connector. Always switch off and disconnect the appliance from the supply before changing accessories or approaching moving parts. New hose-sets supplied with the appliance should be used for water mains connection; old hose-sets should not be reused. Disconnect the appliance from its power source during service and when replacing parts. Children should not play with the appliance. Be cautious when opening the front lower cover, as the metal side panel edges can be sharp. Users MUST wear gloves for replacement, repair, and waste water emptying to prevent injury.
Before cleaning, ensure the machine is completely disconnected from electricity. To drain the tanks, remove the caps on top of the hot and cold water drains. The remaining water will drain out. Cleaning can commence once both tanks are empty. Remember to replace the caps after cleaning. If the water dispenser is damaged, contact your distributor or a qualified technician for repair.
The manual provides a comprehensive troubleshooting guide for common issues:
| Cold Water Temperature | 5-10°C |
|---|---|
| Rated Frequency | 50Hz |
| Frequency | 50 Hz |
| Capacity | 5L |
| Material | Plastic |