ASSEMBLY INSTRUCTIONS
Suggested Tools:
Wrench and/or Ratchet Set
Approximate assembly time is 5-10 minutes
CHAPIN INTERNATIONAL, INC. P.O. BOX 549 700 ELLICOTT ST. BATAVIA, NY 14021-0549 www.chapinmfg.com 800-950-4458
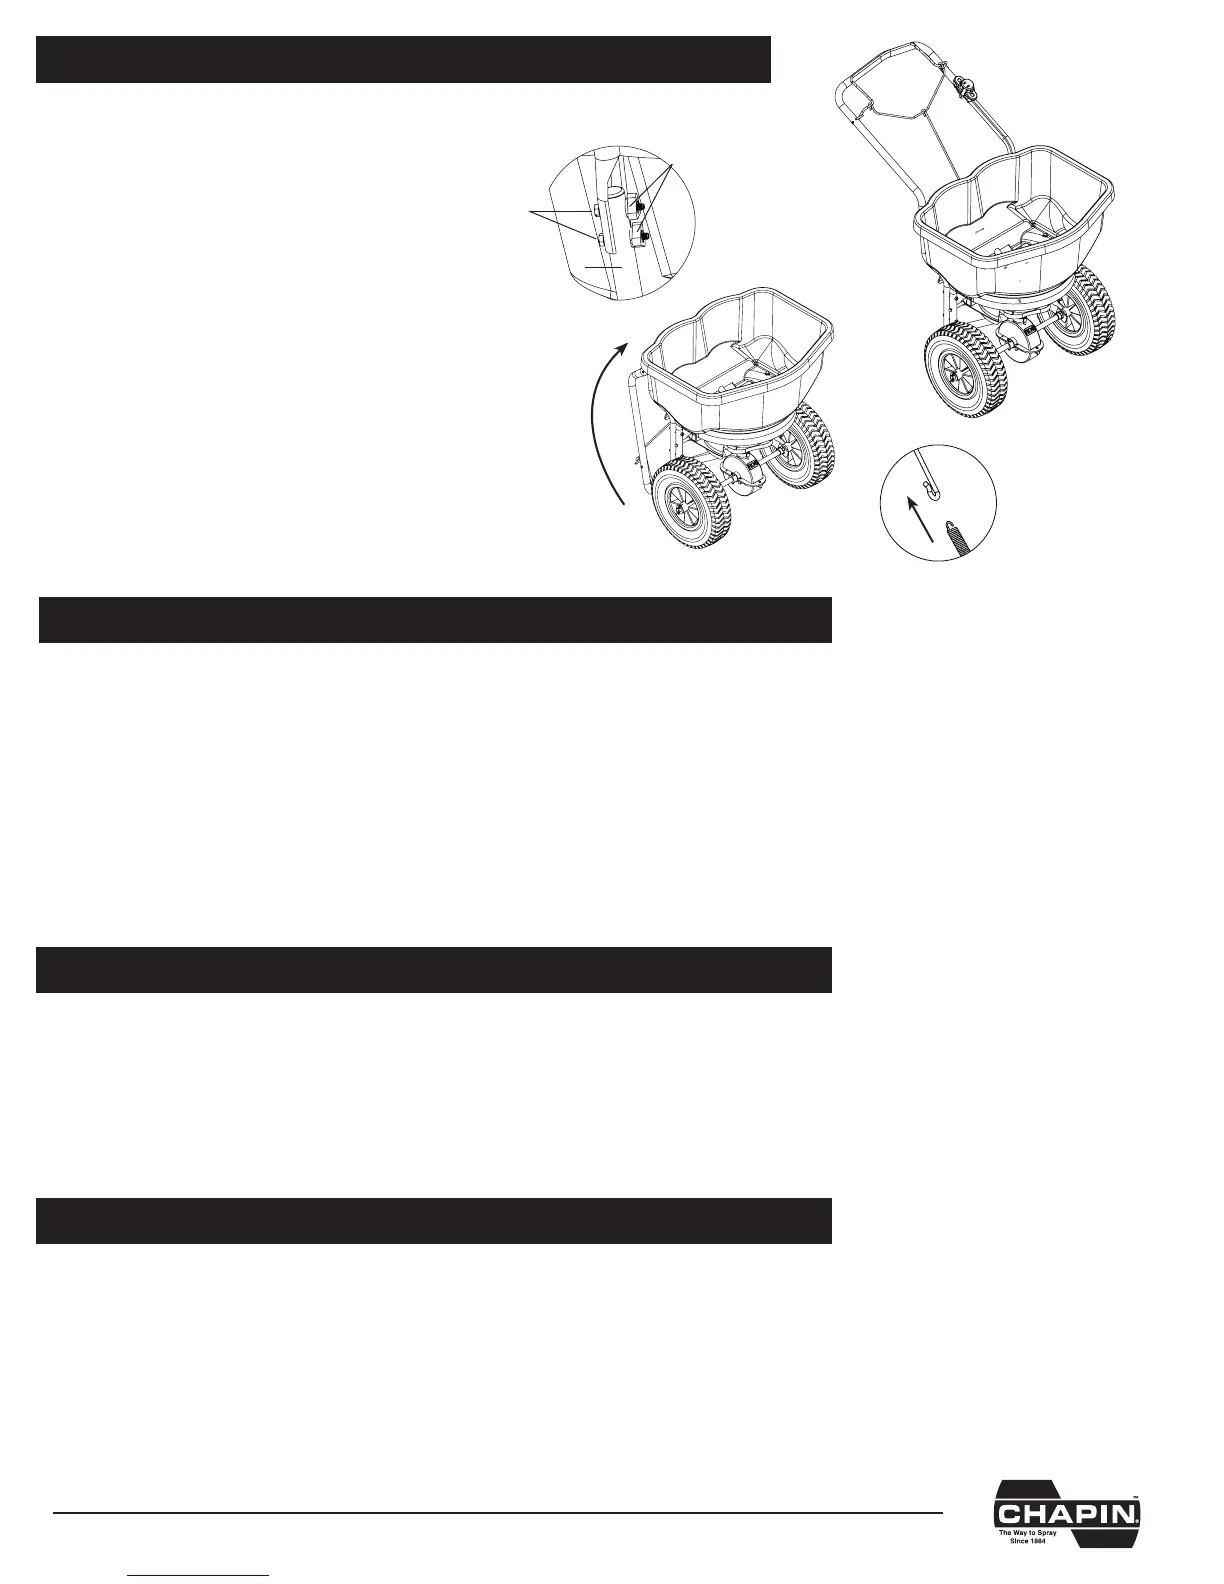
•Removebottomboltfromeachsideof
handle(belowtriangleshapedthumb
screws)
•Loosenthumbscrewsandipuphandle
•Replaceboltsbelowthumbscrews
andtightendown
•Tightenthumbscrewscompletely
*Note:Ifspringdetachesfrombailassembly,
simplyre-attach(seeFigureA).
•Besuregatecontrolisintheclosedposition(donotholdbaildownwhenlling)
•Determineappropriatesettingformaterialbeingusedbyreadingthesuggestedsettingonthematerial’sbag
AND/ORbyreferencingtheapplicationchartonyourspreader’scontrolpanel(Chartsprovidedareonlyguidelines.
Besuretoreadtheinstructionsonthebag/boxofthematerialyou’respreadingtoidentifyaccuratesettingneeded)
•SetthedialtothedesiredsettingImportant Note: Do not adjust dial while holding bail down and gate is open.
is will alter the accuracy of gate settings and cause parts to break.
•Tobeginspreading,startwalking(about3mphpace)andpullthebailsystemdowntoopengate
•Tostopspreadingsimplyletgoofthebailandthegatewillclose
GENERAL OPERATING INSTRUCTIONS
EDGE CONTROL OPERATING INSTRUCTIONS
STORAGE AND MAINTENANCE
•Edgecontrolfunctionstocutothespreadingofmaterialsonthele side only–usethisfeaturewhenspreading
alongowerbeds,sidewalks,driveways,andanyareawhereyouwanttokeepunwantedmaterialsfromlanding
•Touseedgecontrol,moveredlever(locatedonhandle)tothe“ON”position–thiscanbedonewhilewalking
orstandingstill
•Tostoptheblockageofmaterialsimplymovelevertothe“OFF”position
•Whennishedspreadingemptyhopperofanyremainingmaterial
•oroughlywashspreaderandallowtodrybeforestoring
•Tofolddownhandle:
-Simplyremovethebottomtwoboltsonthehandle
-Loosentwothumbscrewsandfolddownhandle
-Replacetwobottombolts
-Tightenthumbscrewscompletely
Handle
Bolts
Thumb
Screws
Figure A