BEFORE YOU BAKE THE KRUMKAKE
Set the Color Control Dial to about 2 ½ to 3. Close the lid. Insert the KrumKake Express
™
power
cord into a 120V-60HZ grounded outlet. For consistent baking times let it warm up and cycle a
few times to stabilize- about 5 minutes. The Green and Red lights will go on and off alternately
a few times.
Spray or wipe the baking plates lightly with a vegetable oil spray the first time you use the
KrumKake Express
™
and anytime thereafter should your krumkake wafers stick.
Use one of our recommended krumkake recipes included here or select a family favorite. One
krumkake (6” diameter) takes a little less than 2 tablespoons of batter. One tablespoon will
make a 4’ diameter krumkake. For best results, do not overfill the waffle iron.
BAKING YOUR FIRST KRUMKAKE
When the green light is ON, spoon the appropriate amount of batter directly in the center or
slightly above the center of the waffle pattern. Promptly close the lid. Press the lid down firmly
and, for a still thinner krumkake, fasten the latch which will spread the batter evenly across the
baking grid.
Lift the lid carefully in 60 seconds to check the color of
your first wafer. If the color is too light, bake another 15
to 20 seconds.
It may take a few tries to find the best setting of the Color
Control Dial; it is finely calibrated and sensitive. A small
movement of the Color Control Dial makes a noticeable
difference in the color of the krumkake. Adjust the Color
Control Dial ½ graduation higher to darken the cone and
½ graduation lower to lighten the krumkake. When you
have the setting just as you like, the green and red lights
usually can be used to time your baking cycle.
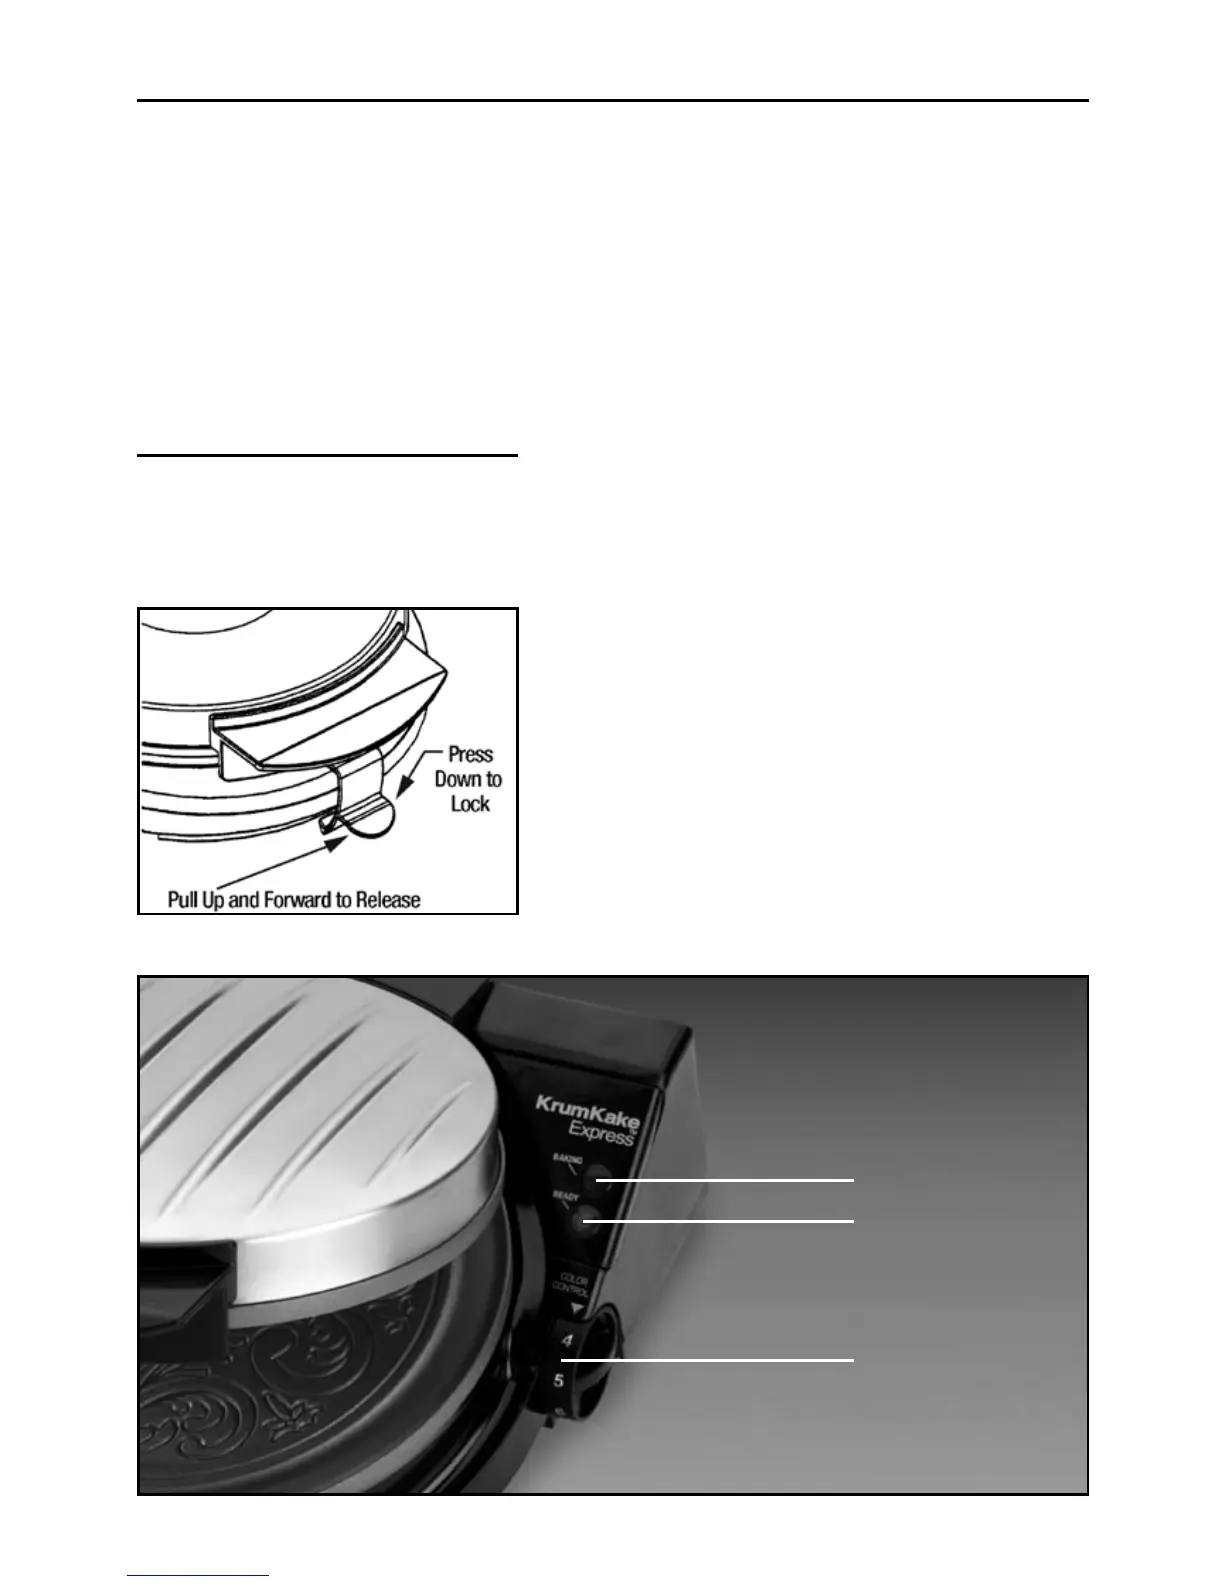
Figure 2. Locking latch.
5
Figure 3. Control panel.
Red “Baking” Light
Green “Ready” Light
Color Control Dial
 Loading...