7 8
OPERATING INSTRUCTIONS OPERATING INSTRUCTIONS
BEFORE FIRST USE
1. Remove all packaging materials and check to ensure that all parts and accessories are
accounted for. Read all stickers and remove ones that are not permanent.
2. Remove and hand wash the water reservoir, the milk reservoir, the portalter, portalter
baskets, measuring scoop, drip tray, and removable coaster with a mild detergent and
water. Rinse and dry well. Only the metal baskets and coaster are top-rack dishwasher safe.
All other parts are NOT dishwasher safe. NOTE: The four parts of the milk reservoir lid can
come apart and are easily reassembled. To reassemble, follow the diagrams below.
3. Before rst use, you must prime the unit (clean and remove any packaging debris)
according to the directions below.
IMPORTANT–PRIME THE UNIT BEFORE FIRST USE
To prime the unit, follow these steps:
1. Fill the water reservoir to between the “Min” and “Max” markings on the tank.
2. Remove the milk reservoir. (Tilt it up rst, then pull out.) Fill the milk reservoir with water
(not milk) to between the “Min” and “Max” markings on the tank and return it to unit.
(To insert it, tilt down and push it rmly into place.)
3. Place a large heatproof cup or mug on the metal coaster set over the drip tray.
(NOTE: the coaster is reversible to make the height adjustable.)
4. Set the froth strength to Extra. Use the silver froth tube lever to position the froth
dispensing tube inside the cup.
5. Place an empty portalter basket in the portalter.
6. Fit the portalter onto the brew head unit, being sure it’s locked in place. (See p. 11 for
more information on placing the portalter.)
7. Plug in the unit and turn it on. (The power switch is located on the side toward
the bottom.)
8. Press the DOUBLE CAPPUCCINO button.
9. The button will blink as the unit preheats; do not press the button again or you will
cancel the function.
10. Let the cup ll with water from the brew head and from the froth dispensing tube. When
the brew cycle function ends, the unit will beep three times. Carefully dispose of the
water in the cup and in the milk reservoir. The unit is now primed and ready for use.
CHOOSE THE RIGHT SIZE CUP
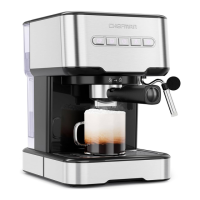
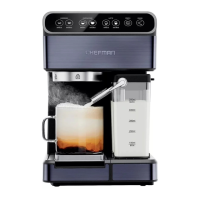
With 15 bars of pressure, the Espresso Machine+ allows for a wide variety of coffee
drinks from a tiny espresso to a large latte. See the graph on p. 10 to choose the right
size cup. Be aware that the actual amount will vary depending on such variables as the
coffee grind and froth amount. Note that you can ip the metal coaster over the drip
tray over to change the height of the cup under the brew head.
a. b. c.