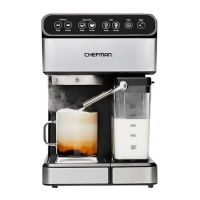
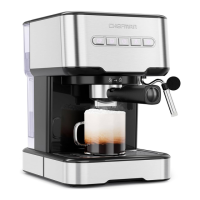
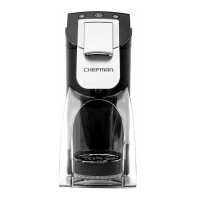
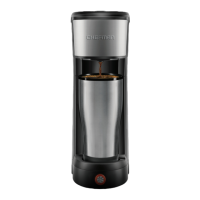
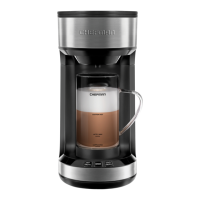
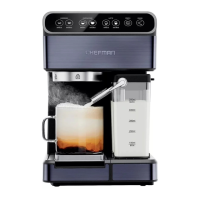
The Chefman Espresso Maker is a versatile appliance designed to help you create a variety of coffee drinks, from a simple espresso to a frothy cappuccino or latte, with one-touch presets. It features an integrated milk frother for customized coffee beverages.
Function Description:
The Espresso Maker operates with 15 bars of pressure to brew rich espresso. It includes dedicated buttons for single and double espresso, cappuccino, and latte, as well as a froth function and a clean function. The unit automatically preheats when switched on, and all available functions illuminate on the control panel. If the milk reservoir is not attached, only the espresso buttons will display. When a drink selection is made, that button blinks during preheating and turns solid during the brew cycle. The unit beeps three times when the brew cycle is complete and returns to standby mode. After 20 minutes of inactivity, it enters sleep mode, with only the CLEAN icon lit, and can be woken by pressing the CLEAN icon. The froth function runs for 30 seconds when pressed, and can be stopped earlier by pressing the FROTH button again.
Usage Features:
Before first use, the unit requires priming. This involves filling both the water and milk reservoirs with water, placing a heatproof cup under the brew head, setting the froth strength to "Extra," inserting an empty portafilter basket, and pressing the DOUBLE CAPPUCCINO button. The unit will dispense water from both the brew head and froth dispensing tube, after which the water should be discarded from the cup and milk reservoir.
To prepare an espresso, fill the water reservoir, fill the portafilter with finely ground coffee, tamp it evenly, and clean any excess grinds. Then, attach the portafilter to the brew head, place a heatproof cup on the metal coaster, and press either the single or double espresso button. The unit will preheat, brew, and beep when finished.
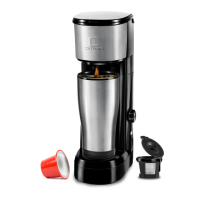
For a cappuccino or latte, in addition to filling the water reservoir and portafilter with coffee, the milk reservoir must be filled with cold milk. The froth strength should be set to "Standard." A heatproof cup or mug is placed on the metal coaster, and the froth dispensing tube is positioned over the cup. After attaching the portafilter, the single or double cappuccino or latte button is pressed. The unit will automatically froth the milk as part of the brewing process. The Espresso Maker allows for various cup sizes, and the metal coaster is reversible to adjust cup height. You can also add more frothed milk to your drink or prepare frothed milk separately by pressing the FROTH button. Any type of milk (whole, skim, soy, oat) can be used for frothing.
Maintenance Features:
Regular cleaning is essential for the Espresso Maker. Before cleaning, the unit should be turned off and unplugged, and allowed to cool. The water reservoir, milk reservoir, portafilter, filter baskets, measuring scoop, drip tray, and removable coaster should be hand washed with mild detergent and water. Only the metal baskets and coaster are top-rack dishwasher safe. Abrasive cleaners and scouring pads should not be used on the milk reservoir to avoid scratching.
To clean the portafilter and brew head, remove the portafilter, discard used coffee grounds, and rinse the basket and portafilter with warm soapy water. The underside of the brew head should be wiped with a damp cloth.
For cleaning the milk reservoir and frothing tube, remove the milk reservoir, transfer any remaining milk, and wash it thoroughly with warm soapy water. Then, attach the portafilter with an empty basket, place a large empty cup under the brew head, ensure water is in the main reservoir, add fresh water to the milk reservoir, set froth strength to "Extra," position the froth dispensing tube over the cup, and press the CLEAN button. Hot water and steam will be dispensed in bursts. The cup should not be removed until the clean cycle is complete (indicated by three beeps and illuminated function buttons). If the cycle is canceled, wait a few minutes before removing the cup as more hot water and steam may be expelled. After the cycle, discard the water from the mug and reservoirs.
The water reservoir should be emptied between uses and washed as needed with soapy water.
Decalcification of the internal parts is necessary when brewing time increases, excessive steaming occurs, or white deposits appear on the brew head. To decalcify, ensure the unit is cool, off, and unplugged. Fill the water reservoir with white vinegar and the milk reservoir with water. Place a large cup or jar on the drip tray and position the froth dispensing tube. Insert the portafilter with an empty basket, plug in the unit, turn it on, and press the CLEAN button. This process should be repeated with fresh water to rinse out any vinegar traces. To decalcify the water reservoir specifically, fill it with fresh, undiluted white vinegar, let it sit for at least 8 hours, then discard the vinegar and rinse thoroughly with fresh water.
The housing of the unit should be wiped with a soft, wet cloth, avoiding abrasive cleaners. The portafilter should not be stored in the brew head as this can affect the seal.