EasyManua.ls Logo

Cheviot 575 User Manual

Cheviot 575
2 pages
To Next Page IconTo Next Page
Page #1 background imageLoading...
Page #1 background image
INSTALLATION INSTRUCTIONS
575 | Solid Brass Console Stand
What’s included in the box:
2 x Rod A 31”
1 x Rod B 22”
2 x Rod C 17”
2 x 4-way Connectors with Set Screws
2 x Console Feet
2 x Wall Mounting Brackets
2 x Console Feet Screws
4 x Wall Mounting Bracket Screws
4 x Drywall Anchors
1 x Allen Key
Notes:
1. Two people are required to install the console.
Installation:
1. Use a pipe cutter to cut the console rods to the desired lengths according to the
Cheviot Products sink you will be using in the table below.
Sink Model
Rod A
Rod B
Rod C
350/22 | ANTIQUE
31”*
18”
13”
350/28 | ANTIQUE
31”*
22”
14”
511/25 | MAYFAIR
31”*
20”
17”
553 | ESSEX
31”*
20”
15 ½”
1230/19 | NUOVELLA
31”*
16 ¾”
17
1230/23 | NUOVELLA
31”*
20 ¼”
17
1232 | NUO
31”*
16”
15
1234 | NUO
31”*
19 ¾”
15”
*Rod A may be left at 31” or may be shortened according to the desired final height of
the console lavatory.
2. Assemble the console by threading Rod A through the 4-way connector. Repeat
for the opposite leg. Connect Rod B to the 4-way connectors on both ends. This
forms the horizontal bar across the front of the console. Connect Rod C to the
Wall Mounting Bracket on one end and to the remaining opening in the 4-way
Question and Answer IconNeed help?

Do you have a question about the Cheviot 575 and is the answer not in the manual?

Cheviot 575 Specifications

General IconGeneral
BrandCheviot
Model575
CategoryRacks & Stands
LanguageEnglish

Summary

Installation Instructions

Preparation and Rod Sizing

Determine and cut console rod lengths according to sink model specifications using the provided table.

Console Assembly and Connection

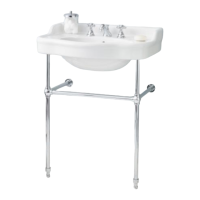
Assemble the console stand by connecting rods (A, B, C) and 4-way connectors as per instructions.

Positioning and Marking for Mounting

Position the console and sink, then mark wall and floor for secure mounting points.

Drilling and Securing Mounts

Drill pilot holes, install anchors, and attach console feet and wall brackets.

Final Console and Sink Installation

Mount the console stand, secure to wall brackets, and attach the sink as per product instructions.