EasyManua.ls Logo

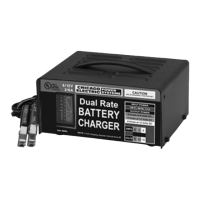
Chicago Electric 45005 User Manual

Chicago Electric 45005
10 pages
To Next Page IconTo Next Page
Page #1 background imageLoading...
Page #1 background image
6 / 2 AMP, DUAL RATE
BATTERY CHARGER
45005
SET UP AND OPERATING INSTRUCTIONS
Distributed exclusively by Harbor Freight Tools
®
.
3491 Mission Oaks Blvd., Camarillo, CA 93011
Visit our website at: http://www.harborfreight.com
Read this material before using this product.
Failure to do so can result in serious injury.
SAVE THIS MANUAL.
Copyright
©
2008 by Harbor Freight Tools
®
. All rights reserved. No portion of this manual or any
artwork contained herein may be reproduced in any shape or form without the express written
consent of Harbor Freight Tools. Diagrams within this manual may not be drawn proportionally.
Due to continuing improvements, actual product may differ slightly from the product described
herein. Tools required for assembly and service may not be included.
For technical questions or replacement parts, please call 1-800-444-3353.
Revised manual 08j, 09f
Other manuals for Chicago Electric 45005

Questions and Answers:

Chicago Electric 45005 Specifications

General IconGeneral
Input Voltage120V AC
Output Voltage6V / 12V DC
Charger TypeAutomatic
Safety FeaturesOvercharge Protection, Reverse Polarity Protection
Battery CompatibilityLead-Acid
DisplayLED indicators

Summary

Set Up and Operating Instructions

Specifications

General Safety Warnings

Read and Understand All Instructions

Crucial safety instructions must be read and understood to prevent injury.

Work Area

Guidelines for maintaining a safe and clean work environment.

Electrical Safety

Essential safety precautions regarding electrical connections and grounding.

Personal Safety

Stay Alert and Use Common Sense

Maintaining awareness and avoiding distractions while operating equipment.

Avoid Accidental Starting

Ensuring the power switch is off before plugging in the equipment.

Use Safety Equipment

Wearing appropriate protective gear like eye protection.

Equipment Use and Care

Proper Equipment Usage

Using the correct equipment for its intended purpose and application.

Power Switch Functionality

Ensuring the power switch operates correctly for safety.

Disconnect Power Before Service

Unplugging equipment before making adjustments or performing maintenance.

Store Idle Equipment Safely

Keeping equipment out of reach of children and untrained persons.

Maintain Equipment

Carefully maintaining equipment and servicing damaged parts.

Service and Maintenance

Qualified Service Personnel

Equipment service must be performed only by qualified repair personnel.

Replacement Parts

Using only identical replacement parts for servicing.

Additional Battery Charger Safety Precautions

Battery Compatibility

Use only with lead-acid, rechargeable batteries, not dry-cell types.

Avoid Charging Frozen Batteries

Do not attempt to charge a battery with frozen battery fluid.

Handling Battery Fluids

Avoid battery fluids near the charger and flush skin/eyes if contact occurs.

Connect Cables Before Plugging In

Make all cable clamp connections before plugging in the charger.

Remove Metal Objects

Remove metal objects from around the battery being charged.

Battery Ventilation

Ensure batteries are vented and free from obstructions.

Unattended Charging

Do not leave the battery charger unattended during operation.

Pacemaker Precautions

Pacemaker users should consult physicians regarding electromagnetic fields.

Lead Exposure Warning

Warning about lead exposure from product cord; wash hands after handling.

Grounding

Grounding Requirements

Importance of proper grounding for tools with three-prong plugs.

Extension Cord Selection

Guidelines for selecting appropriate three-wire extension cords.

Unpacking

Operation

Charger Placement

Position the battery charger approximately six feet from the battery.

Connect to Battery

Connect positive and negative clamps to the correct battery terminals.

Select Charging Setting

Set the switch to the proper voltage and amperage for the battery.

Start Charging

Plug the charger into a grounded outlet to begin the charging process.

Monitor Charging Status

Observe the ammeter to view charging current and battery charge level.

Fully Charged Battery (12V)

Charger switches to float mode for 12V settings when battery is fully charged.

Disconnect Clamps

Remove the negative and then the positive cable clamps from the battery.

Maintenance

Cleaning and Storage

Wipe clamps and charger, coil cables, and store in a clean, dry location.

Cable Inspection

Have cracked cable insulation repaired or replaced by a qualified technician.

Troubleshooting

Maximum Ammeter Reading

Addresses issues with maximum ammeter readings, often related to defective batteries.

No Ammeter Reading

Troubleshooting no ammeter reading, checking power, connections, and battery.

Charging Current Issues

Diagnosing charging current not reaching full output, due to partial or defective batteries.

Ammeter Clicking Noise

Resolving ammeter needle movement and clicking due to circuit breaker overload.

Limited 90 Day Warranty

Related product manuals