Do you have a question about the Chicago Electric BREAKER HAMMER 94882 and is the answer not in the manual?
| Brand | Chicago Electric |
|---|---|
| Model | BREAKER HAMMER 94882 |
| Category | Power Tool |
| Language | English |
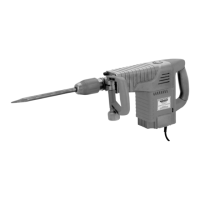
Details the electrical requirements, dimensions, performance, and weight of the Breaker Hammer.
Emphasizes the importance of keeping the manual for safety, assembly, operation, and maintenance procedures.
Keep your work area clean and well lit. Cluttered benches and dark areas invite accidents.
Covers grounding, double insulation, avoiding wet conditions, and proper cord usage.
Stay alert, use common sense, and avoid operating while tired or under the influence of drugs or alcohol.
Wear appropriate clothing, contain long hair, and use ANSI-approved safety glasses, hearing, and breathing protection.
Includes checks for tool functionality, disconnecting power before adjustments, and proper maintenance.
Tool service must be performed only by qualified repair personnel using identical replacement parts.
Explains the importance of proper grounding for tools with three-prong plugs to prevent electric shock.
Details that double insulated tools do not require grounding and can use two-prong plugs.
Provides recommendations for selecting the correct gauge and type of extension cord based on length and load.
Explains common symbols used in the manual, including Double Insulated, CSA, UL, Volts, and Amperes.
Covers maintaining labels, following OSHA, checking for damage, and disconnecting power for service.
Warns about chemicals in dust from construction activities and suggests safety measures.
Details risks associated with vibration exposure and provides guidelines to reduce injury.
Instructions for unpacking and verifying all parts are included using the Parts List and Assembly Diagrams.
Step-by-step guide on how to attach and adjust the side handle of the breaker hammer.
Procedure for inserting and locking the chisels into the breaker hammer.
Instructions on how to turn on the tool and adjust the impact level using the provided knob.
Guidance on using the tool for chipping in a straight line and breaking concrete with a bull point bit.
Inspect the tool's general condition, switch, plugs, cords, and check for damage or loose parts.
Emphasizes disconnecting power before any service, maintenance, or cleaning activities.
Comprehensive list of all parts with their corresponding numbers, names, and quantities.
Visual representation of how the parts are assembled, with numbered components.
Outlines the warranty period, coverage, exclusions, and procedures for claims.