41
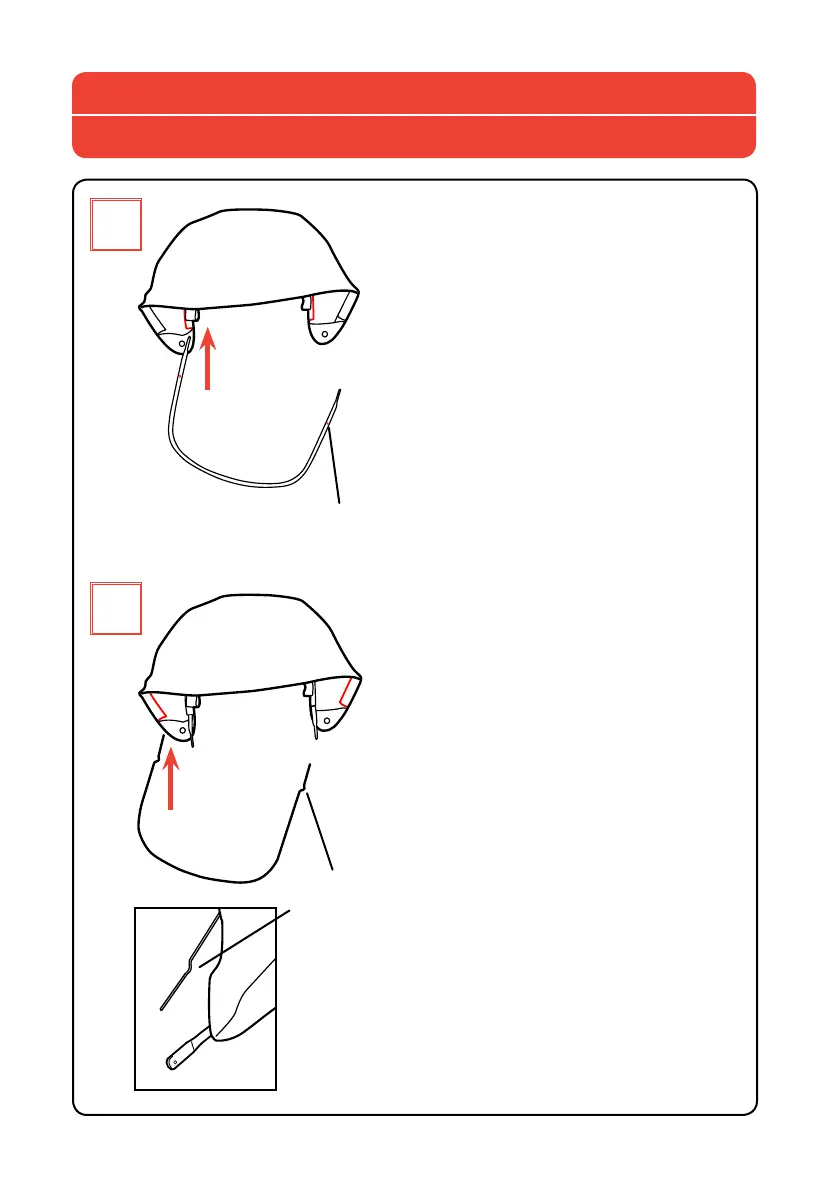
28A.ToattachtheCanopyfabric,
slidethebowthroughthefront
Canopysleeve,asshown.Makesure
thedimpleonthebowisfacingup
whenslidingbowthroughthesleeve.
28A.Pourremettreletissudela
capoteenplace,insérerl’arceauplat
danslemanchonavant,comme
l’indiquel’illustration.Englissant
l’arceaudanslemanchon,s’assurer
quelescransdel’arceausont
orientésverslehaut.
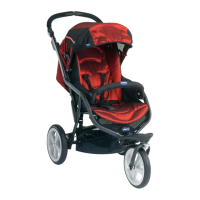
28B.Slidethewirebowthrough
thebackCanopysleeve,asshown.
Makesurethewirebendonthebow
isfacingdownwhenslidingbow
throughthesleeve,asshown.
Tore-attachtheCanopyCliprepeat
steps26thru27inREVERSE.
28B.Insérerl’arceauenbrochedans
lemanchonarrière,commel’indique
l’illustration.Englissantl’arceaudans
lemanchon,s’assurerquelescoudes
delabrochesontorientésverslebas.
Pourremettrelespincesdelacapote
enplace,reprendrelesétapes26et27
ensensINVERSE.
Dimple
Cran
WireBend
Coude
28
A
How to Re-attach the Canopy Fabric
Installation du tissu de la capote
28
B