This document is an owner's manual for the Chicco Bravo® Primo Stroller, providing detailed instructions for assembly, use, and maintenance.
Function Description
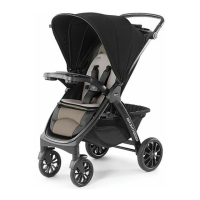
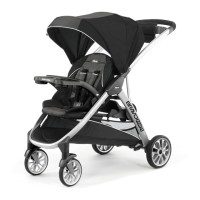
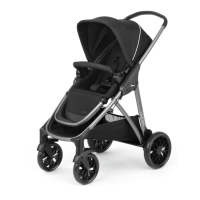
The Chicco Bravo® Primo Stroller is designed to transport infants and young children safely and comfortably. It features a robust frame, adjustable components, and a safety harness system to ensure the child's security. The stroller is intended for use at walking speed and is not suitable for jogging, skating, or other high-speed activities. It can also be used as a car seat carrier with a compatible Chicco infant car seat, offering versatility for parents on the go. The stroller is designed for a single child weighing up to 50 lbs (22.7 kg).
Usage Features
Assembly:
- Frame Setup: The stroller frame is unfolded by standing it on end and pressing down on the seat until it locks with an audible "CLICK!".
- Rear Axle Assembly: The rear axle assembly is attached to the stroller frame by aligning snap buttons with holes until they click into place.
- Rear Wheels: Rear wheels are installed by sliding them onto the rear axle, ensuring the brake tab fits into a groove. A washer is then slid onto the axle, followed by a pin to secure the wheel. Hubcaps are snapped onto the wheels to cover the washer and pin. It's crucial to pull on each wheel to confirm secure attachment.
- Front Wheels: Front wheels are attached by lining up and inserting the wheel pin into the corresponding opening on the stroller's front leg. Both front wheels must be secure.
Adjustments:
- Handle Adjustment: The parent handle can be rotated up from the closed position and adjusted to three different height positions. Buttons on both sides of the handle are pressed to release and adjust it.
- Seat Recline: The backrest can be reclined by squeezing two levers together and pulling down. To return to an upright position, push up on the backrest until it locks.
- Recline Panel: The recline panel features a mesh section that can be revealed by unzipping both sides. The fabric panel rolls down and is secured by three snap buttons.
- Canopy Use: The canopy can be opened by pulling its front edge forward, revealing a covered mesh panel. An additional extension panel is tucked under the front panel and can be pulled out for extra coverage. The mesh panel on the canopy can also be opened by folding the fabric section forward.
Safety Features:
- Brakes: The stroller is equipped with brake lock levers on each side of the rear wheel assembly. Pushing down on these levers locks the rear wheels, and pulling up unlocks them. Brakes should always be applied when the stroller is stationary, especially on sloped surfaces.
- Safety Harness: The stroller features a 5-point safety harness with three height positions for the shoulder straps. The shoulder straps should always be used in a position ABOVE the child's shoulder line, with the closest position being preferred. The shoulder strap connector is designed to break away from the waist clip when not secured in the crotch strap buckle. To secure the child, the shoulder strap connectors are slid onto the waist strap clips, and both waist clips are slid into the crotch strap buckle. To release the harness, the button on the center of the buckle is pressed, and both waist clips are pulled out. The shoulder strap connector can be pulled up to remove it from the waist strap clip.
- Harness Adjustment: The length of the shoulder straps can be adjusted by pulling on the adjustment buckles. The waist straps can be adjusted by pressing the tab at the end of the waist strap clip and pulling on the strap.
- Soft Insert: A soft insert can be placed in the stroller seat, with the shoulder, waist, and crotch straps threaded through its corresponding openings. The soft insert is recommended for the lower two shoulder harness positions or for children up to 40 lbs.
Storage and Accessories:
- Basket: The storage basket includes two storage pockets on the back panel. It can be accessed from the front by lifting up the footrest pad. The basket has a weight limit of 10 lbs (4.5 kg).
- Accessory Pocket: An accessory pocket can be accessed by lifting its front edge and undoing the hook and loop fastener. To remove it, a plastic tab from the groove under the front of the parent tray is flipped out, and the pocket is pulled up.
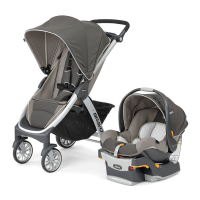
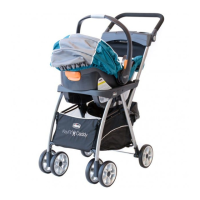
Car Seat Carrier Mode:
- Chicco Infant Car Seat Compatibility: The stroller is designed to be used only with a Chicco infant car seat. The child's tray must be properly attached before using the car seat. The car seat should be placed into the stroller frame "REAR FACING ONLY" with the backrest fully reclined, ensuring it clicks into place on both sides. The infant car seat handle can be rotated down to allow the canopy to fully extend. The stroller canopy can be used in this mode for additional infant coverage.
Folding and Disassembly:
- Folding the Stroller: To close the stroller, any attached infant car seat must be removed. The seat fabric is lifted to locate the fold handle. The handle release button is slid over, and the fold handle is lifted. The stroller legs and seat back will fold down, and the front wheels will automatically swivel. The closed stroller will stand on its wheels, and the fold handle acts as a carry handle.
- Removing Front Wheels: Front wheels can be removed by pushing in on the release button above the wheel and simultaneously pulling the wheel off the stroller frame.
- Removing the Seat: The canopy zipper is pulled up and around the outside of the canopy, and the canopy clips are pulled out from both sides of the stroller frame. Fabric clips located below the parent tray are pressed down, and the fabric clip is pulled out from the stroller frame. The flexible tab on the parent tray is lifted and removed from its groove. The footrest pad is lifted to locate two sets of straps with buckles under the seat pan, which are then undone. Two release buttons at the back of the seat are pressed together, and the back section of the seat pan and seat pad assembly is tilted up and removed.
- Attaching the Seat: To reattach the seat, the bottom of the seat pad is folded up to expose the seat bracket. The seat is inserted between the stroller frame, and the seat bracket is tilted to align tabs with openings on the seat pan. The tabs are slid into the openings. The back edge of the seat bracket is pressed down until it clicks into place on both sides.
Maintenance Features
- Regular Maintenance: The product requires regular maintenance, which should be carried out by an adult.
- Cleaning Fabric Parts: Refer to the care label for specific instructions on cleaning the fabric parts of the stroller.
- Cleaning Plastic Parts: Plastic parts should be wiped clean periodically with a soft, damp cloth.
- Drying Metal Parts: Metal parts must always be dried to prevent rust, especially if they have come into contact with water.
- Lubrication: Moving parts should be lubricated only if necessary, using a light application of a silicone-based lubricant.
- Wheel Inspection: Periodically check the condition of the wheels and keep them clean of dust and sand.
- Clean Movable Parts: Ensure all movable plastic parts along the metal frame are clean of dust, dirt, or sand to avoid friction and ensure correct operation.
- Storage: Store the stroller in a dry place. Prolonged exposure to direct sunlight can cause the fabric to fade.