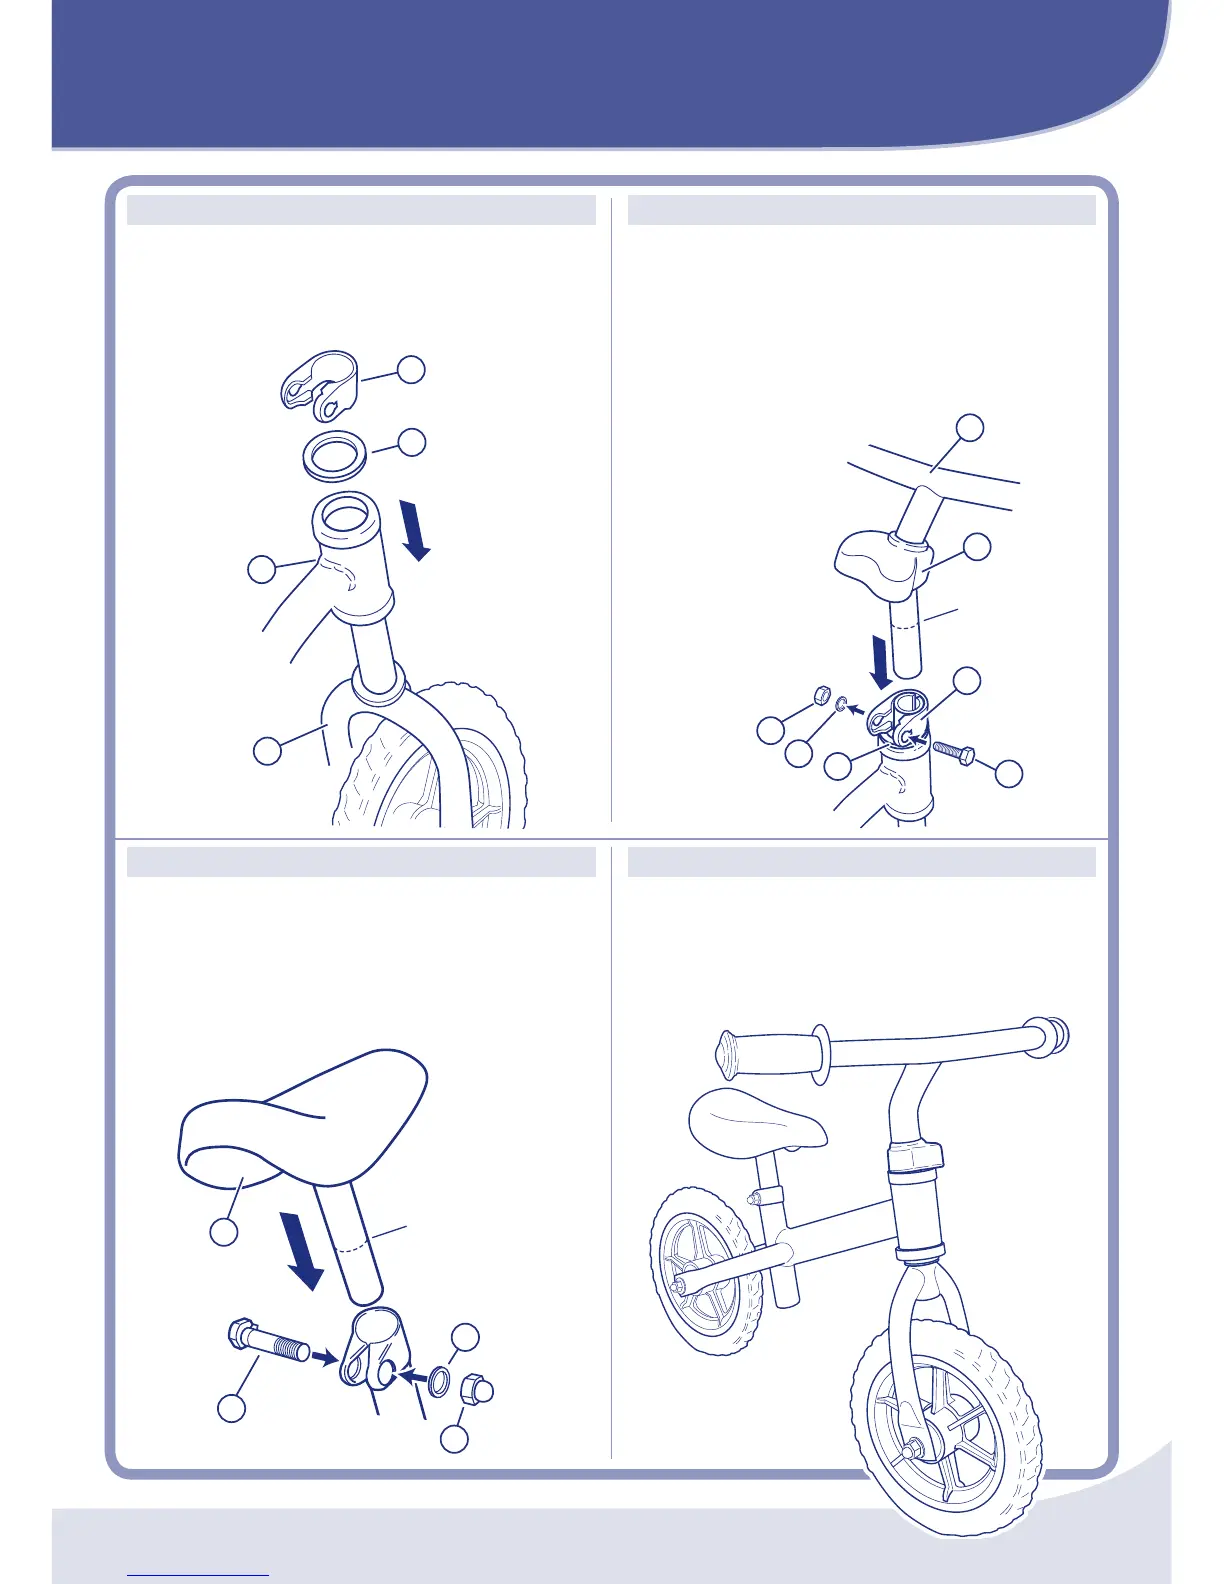
FITTINGTHESADDLE
1 Pushthesaddlepillarintothedowntubeatleastasfaras
theMinimuminsertionmark.
2 Align the saddle with the bike frame and tighten the
clampwithaspanner.
ASSEMBLEDBIKE
Pleasecheckallscrewsandttings aresecurebeforegiving
toyourchild.Thetoyshouldbeused withcaution,sinceit
requiresgreat skill,soas to avoidfallsorcollisions causing
injurytotheuserandthirdparties.
FRONTFORKASSEMBLY
1 Remove protectivecapand slide the forkstemthrough
thefrontheadtube.
2 Pushtheplasticringandclampontothetopofthefork
stem.
FITTINGTHEHANDLEBARS
1 Removeprotectivecapandslidetheclampcoverontothe
handlebarstem.
2 Pushthehandlebarstemintotheforkstematleastasfar
astheMinimuminsertionmark.
3 Alignthehandlebarwiththefrontwheelandtightenthe
clampwiththespanner.
4 Slidetheclampcoverdownovertheclamp.
(Minimuminsertionmark)
Minimum
insertion
mark
Minimum
insertion
mark