18 19
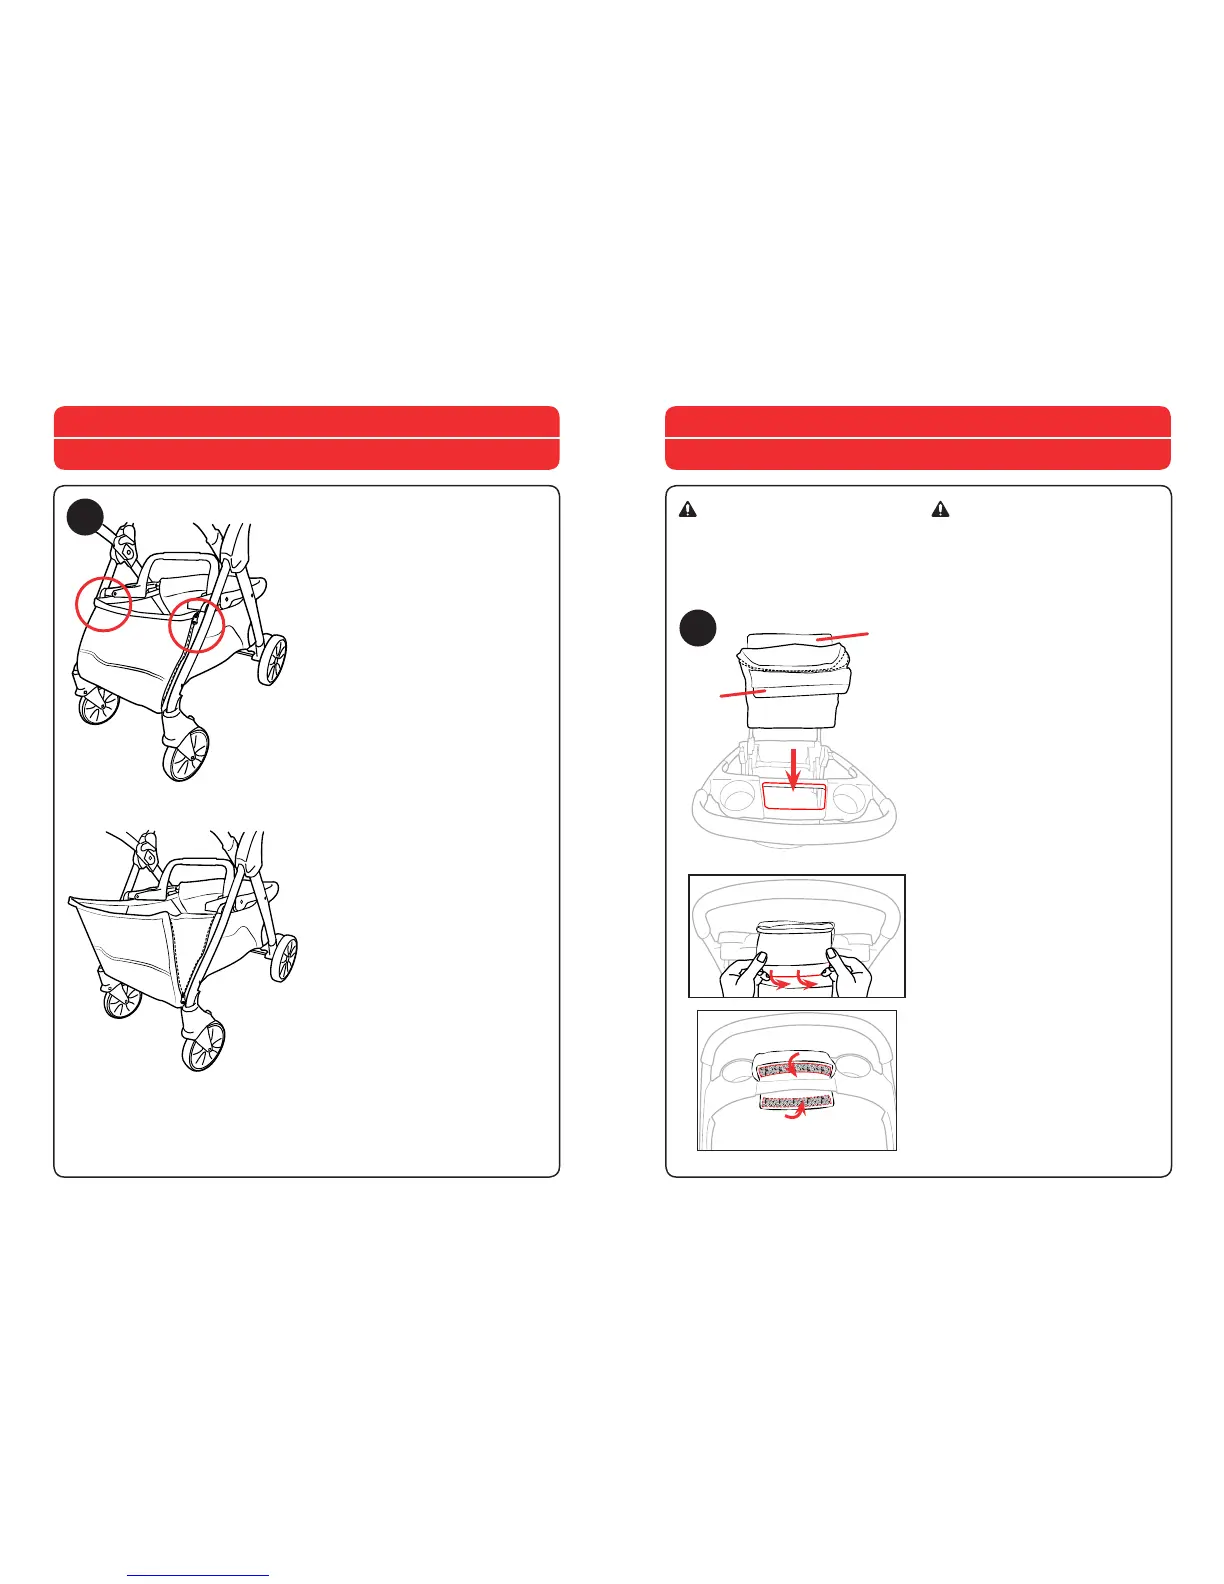
7. To access the Storage Basket from
the front, unzip both zippers located
on each side of the front of the
Basket.
7. Para acceder al cestillo
portabojetos desde la parte
delantera, baje los cierres ubicados a
cada lado del frente del cestillo.
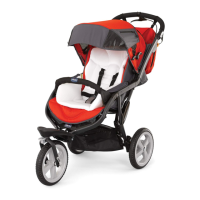
WARNING
Accessory pocket MUST be
assembled at all times. Do not place
more than 1lb (0.45kg) in the pocket.
ADVERTENCIA
El bolsillo para accesorios DEBE ser
ensamblado en todo momento. No
coloque más de 1 libra (0.45kg) en el
bolsillo.
7
Storage Basket Access
Acceso al cestillo portaobjetos
How to Attach Accessory Pocket
Cómo sujetar el bolsillo para accesorios
8. Insert the Accessory Pocket (M)
into the Parent Tray, as shown.
Flip Back fabric flap under the back
edge of Parent Tray, and tuck the
plastic tab into the slot behind the
back edge. Wrap both Front fabric
sections around the front edge of the
Parent Tray, and secure the hook and
loop tabs.
8. Coloque el bolsillo para
accesorios (M) en la bandeja para
padres, como se muestra.
Voltee la solapa de tela posterior
debajo del borde posterior de la
bandeja para padres e inserte la
lengüeta de plástico en la ranura
detrás del borde posterior. Envuelva
el borde delantero de la bandeja para
padres con ambas secciones de tela
delanteras y ajuste las lengüetas de
gancho y bucle.
8
Front
Back
Parte
trasera
Parte
delantera