8
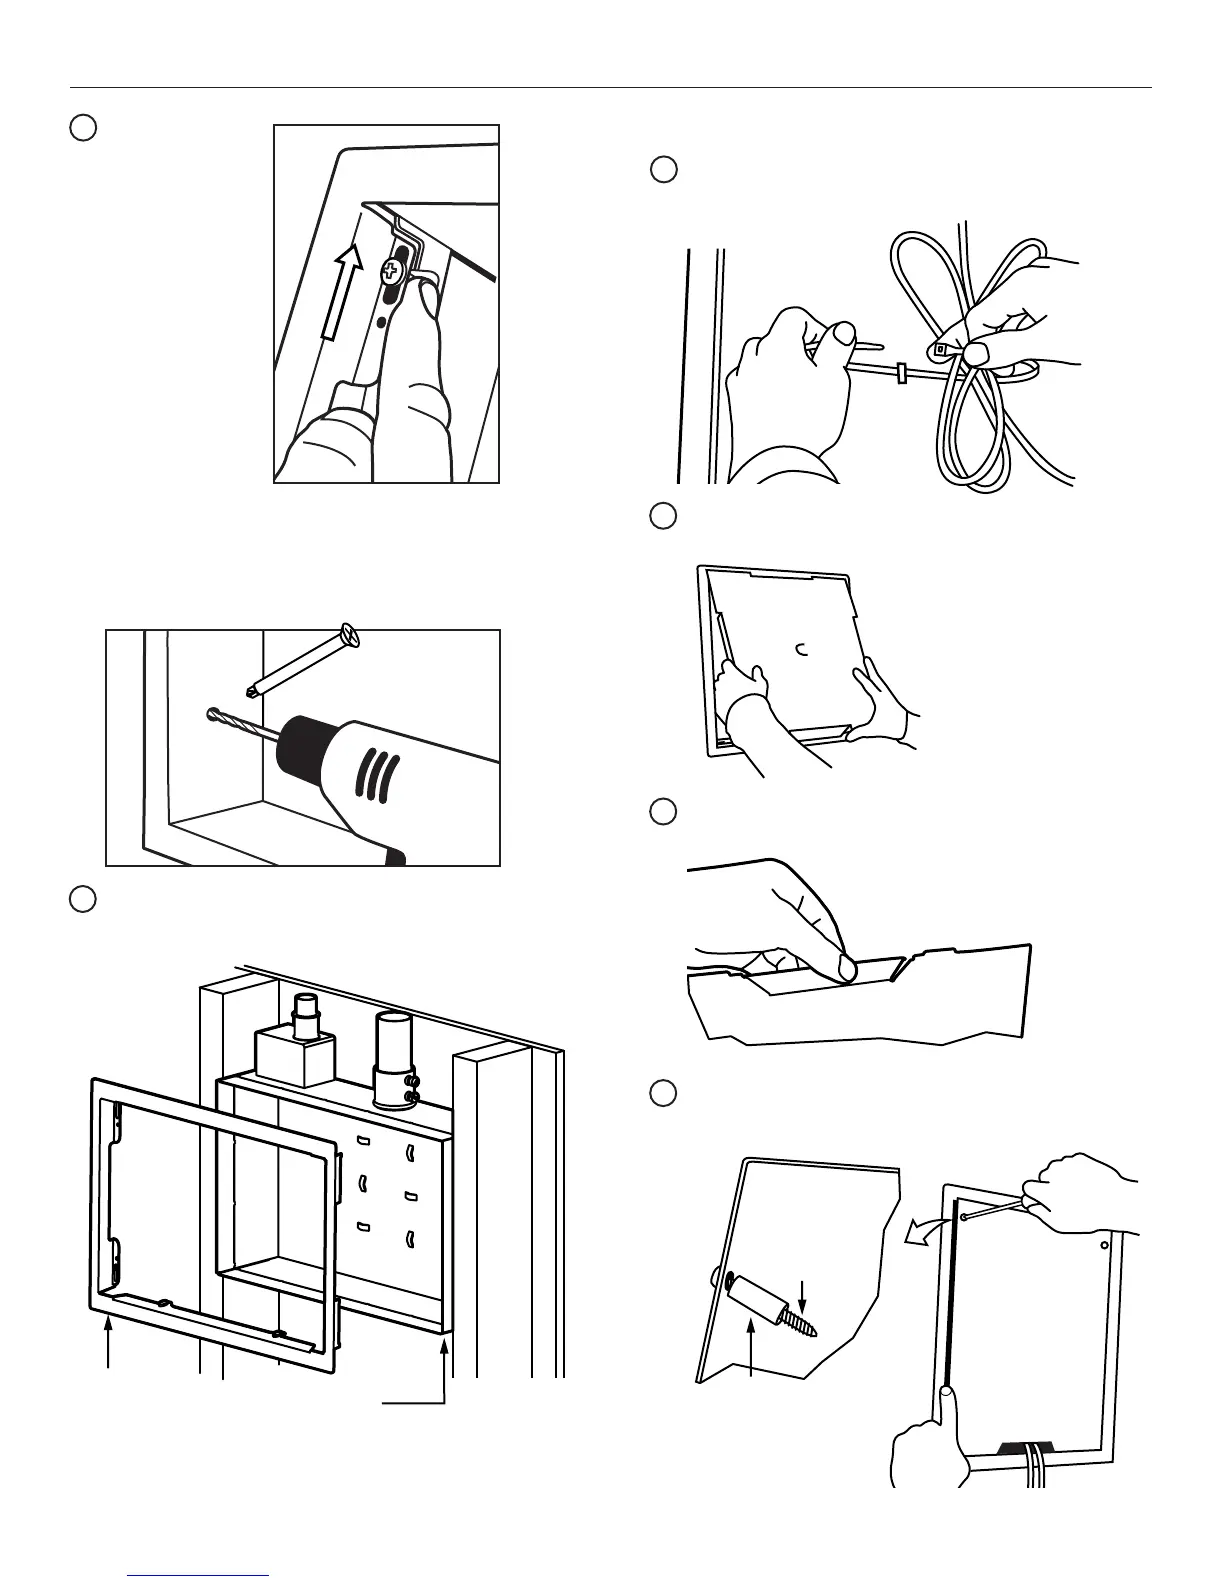
Wire/Cable Management - Use “integrated zip-tie hook”
in back wall of box to organize and secure cables and
AV components.
16
Install template as temporary cover if needed to protect
from debris by folding tabs in and inserting into opening.
17
Gather wires and route through cover opening. Install
cover, screw fasteners(2) into place to secure and
complete enclosure.
19
Secure box into
place by methods
chosen.
DRYWALL
ATTACHMENT:
Slide locking
cleats into place.
Tighten screws
to secure.
STUD ATTACHMENT:
Drill pilot holes (optional) into studs through mounting
holes in box. Wood studs - use 3/16” bit. If steel studs
- use 1/4” bit. Install with 1/4 - 20 x 2 1/2” screws (E)
into pilot holes.
14
NOTE:
Box may be installed with outer flange removed
for a pre-sheetrock open stud mount configuration.
NOTE:
Save flange for
reattachment after
sheetrock is installed.
Plastic
Spacer
Mounting
Screw
Cover
15
PAC525/526 Final Finishing
Modify enclosure cover before attaching. Break away tab(s)
to allow wire exit from box and meet ventilation needs.
18
NOTE:
Locate front edge of box extended
beyond studs by thickness of
sheetrock to be used.
Installation Instructions
PAC525/526