5
6
4 mm
5
ES
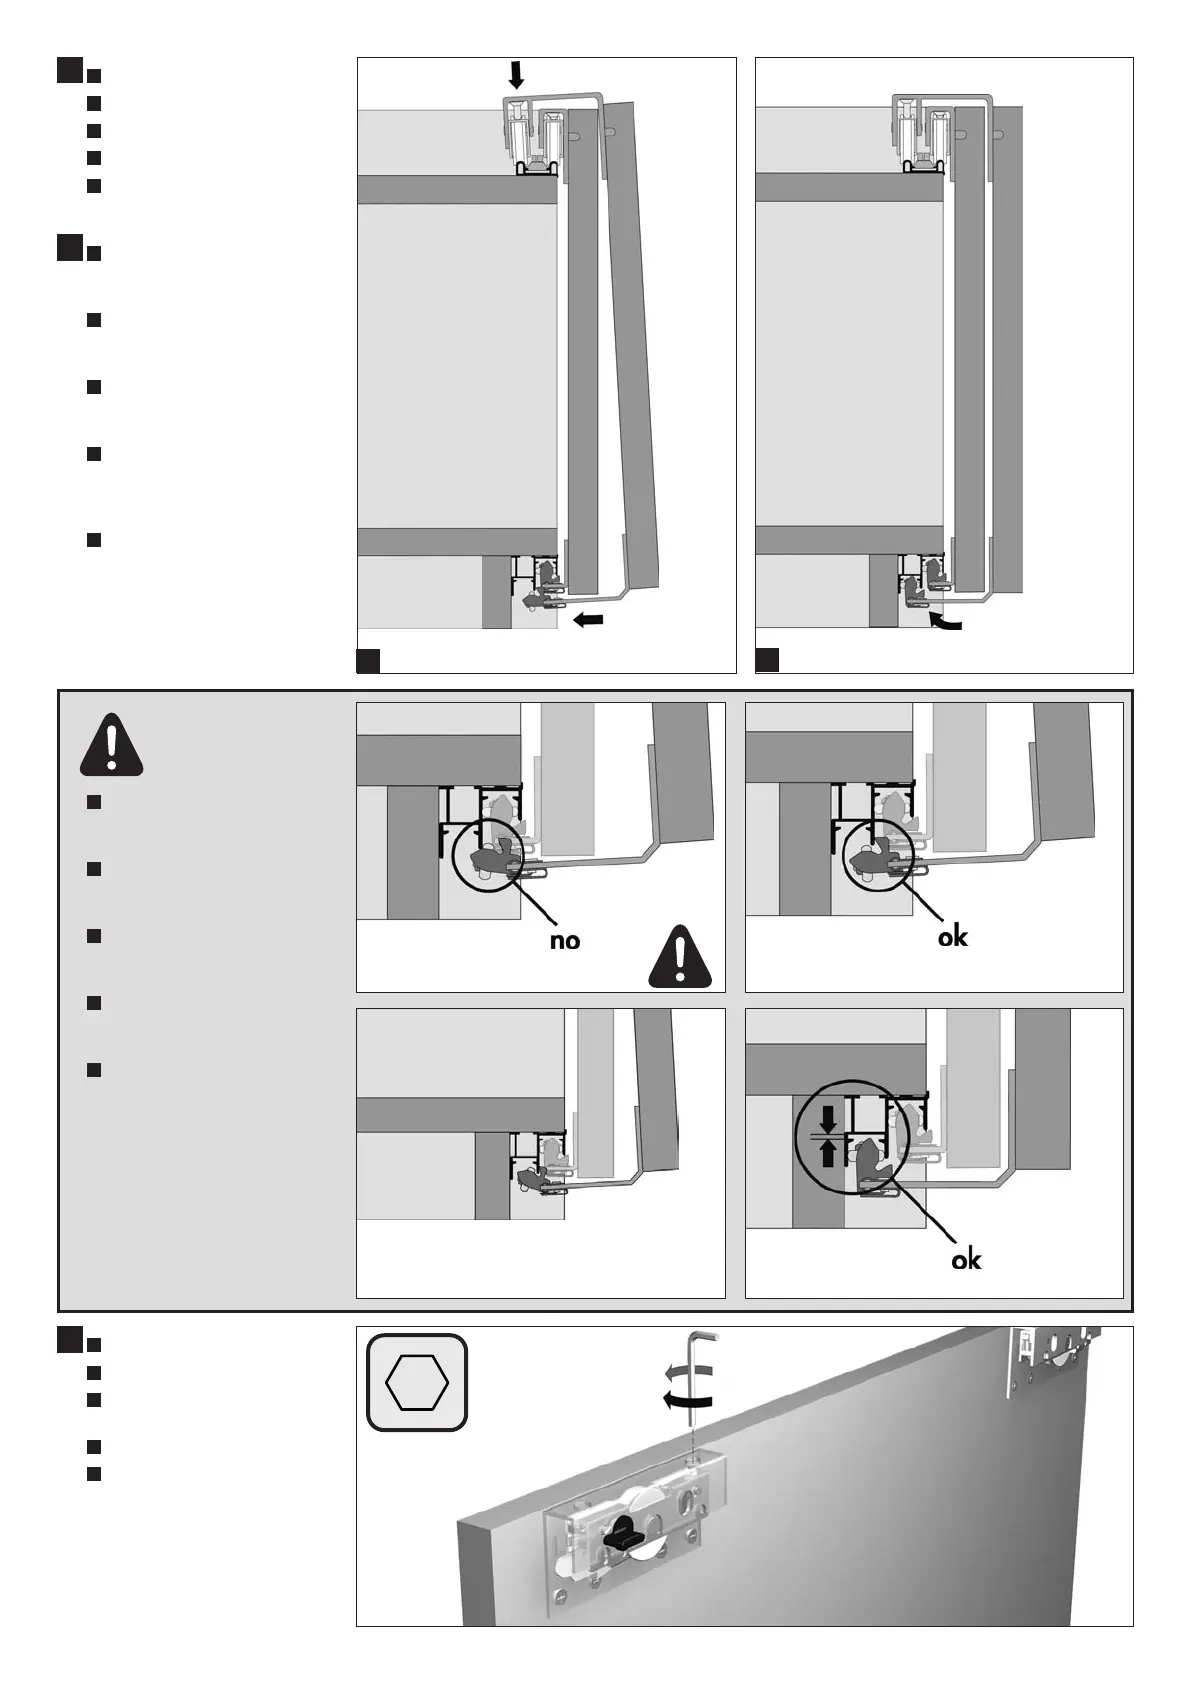
Colgar las puertas en el mueble.
EN
Hang the doors on the wardrobe.
FR
Accrocher les portes à l’armoir.
DE
Die Tuere an den Schrank anhaengen.
I
T
Montare le ante sul mobile.
6
ES
Empujar la puerta en la parte inferior para
enganchar los patines en la vía activando
así el sistema contra el descarrilamiento.
EN
Push the lower part of the door untill it
hooks in the rail and the anti-derailing
system will be activated.
F
R
Pousser la porte dans la partie inférieure
pour accrocher les patins dans le rail en
activant le dispositif «anti-glissement».
D
E
Druecken die Tuer unten bis wann die unte-
re Laufwagen in dem Unterprofil eingesteckt
ist, automatisch wird sich die Abrutscht-
Sicherung auch aktivieren.
IT
Spingere l’anta nella parte inferiore per
agganciare i pattini nel binario attivando
così l’anti-scarrucolamento.
7
ES
Cerrar las puertas y regular la altura.
EN
Close the doors and adjust in the height.
FR
Fermer les porte et faire le reglage en hau-
teur.
DE
Die Tuere schliessen und verstellen.
IT
Chiudere le ante e regolare in altezza.
ES
J atención!
J en este caso, significa que la puerta es
regulada demasiado alta! J bajala!
E
N
Warning: if this happens, it means that
the door is adjusted too high! Please
lower it!
FR
Attention: dans ce cas, cela signifie que
la porte est reglée trop haut! S’il Vous
plait, l’abaisser!
DE
Vorsicht: sollte das passieren, es bedeu-
tet, dass die Tuer zu hoch verstellst ist!
Bitte niedriger machen!
IT
Attenzione!
In questo caso l’anta è regolata troppo
in alto, è necessario abbassarla!
 Loading...