EasyManuals Logo

Cisco ASA 5506-X Mount The Chassis

Cisco ASA 5506-X
10 pages
To Next Page IconTo Next Page
To Previous Page IconTo Previous Page
Page #6 background imageLoading...
Page #6 background image
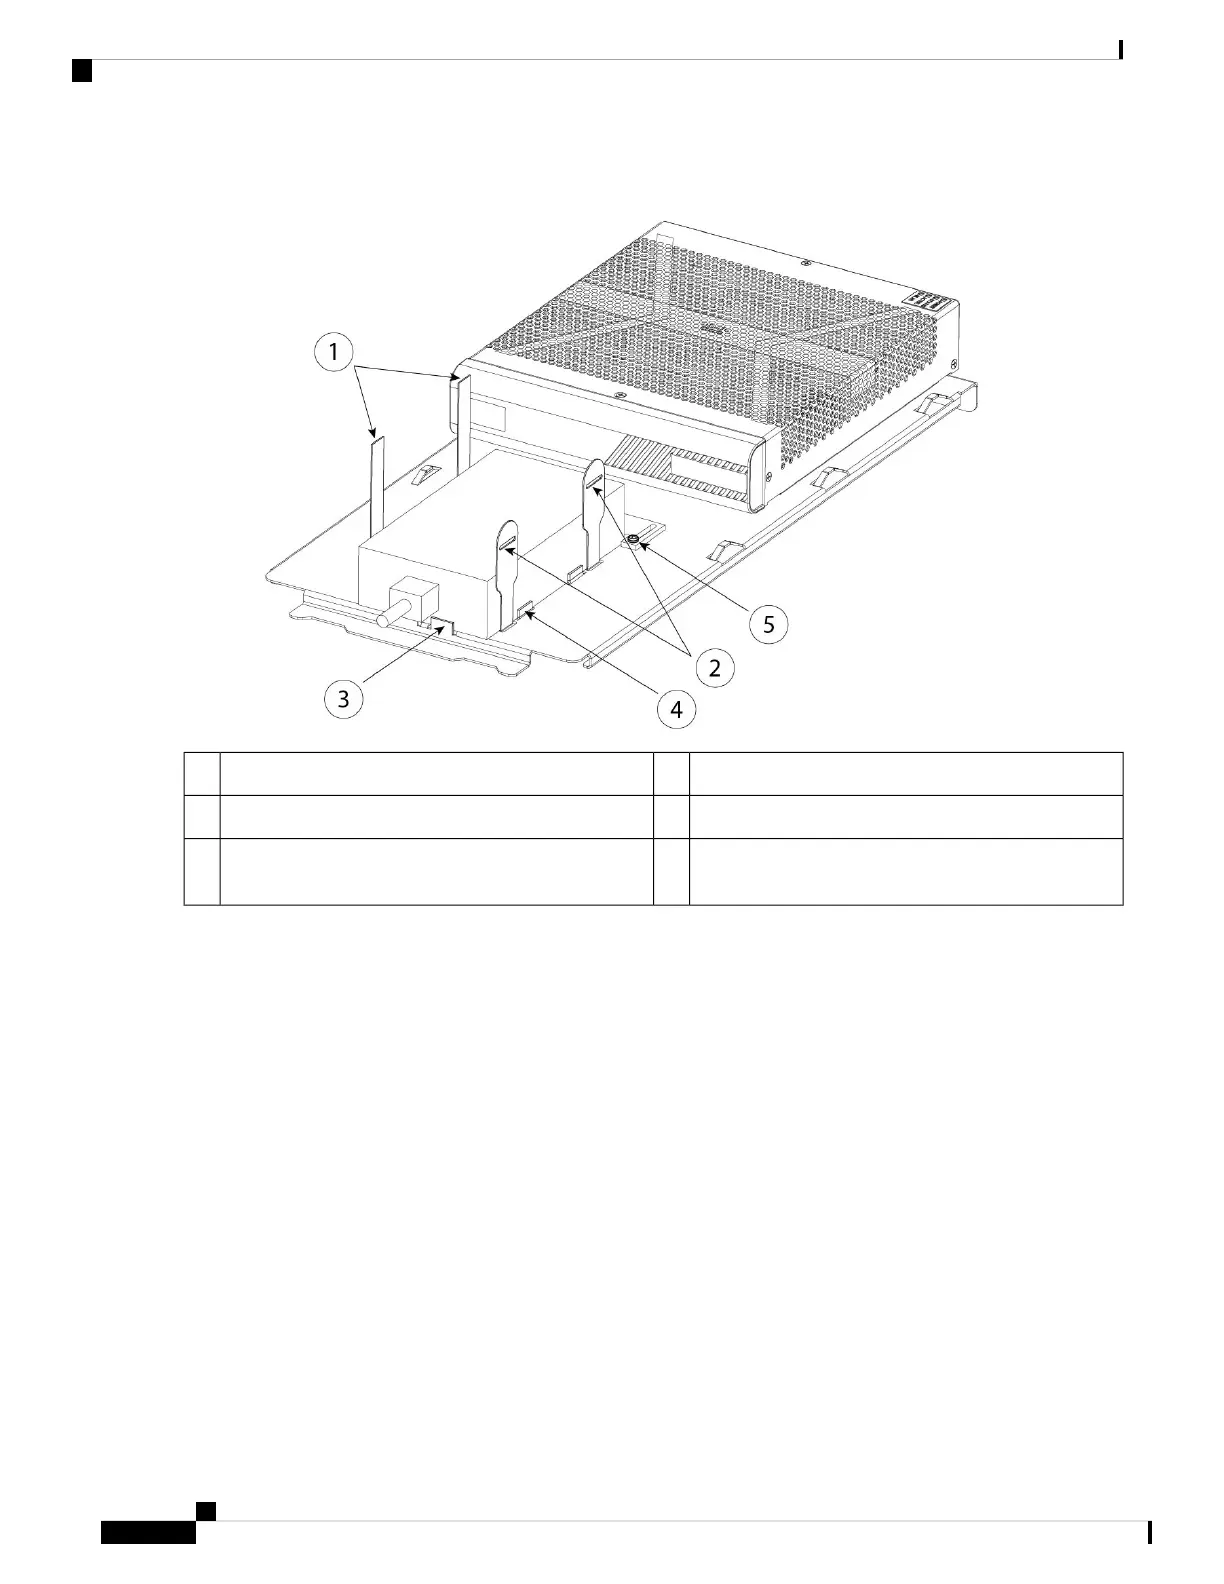
Figure 4: Install the Power Supply in the Rack Shelf
Velcro straps for power supply2Velcro straps for power supply1
Power supply stop4Power supply stop3
Rear sliding stop and screw (one of two screws on the
sliding stop)
5
a) Loosen the Velcro straps and place the power supply on the rack shelf behind the chassis.
Make sure the AC inlet cord faces the rear.
b) Align the power supply to the side and rear stops.
If the rear sliding stop is not touching the power supply, loosen the two screws, slide the stop up to touch the power
supply, and then retighten screws.
c) Re-engage the Velcro straps and tighten them to secure the power supply.
Mount the Chassis
6
Mount the Chassis
Rack-Mount the Chassis

Other manuals for Cisco ASA 5506-X

Questions and Answers:

Question and Answer IconNeed help?

Do you have a question about the Cisco ASA 5506-X and is the answer not in the manual?

Cisco ASA 5506-X Specifications

General IconGeneral
ModelASA 5506-X
Firewall Throughput750 Mbps
Maximum Firewall Connections50, 000
Maximum VPN Peers50
Integrated Ports8 x 1 GE
Stateful Inspection Throughput750 Mbps
Weight4.4 lb (2 kg)
Firewall Throughput (Multiprotocol)750 Mbps
Firewall Throughput (Application Visibility and Control AVC)250 Mbps
Concurrent Sessions50, 000
New Connections per Second10, 000
IPsec VPN Throughput100 Mbps
Interfaces8 x 1 GE
Memory4 GB
Flash Memory8 GB
Form FactorDesktop
VPN Throughput100 Mbps
Maximum Concurrent Sessions50, 000
New Sessions per Second10, 000
Operating Temperature32 to 104°F (0 to 40°C)
Storage Temperature-13 to 158°F (-25 to 70°C)
Power SupplyExternal
Humidity10% to 90% non-condensing

Related product manuals