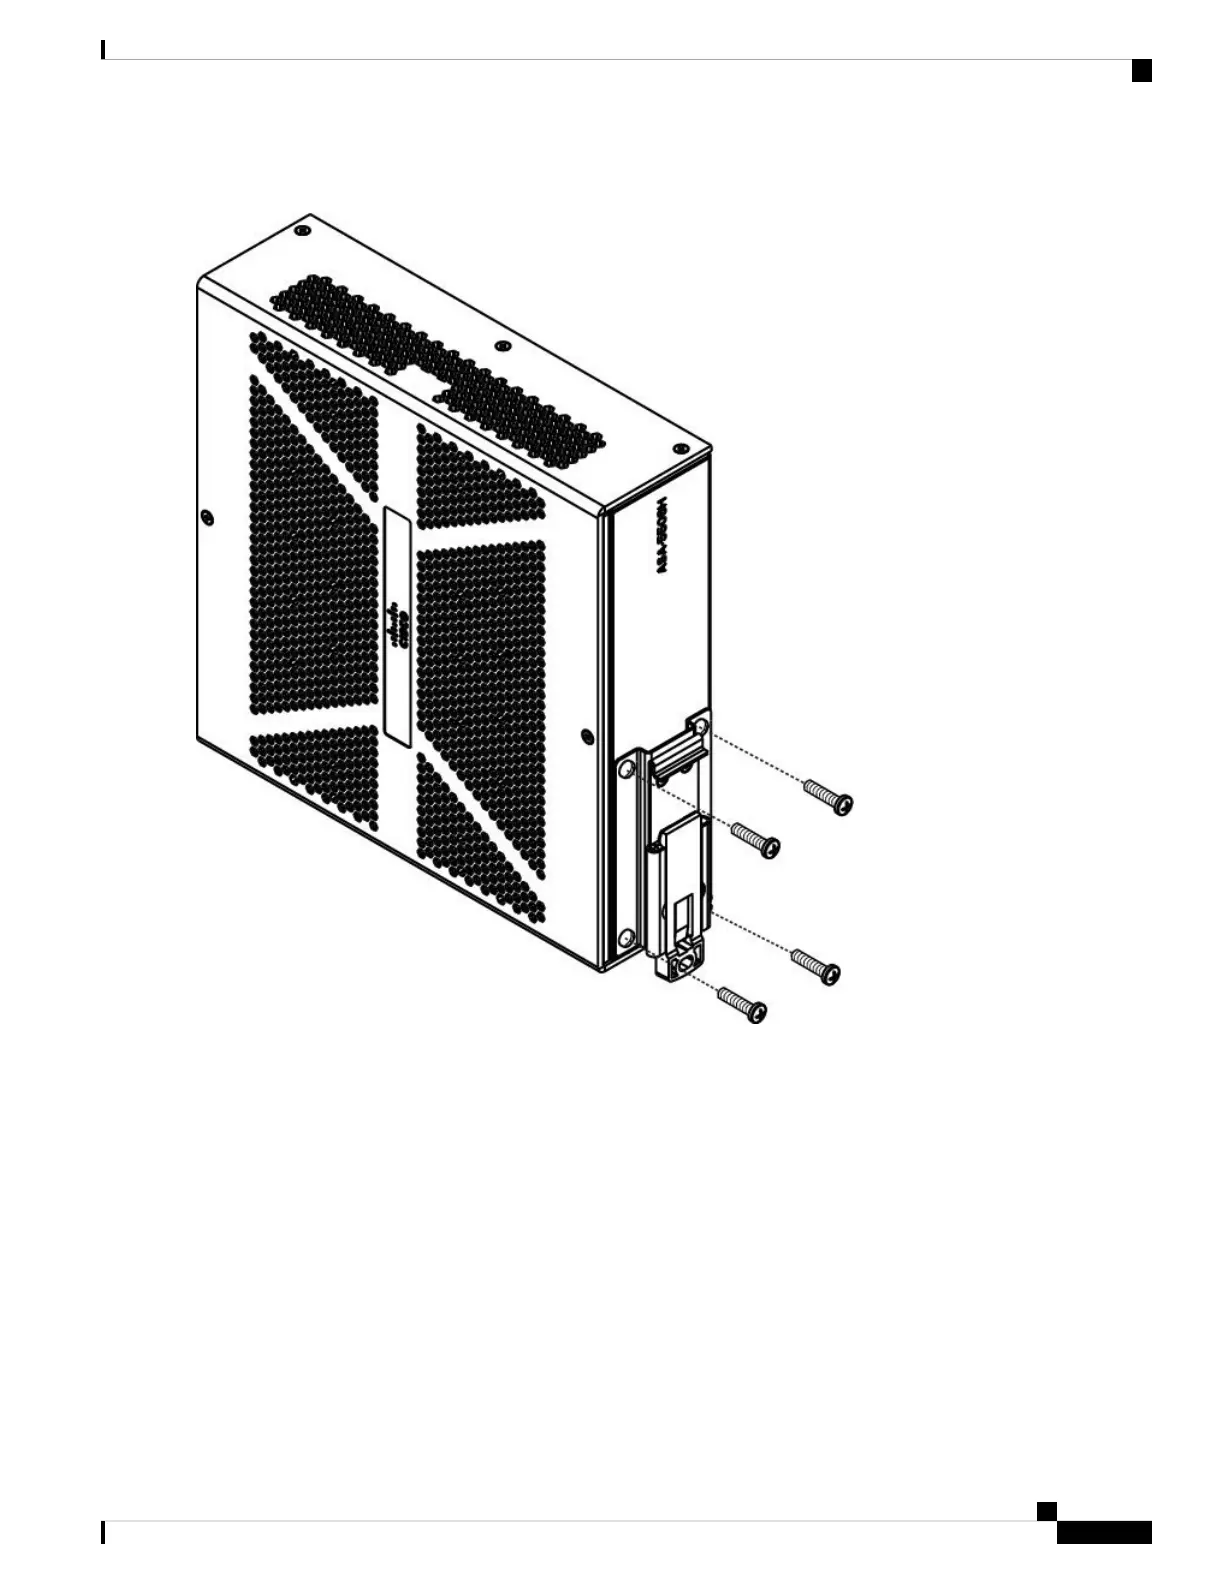
Figure 4: Attaching the DIN Rail Bracket to the ASA 5506H-X
Step 2 Locate the plastic tab on the end of the DIN rail bracket that extends past the chassis. Press the tab in and slide the plastic
latch piece out while the tab is pressed down to put it into the locked position.
Step 3 Turn the chassis sideways so that the power connector is near the top.
Step 4 Position the rear edge of the chassis directly in front of the DIN rail making sure that the DIN rail fits in the space between
the plastic latch and the metal hook.
Step 5 Position the chassis so that the hook on the DIN rail bracket hooks onto the top edge of the DIN rail. The weight of the
chassis can rest on the hook temporarily while the DIN rail bracket latches are secured.
Step 6 Push the DIN rail bracket latch up when the chassis is over the DIN rail to secure it. This snaps the latch into the closed
position which locks it onto the DIN rail.
Mount and Connect
5
Mount and Connect
Install the ASA 5506H-X in a DIN Rail

 Loading...


