16
17
16
Click [Next].
The ASA can be remotely man-
aged from an Auto Update
Server. This includes automatic
updating the ASA configuration,
ASA image, ASDM image as
needed.
17
Click [Finish].
You have completed the Startup
Wizard. To send your changes
to the ASA, click [Finish]. If you
want to modify any of the data,
click [Back].
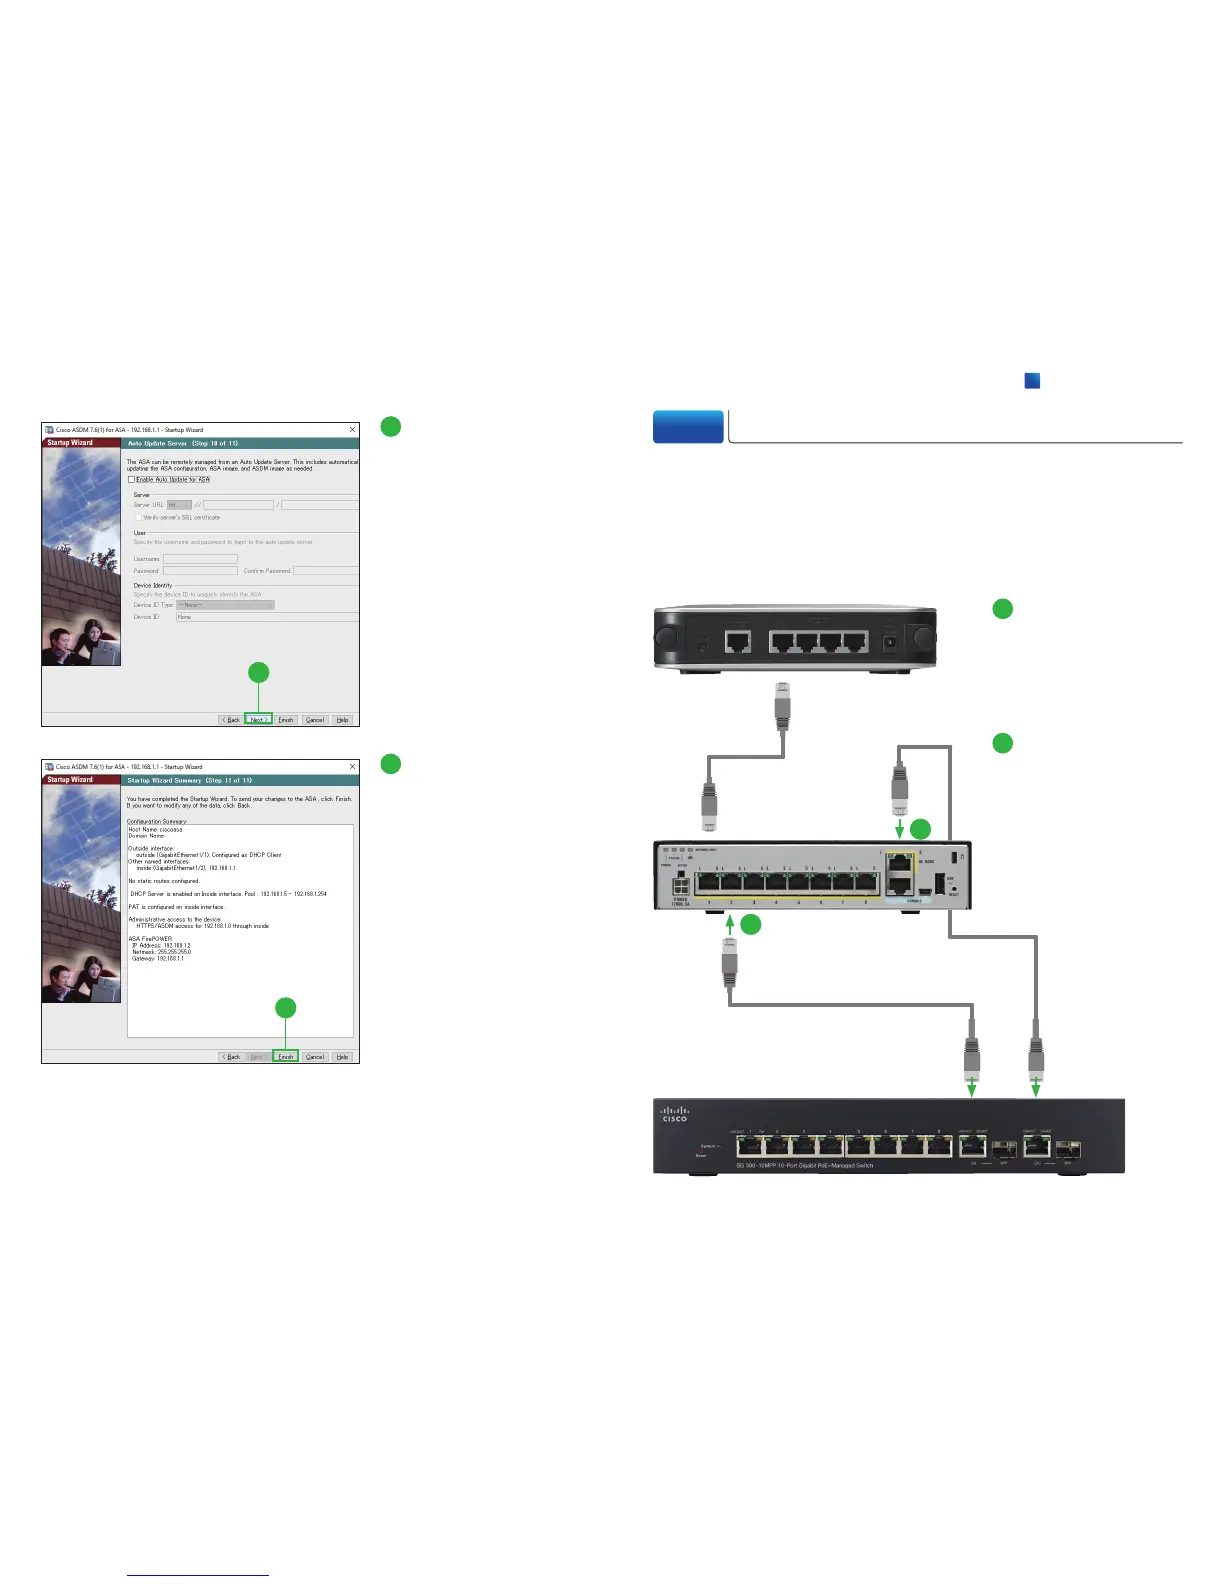
3-3 Connecting Switch to ASA
After completing the Startup Wizard, exit the ASDM and disconnect the Ethernet
cable from your PC. Then, follow these steps to connect your switch to the ASA.
Make sure that nothing is connected to the switch, its settings are configured to
use DHCP, and the first Ethernet cable is still connected between the ASA and your
WAN device.
1
2
1
Connect the second Eth-
ernet cable to the Ethernet
port #2 of the ASA, and
the other end of the cable
to the Ethernet port of your
switch.
2
Connect the third Ethernet
cable to the Ethernet man-
agement port of the ASA,
and the other end of the
cable to the Ethernet port
of your switch.
WAN Device
Switch

 Loading...


