EasyManua.ls Logo

Cisco M20 - User Manual

Cisco M20
14 pages
Print Icon
To Next Page IconTo Next Page
Loading...
user guide
Question and Answer IconNeed help?

Do you have a question about the Cisco M20 and is the answer not in the manual?

Summary

Product Overview and Hardware

Device Overview and Status Lights

Details the physical layout, ports, and status LEDs on the Valet device.

Wall-Mounting the Valet

Details on how to wall-mount the Valet using its integrated slots and screws.

Cisco Connect Software Setup and Usage

Cisco Connect Software Installation

Guides users through installing the Cisco Connect software on Windows and Mac.

Initial Valet Connection Process

Outlines the process of connecting the Valet to a computer and power source.

Connecting Additional Computers

Provides instructions on connecting more computers using the Easy Setup Key.

Connecting Computers via Easy Setup Key

Step-by-step guide to connect a computer using the Easy Setup Key.

Updating or Creating Easy Setup Key

Instructions for creating or updating the Easy Setup Key on a USB drive.

Initial Parental Controls Setup

Guides on creating a password, secret question, and answer for parental controls.

Changing Valet Network Name or Password

Guides on changing the Valet's network name and administrator password.

Overview

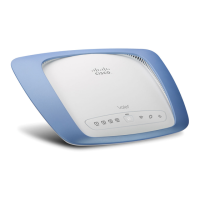
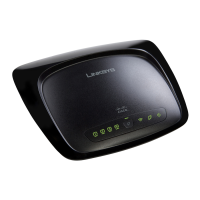
The Cisco Valet wireless hotspot allows users to connect to the Internet wirelessly with devices such as laptops, desktops, gaming devices, or phones. It also features Ethernet ports for connecting wired devices. The Valet Plus model offers Gigabit Ethernet ports for faster wired speeds. Users can also leverage the Valet wireless hotspot to share resources like computers and printers. The device incorporates various security features to safeguard data and privacy online. The Cisco Connect software, included with the Valet, helps manage settings, local and guest access, and parental controls.

Physical Features and Indicators

The Valet has four rubber feet on its bottom panel for stable horizontal placement near an electrical outlet. For wall-mounting, it has two slots on its bottom panel, 152 mm apart, requiring two screws with 3 mm of the head exposed.

The device features several LED indicators:

  • Wi-Fi Protected Setup Button: This button allows for automatic configuration of wireless security for client devices that support Wi-Fi Protected Setup™.
  • Wireless (Blue) LED: Lights up when the wireless feature is enabled and flashes during data transmission.
  • Internet (Blue) LED: Lights up when an Internet connection is established and flashes during network activity over the Internet port.
  • Valet Plus (M20 Only) (Green/Blue) LED: For the Valet Plus, this LED lights green for a gigabit port connection and blue for a 10/100 port connection.
  • Power (Blue) LED: Lights up when the Valet is powered on. It flashes during self-diagnosis upon boot-up and remains continuously lit once the diagnostic is complete.
  • Numbered LEDs (1, 2, 3, 4) (Blue): These LEDs correspond to the numbered Ethernet ports on the back of the Valet. They light continuously when a device is connected to a port and flash during network activity. For the Valet Plus (M20 Only), these LEDs also indicate green for a gigabit port connection and blue for a 10/100 port connection.

Back Panel Ports:

  • Internet Port: Connects to the network (Ethernet) cable from the Internet connection, typically from a cable or DSL modem.
  • Ethernet Ports (4, 3, 2, 1): Connect the Valet to wired devices like computers, gaming consoles, HDTVs, Blu-ray disc players, or printers.
  • Reset Button: Used to restore the Valet to its factory defaults by pressing and holding for approximately five seconds, or through the browser-based utility.
  • Power Port: Connects the power adapter.

Installation and Setup

To install the Valet:

  1. Insert the Easy Setup Key into a USB port on your computer.
  2. Click "Connect to your Cisco Valet." If the setup software doesn't auto-run, navigate to the Easy Setup Key folder and double-click "Connect.exe."
  3. Read and accept the Software End User License Agreement by clicking "Next."
  4. Follow the connection steps displayed:
    • Plug the power cord into the Power port on the back of the Valet and into an electrical outlet.
    • Unplug the existing network cable from your computer and plug it into the yellow "Internet" port on the back of the Valet. Click "Next."
  5. Wait for the Valet to be set up.
  6. Once the "Congratulations" screen appears, your computer is connected to the Internet. Remove the Easy Setup Key and keep it safe for connecting additional computers. Click "OK."

Cisco Connect Main Menu

The main menu provides four options:

  • Computers and Devices: Connects other computers or devices to your Valet's local network.
    • Add device: Guides you through connecting additional devices.
  • Parental Controls: Restricts Internet access for up to five computers, allowing users to block or limit access times and specific websites.
    • Change: Enables parental controls or modifies existing settings.
  • Guest Access: Provides Internet access only to guests, without granting access to your local network or personal data.
    • Change: Disables guest access or modifies settings.
  • Valet Settings: Personalizes Valet settings.
    • Change: Modifies Valet name, password, and other settings.

Connecting Devices

Computers:

When adding a computer, users have three options:

  • Yes, I have an Easy Setup Key: Use an existing Easy Setup Key.
  • No, I don't have an Easy Setup Key - create a new one now: Create or update an Easy Setup Key.
  • I want to connect manually using my wireless settings: Connect without the Easy Setup Key by entering Network name (SSID), Security Key, and Security Type settings.

After connecting, users name the device for identification.

Wireless Printer:

Connects a wireless printer by referring to the printer's documentation and entering the Network name (SSID), Security Key, and Security Type settings.

Other Devices:

Connects devices like smartphones or game consoles by entering the Network name (SSID), Security Key, and Security Type settings.

Parental Controls

For first-time access, users must create a parental controls password, verify it, set a secret question and answer, then click "OK." To set up parental controls for a computer:

  1. Select the computer from the "Restrict Internet access on" list.
  2. Choose "Block Internet access" options:
    • Never: Always allow Internet access.
    • Always: Always block Internet access.
    • Specific times: Block Internet access during specific days and times (School nights, Weekends).
  3. Choose "Block sites inappropriate for" options:
    • Don't Block: No blocking.
    • Teen: Blocks content inappropriate for teenagers.
    • Child: Blocks content inappropriate for children.
  4. For "Block specific sites," click "Edit" to create a list of websites to block.

Changing Parental Controls Password:

Users can change the password by entering the old password, a new password, and verifying it.

Guest Access Settings

  • Allow guest access: Enabled by default. Can be disabled by selecting "no."
  • Guest network name: Set by the setup software.
  • Password: Set by the setup software. Can be changed by clicking "Change."

Valet Settings

  • Easy Setup Key: Create or update the Easy Setup Key.
  • Safe Web Surfing: Alerts users about potentially harmful websites. Enabled by default.
  • Other Options:
    • Register now to receive special offers and updates: Sign up for updates.
    • Valet details: View information like Model name, Serial number, Firmware version, IP addresses, etc.
    • Advanced settings: Access browser-based utility for advanced configuration.

Changing Valet Name or Password:

Users can change the Valet name (also the wireless network name) and password. If changed, wireless devices will need to be reconnected using the new credentials.

Advanced Settings (Browser-Based Utility)

For advanced users, the browser-based utility provides access to advanced configuration settings. Modifying these settings may disable settings applied using the Easy Setup Key. Users need to enter a username (admin by default) and password to access this utility.

Exiting Cisco Connect

To exit Cisco Connect, click "Close" on the main menu.

Accessing Cisco Connect

  • Windows: Go to Start > All Programs > Cisco Connect.
  • Mac: Go to Go > Applications > Cisco Connect.

Cisco M20 Specifications

General IconGeneral
Ethernet LANYes
Cabling technology10/100/1000Base-T(X)
Networking standardsIEEE 802.11b, IEEE 802.11g, IEEE 802.11n, IEEE 802.3ab, IEEE 802.3u
Ethernet LAN data rates10, 100, 1000 Mbit/s
Ethernet LAN interface typeGigabit Ethernet
Wi-Fi bandNo
Input current1.0 A
Rack mounting-
Bandwidth (first)2.4 GHz
Minimum system requirementsInternet Explorer 6, Safari 3, Firefox 2 \\r USB, \\r Windows XP SP3, Windows Vista SP1 or Windows 7\\r OS X Tiger 10.4.11, Leopard 10.5.8, or Snow Leopard 10.6.1
Ethernet LAN (RJ-45) ports4
Antennas quantity3
Antenna gain level (max)2.2 dBi
Security algorithmsWEP, WPA2
Product colorSilver, White
LED indicatorsPower
Storage temperature (T-T)-20 - 60 °C
Operating temperature (T-T)0 - 40 °C
Storage relative humidity (H-H)5 - 90 %
Operating relative humidity (H-H)10 - 80 %
CertificationFCC, UL/cUL, ICES-003, RSS210, CE, Wi-Fi (IEEE 802.11b/g/n), WPA2TM, WMM®, Wi-Fi Protected SetupTM
Output voltage12 V
Weight and Dimensions IconWeight and Dimensions
Depth160 mm
Width202 mm
Height34 mm
Weight309 g

Videos

How to Set Up CISCO LINKSYS M20 Router

Related product manuals