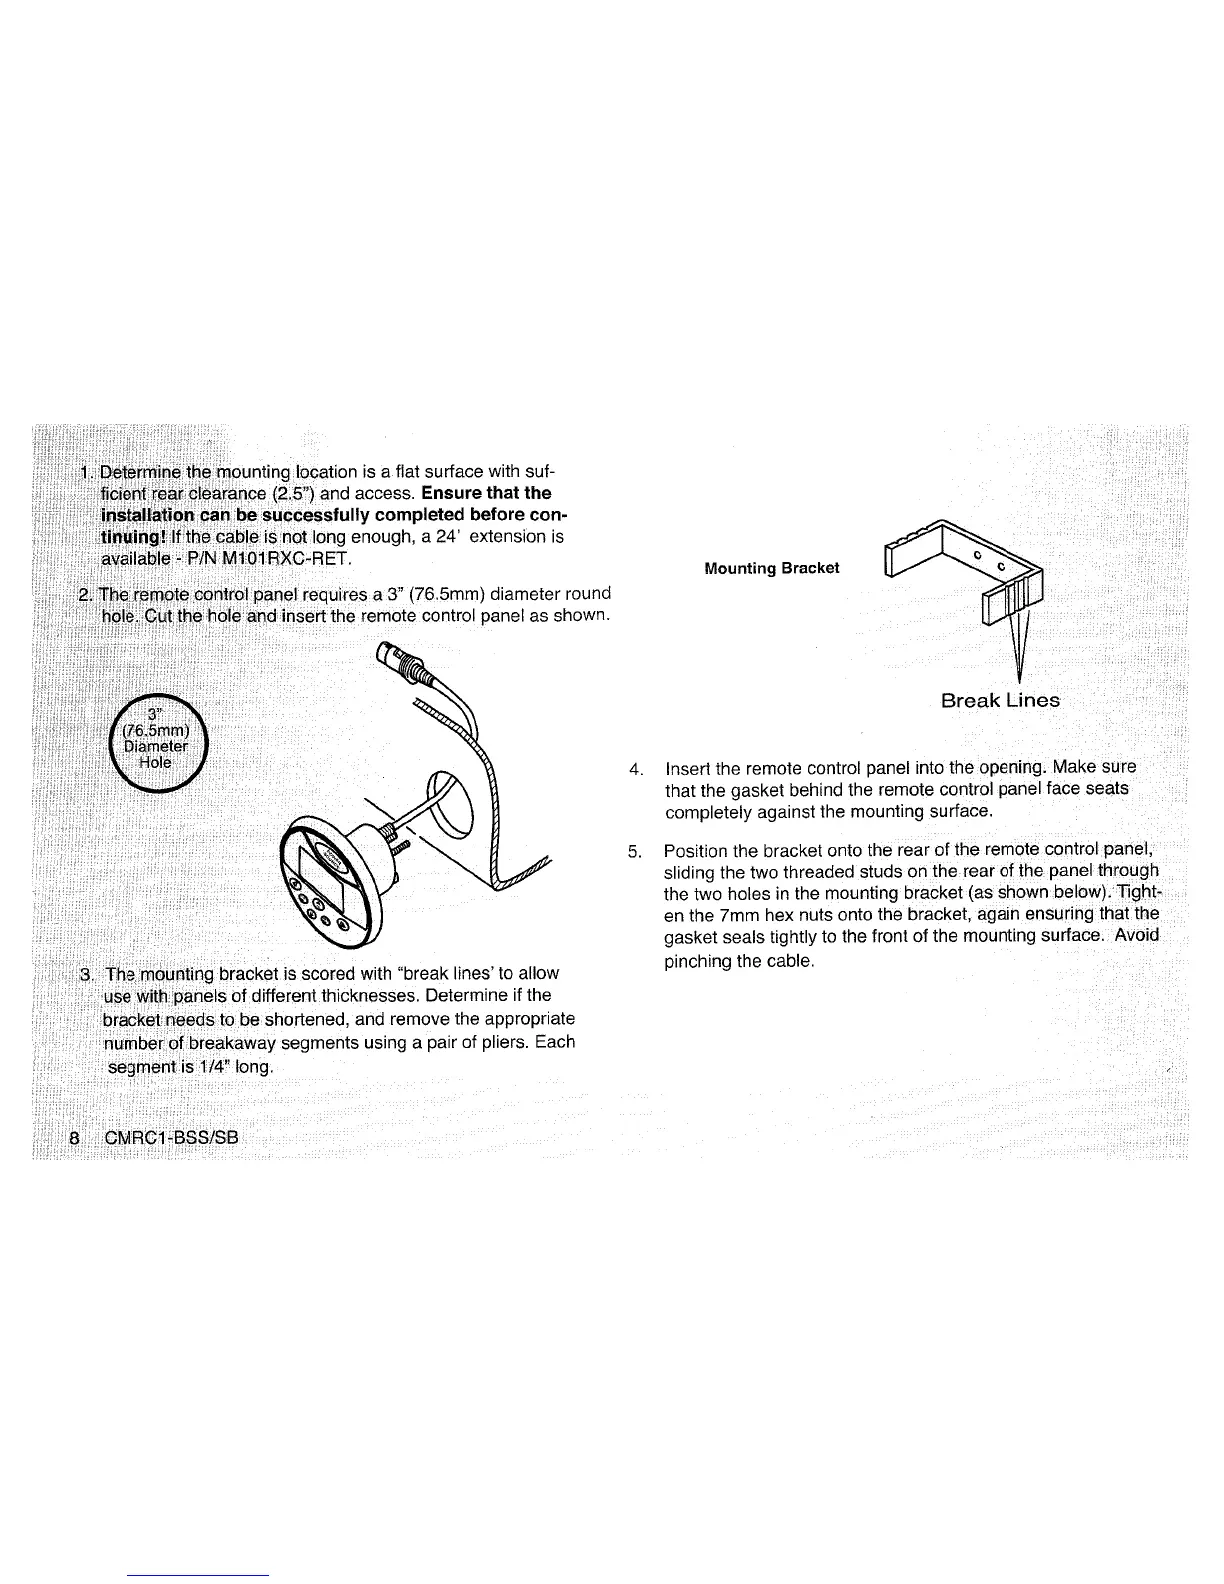
4.
Insert
the
remote control panel
into
that the
gasket
behind
the
remote
completely
against the mounting surface.
5.
Position the bracket onto the rear
of
the remote control pariel,
sliding the two threadedstuds on
the
rearotthepanel
through
the two holes in the mounting
bracket{as
shownbel0-.v)
.1"i~ht"
en the 7mm hex
nuts
onto the bracket,
again
ensuring
that
the
gasket seals tightly to the front of the mounting surface.
AvOii:!
pinching the cable.
Mounting Bracket
JI~!!lr~II~~~~\~!~'~I~~!"~8,untirn.~kl~alion
is
aflat
surface
with
suf-
~TfC:!lnp~
t;~~;"'Jcma
access.
Ensure that
the
~~ll~ei$u,bd«:!~SlfUIIY
completed before con-
v,
.,,"""""'"
a 24' extension is
1
!10!flllll~~I!ii!:lilll~1!~E~~~~~with
"break
lines'
to
allow
thi{'knIA~<::~Ac:.
Determine
if
the
and remove the appropriate
a pair of pliers. Each

 Loading...