8
Parts & Service: 020 8988 7400 / E-mail: Parts@clarkeinternational.com or Service@clarkeinternational.com
STEP 2: ASSEMBLING THE ROOF
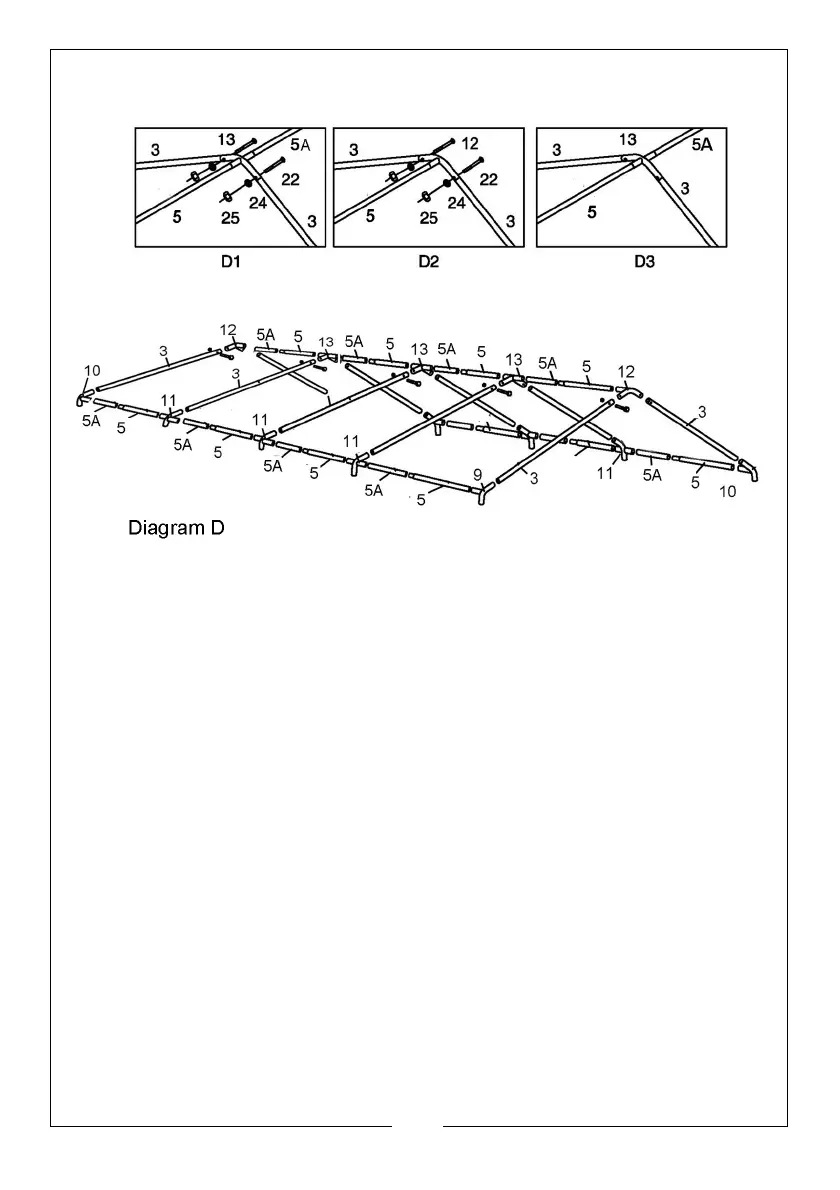
1. Assemble the roof frame by connecting the parts layout above.
NOTE: The hole end on Part #3 needs to be connected to Parts #12 and
#13 (See Diagram D1& D2) by the fittings #22, #24 and #25.
• There is a spring button on both ends of Part #5. Make sure the
button pops up when connecting with Parts #12 & Part #13 (see
Diagram D3).
2. Use a rubber or wooden mallet if required to ensure all tubes are fully
inserted.


 To Next Page