English
GREAT BRITAIN • customer service
tel: 08545 300 9799 e-mail: customerservice@clasohlson.co.uk internet: www.clasohlson.com/uk
Ver. 20130620
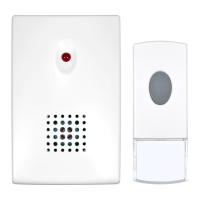
Wireless Doorbell
Art.no 36-5413 Model SCW-1105+SC-321T
Please read theentire instruction manual before using theproduct and save it
for future reference. Wereserve theright for any errors in text or images and any
necessary changes made to technical data. Ifyou have any questions concerning
technical problems please contact our Customer Services.
1. Description
• Wireless doorbell, consisting of push-button (transmitter) and chime (receiver).
• Eight different signals.
• Range: approx. 25m.
• Batteries: Pushbutton: 1×CR2032 (included).
Doorbell: 2×AA/LR6 (sold separately).
2. Beforeinitial use
Inserting thebatteries
The (push-button) transmitter operates on aLithium battery (CR2032, 3 V).
The battery is included with theproduct but theplastic insulating strip
covering thebattery must be removed before thepush-button is ready to use.
Openthepush-button and remove theplastic film in thedirection of thearrow.
Opening thepush-button
1. Pull thetransparent plastic cover upwards.
2. Push thecatch (on theside) and pry thepush-button’s back off carefully
using ascrewdriver.
3. Pull out theplastic strip in thedirection of thearrow.
4. Refit thebattery cover.
5. Push thepush-button once. Anew unique code will be created and sent to
thechime. Thechime will sound indicating that thecode has beensaved.
Warning: Useonly therecommended type of batteries and insert them correctly
according to the(+) and (-) markings in thebattery compartment.
If interference is experienced from other wireless devices, remove thebatteries
from thepush-button and chime and repeat steps 2–5 to switch codes.
3. Chimemelodies
There are 8 different melodies/sounds available. The“Westminster” melody
is thepreset melody. Themelody settings button, marked [ S ] is found inside
thepush-button’s housing. Pushthebutton sequentially for toggling and selecting
between different chime signals.
Things to consider:
• Do not mount thepush-button on metal door frames etc.
Testthefunctionality at thelocation before final mounting.
• Do not expose thepush-button or receiver to water or extreme heat.
• Do not mix new and old batteries or different types of batteries.
Removethebatteries if theproduct is not to be used for along time
(thebatteries can begin to leak).
• Alkaline batteries are recommended for thechime as these tend to have
alonger service life. Removeall consumed batteries to prevent them from
leaking into thebattery compartment.
5. Function
Press thepush-button once to send asignal to thechime. Thesignal is not
repeated if you hold in thepush-button, release thepush-button and press again
if you wish to repeat thesignal. TheLED is alow battery indicator which comes
on when thebattery power islow.
6. Troubleshooting
No sound when thepush-button
is pushed in.
The range between theunits is toofar.
The push-button’s battery is flat.
Changethebattery.
The battery is incorrectly inserted.
Reinsertthebattery correctly with
the+pole facing outwards.
The chime sounds without
thepush-button having
beenpressed.
Wireless devices in thevicinity are affecting
thesignal. Changecodes (see above).
The LED shines or thechime
sounds strangely for no reason.
The chime’s batteries are flat.
Changebatteries.
7. Disposal
This product should be disposed of in accordance with local regulations.
Ifyou are unsure how to proceed, contact your local authority.
8. Specifications
Push-button (transmitter)
Battery CR2032 lithium (3 V)
Power consumption 9 mA (while transmitting)
0.005 mA (in standby mode)
Chime (receiver)
Batteries 2×AA/LR6 (sold separately)
Power consumption 80 mA (while receiving)
0.3 mA (in standby mode)
Operating temperature −10 to +40 °C
Range Up to 25 m (line-of-sight, outdoors)
Chime signals 8 different melodies/sounds
Size 95×60×40 mm (chime)
85×33×25 mm (push-button)
Digital codes 256 different digital codes
Chime (receiver) batteries: 2×AA/LR6 (sold separately).
1. Remove thebattery cover on theback.
2. Insert 2×AA/LR6 batteries according to thepolarity markings in thebattery
compartment.
3. The chime sounds twice indicating that it is ready to use and receive
thepush-button code signal (the wireless doorbell has anadvanced random
learning function used for setting thedigital code between thetransmitter
and receiver). Note: Theautomatic learning function is only active for
15minutes from thetime that thebatteries have been inserted.
Chime signals
1. Westminster chime
2. Ding-dong
3. Telephone signal
4. Circus theme
5. Banjo on myknee
6. Twinkle-twinkle
7. It’s asmallworld
8. Dogbark
4. Installation
Find asuitable location and test thesignal range before drilling any mounting holes.
Push-button (transmitter)
Push thecatch (on theside) and pry thepush-button’s back off carefully using
ascrewdriver. Usethetwo holes on thebackside as atemplate and mark desired
location close by thedoor. Drilltwo holes at themarking and mount thepush-
button with thesupplied screws (use plugs if needed) or double-sided adhesive
tape (not included).
Note: Donot mount thepush-button on ametal surface as it will reduce
therange considerably.
Chime (receiver)
Use theslotted hanging clip for mounting. Beginby screwing ascrew into
thelocation where you wish to mount thechime. Donot screw thescrew flush
onto thesurface. Leaveat least a3 mm space between thescrew head and
thewall.