• Minimum distance of inflammable materials from any part of the fixture:
0.10 m (4”) for QS and HMI 1200 Basic versions.
The fixture may be mounted on surfaces rated normally inflammable.
IMPORTANT: For better and more reliable operation of the projector, the ambient
temperature must not exceed 35° C (95° F). Protection factor IP 20: the fixture is pro-
tected against penetration of solid bodies more than 12 mm (0.5”) in diameter (first
digit 2), but can be damaged by spray, jet, drip or rain water (second digit 0).
ENGLISH
SHADOW
POWER SUPPLY AND INTERFACE
2
• Connecting to the electrical power supply
The operations described in this heading must be carried out by a licensed
electrician.
It is good policy to connect projectors to the power supply by way of dedicated
switches, so that each can be turned on and off individually from a remote station.
INSTALLING THE PROJECTOR- SAFETY INFORMATION
1
IMPORTANT: Read carefully. It is essential for the correct and safe use of
the equipment that erectors and operators should be fully conversant with
the information and instructions given in this manual.
INSTRUCTION MANUAL
2
5
4
6
7
3
1
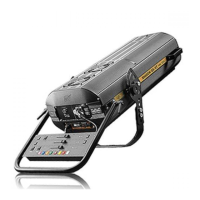
• Unpacking
Open the wooden box, remove the projector from the packing and place it on a flat
horizontal surface. Unpack the standard accessories supplied with the equipment.
Inspect the lamp change label (1) on the projector cover and replace it with one of the
optional language versions if necessary.
Make certain that the label is never removed, as it displays important safety
information.
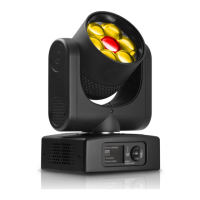
• Initial assembly operations
Position the bracket (2) on the graduated plate (3) at the desired height, select the
required hole and insert the bushing (4), the chamfered washer (5) and the screw (6)
and tighten the assembly using the supplied Allen wrench.
The bracket can also be mounted on the top of the projector for truss mounting by
inverting the position of the graduated plate (3).
Position the support as desired and then secure it by tightening the knobs (7).
• Fitting the lamp
Refer to directions for replacement of the lamp given under heading 8 MAINTE-
NANCE.
• Installing the projector
The projector can be mounted in any position without its operating characteristics
being affected.
IMPORTANT: for ceiling installation secure the projector in the desired position by
means of the holes in the support. Secure preferably using two ø12 mm bolts with
nuts and lock washers.
Make certain that the anchorage is stable before positioning the projector.
• Minimum distance from target objects
The projector must be positioned in such a way
that objects struck by the beam are separated from
the fixture by at least the distance specified on the
lamp change sticker next to the symbol shown in
the figure on the right.
The projector is designed to operate at the voltage and frequency indicated on the
electrical data plate (8) affixed to the rear end.
Check that these two values correspond to the mains voltage and frequency.
IMPORTANT: the projector must be connected to a power supply circuit having
a proper earth system (Class I appliance).
• Photobiological Safety
This product is intended for the following areas of application:
studios, stages, theaters, exhibitions, trade fairs, events, theme
parks, entertainment venues, architectural lighting and similar
Not suitable for household illumination
Not for residential use
Disposing
This product is supplied in compliance with European Directive
2012/19/EU - Waste Electrical and Electronic Equipment (WEEE). To
preserve the environment please dispose/recycle this product at the
end of its life according to the local regulation.
Gruppo di
rischio 2
Secondo la norma
EN 62471