Instructions
Instructions
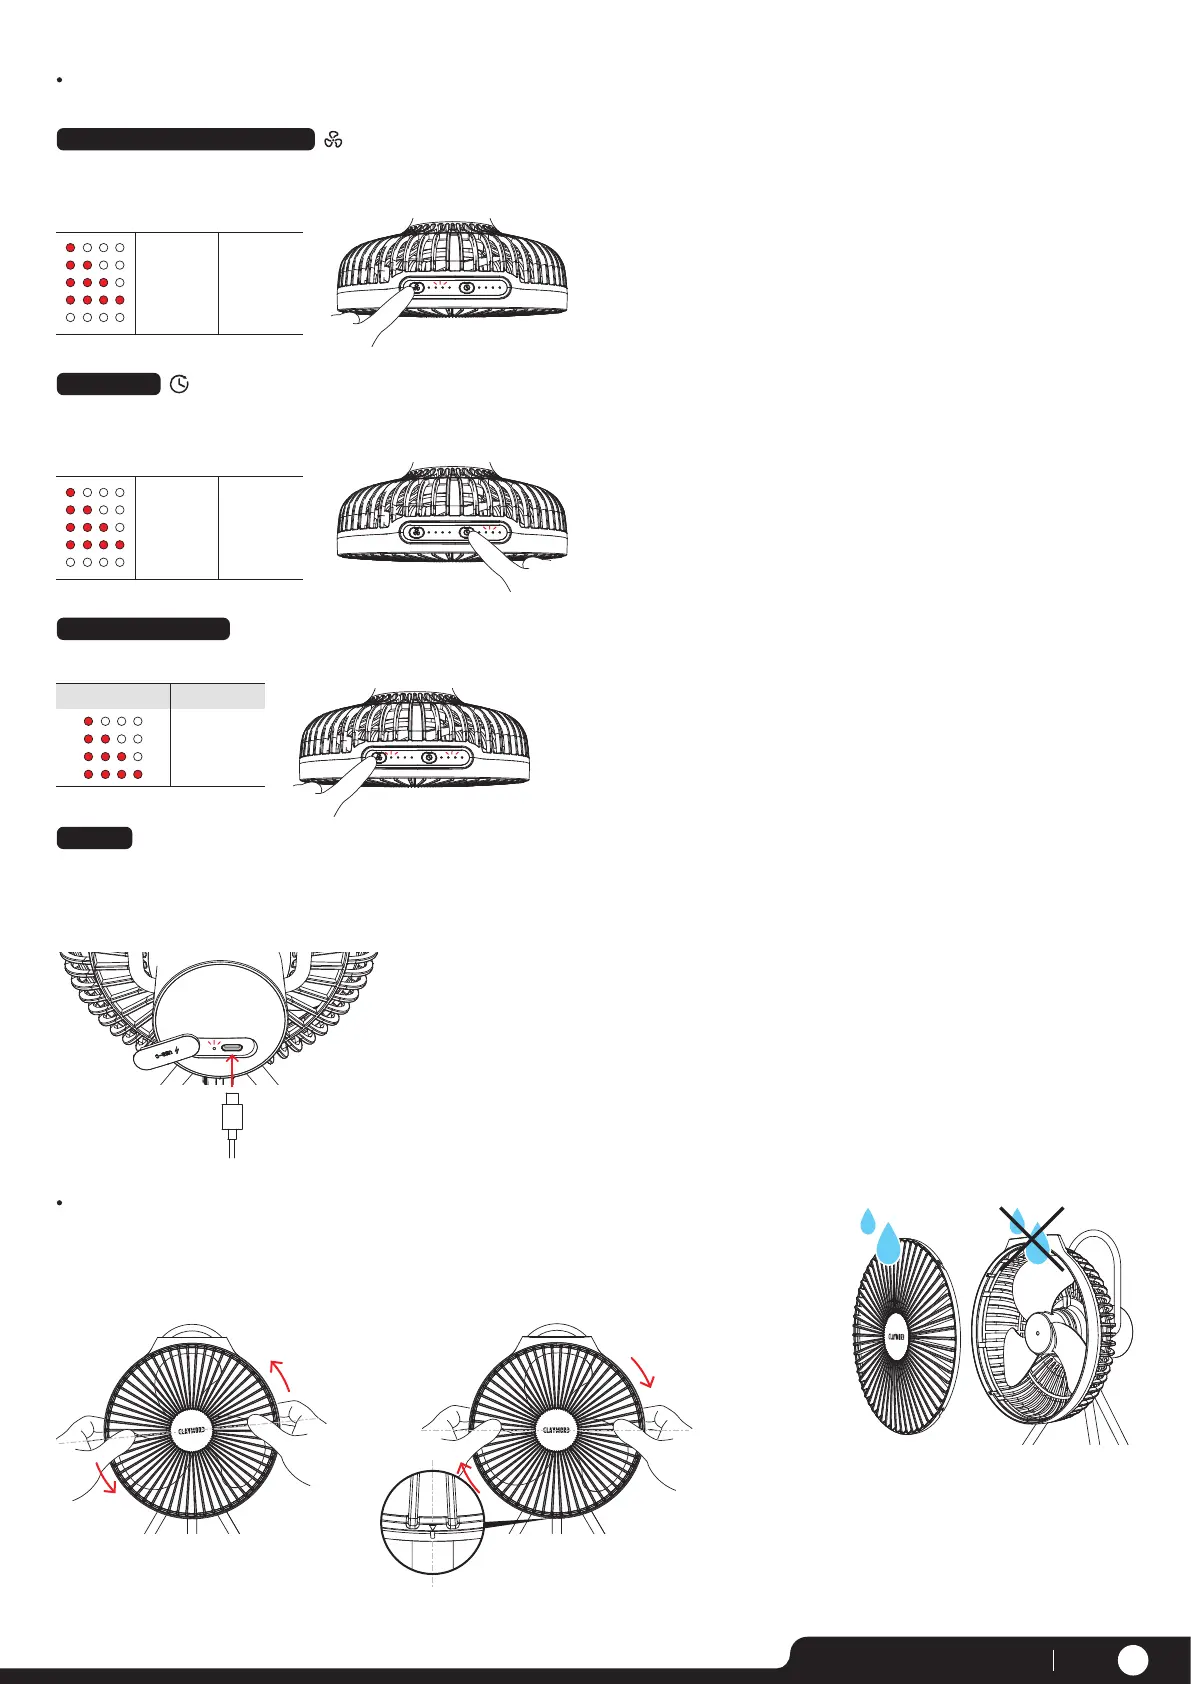
- When the speed button is pressed, it changes in the order of 1-2-3-4-OFF.
- The indicator on the right side of the button lights up when the fan is on.
Fan Power and Wind Speed Control
1 level per
button press
Wind Speed Indicator
1 (Ultra low)
2 (Low)
3 (Medium)
4 (High)
Turn off
- After starting the fan, press the timer button to set the timer for 1 hour-2 hours-3 hours-4 hours.
- The indicator on the right side of the button lights up when the fan is on.
Setting Timer
1 level per
button press
Timer Indicator
1 hour
2 hour
3 hour
4 hour
Turn off
When you press on the power button, the remaining battery level is shown for 5 seconds.
Checking Battery Level
Battery indicator Charging
0~25%
25~50%
50~75%
75~100%
1) Open the rubber cover on the back of the main unit
and connect the USB cable to the charging port to initiate charging.
2) When charging, the charging indicator will flash.
When fully charged, the charging indicator will turn off.
Charging
INPUT
PAGE 02www.claymoreoutdoor.com
Separate
Lock
Hold the head as shown
in the left figure and turn the outer side
of the front safety cage
counterclockwise to separate it.
Place the separated safety cage back
into the head, turn it clockwise, and when clicked, it is affixed.
When the arrow on the bottom and the slot
are aligned, it is mounted correctly.
The safety cage can be washed with water after
separation. After washing, dry it well before
re-mounting it onto the main unit.
Do not wash the main unit with water.
Please wipe it with wet tissue or dry cloth.
※ Be sure to turn off the power when separating
the safety cage.
※ The blades cannot be separated.