17
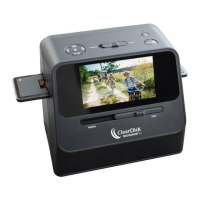
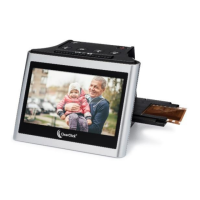
How To View or Delete Scanned Images On The
Scanner
(To view scanned images on your computer instead,
please see Quick Start Guide step #6.)
If you’d like, you can browse scanned images before
transferring them to your computer.
To do this, while the scanner is turned on,
simply press the play (►) button on the
scanner.
The most recently scanned image will appear on the
screen. You can browse through the scanned images
by pressing the “left” and “right” arrow buttons.
To delete an image, select it and press the Delete
button once, and confirm.
To view an image, press the “OK” button.
To start a slide show of the images, press the
Playback button again. To exit the slideshow,
press the “OK” button.
To delete all photos, press the Delete( ) button
twice.