READ BEFORE INSTALLATION:
• Panels may be heavy. Be careful to avoid injury when installing.
• Two adults are required for the installation of your sauna
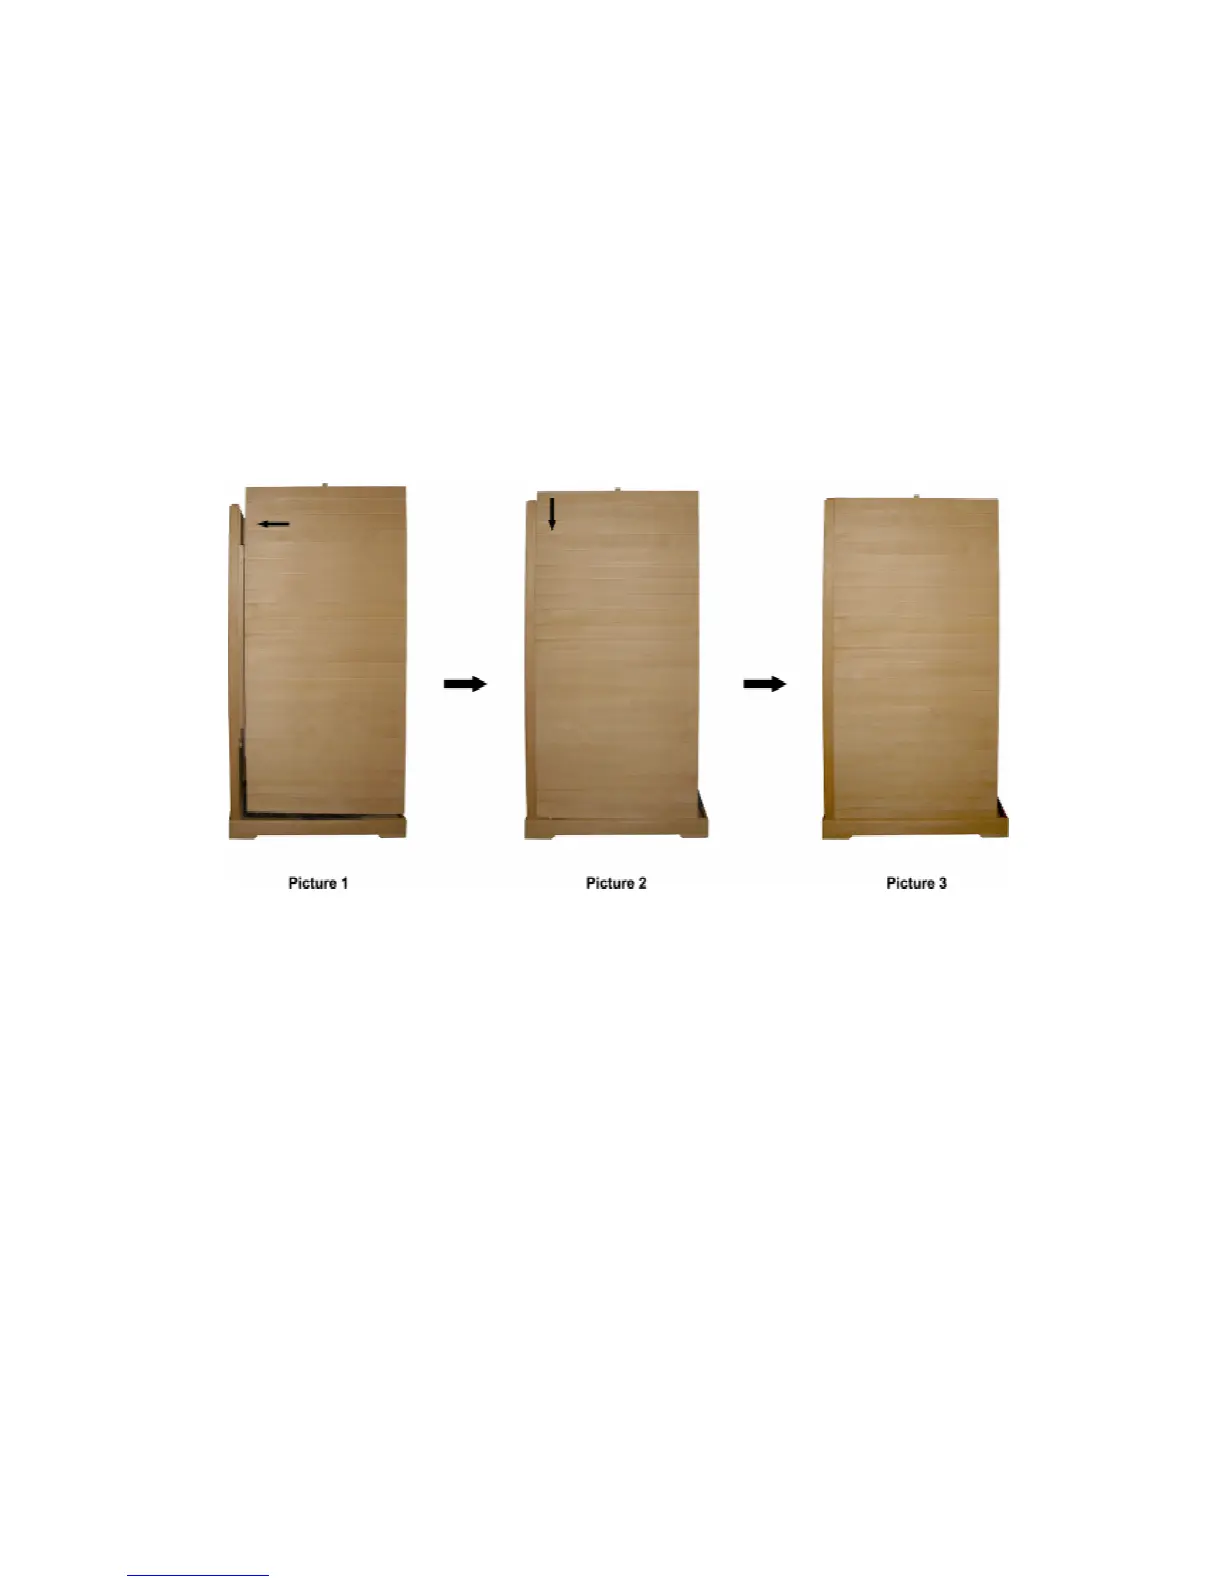
• There is a
“
+
”
button or a
“–”
button at the side of each panel. The panels will be installed
by corresponding one “+” panel to one “–” panel as below at the time of install. The panel with
the “+” button should be lifted up about 4 inches (10cm) higher than the panel with the
“-“ button (Refer to Picture 1). Place the “+” panel against the “–” panel (Refer to Picture 2),
and then slide down the panel with “+” button until the two panels are equal in height (Refer to
Picture 3). If they are not equal in height or there is an obvious gap between the two panels, this
means they are not properly attached, and you should try again.
The panels should be installed in the following order:
1. Floor
2. Back Wall
3. Left Side Wall
4. Right Side Wall
5. Under Bench Support
6. Bench
7. Front Wall
8. Roof
5