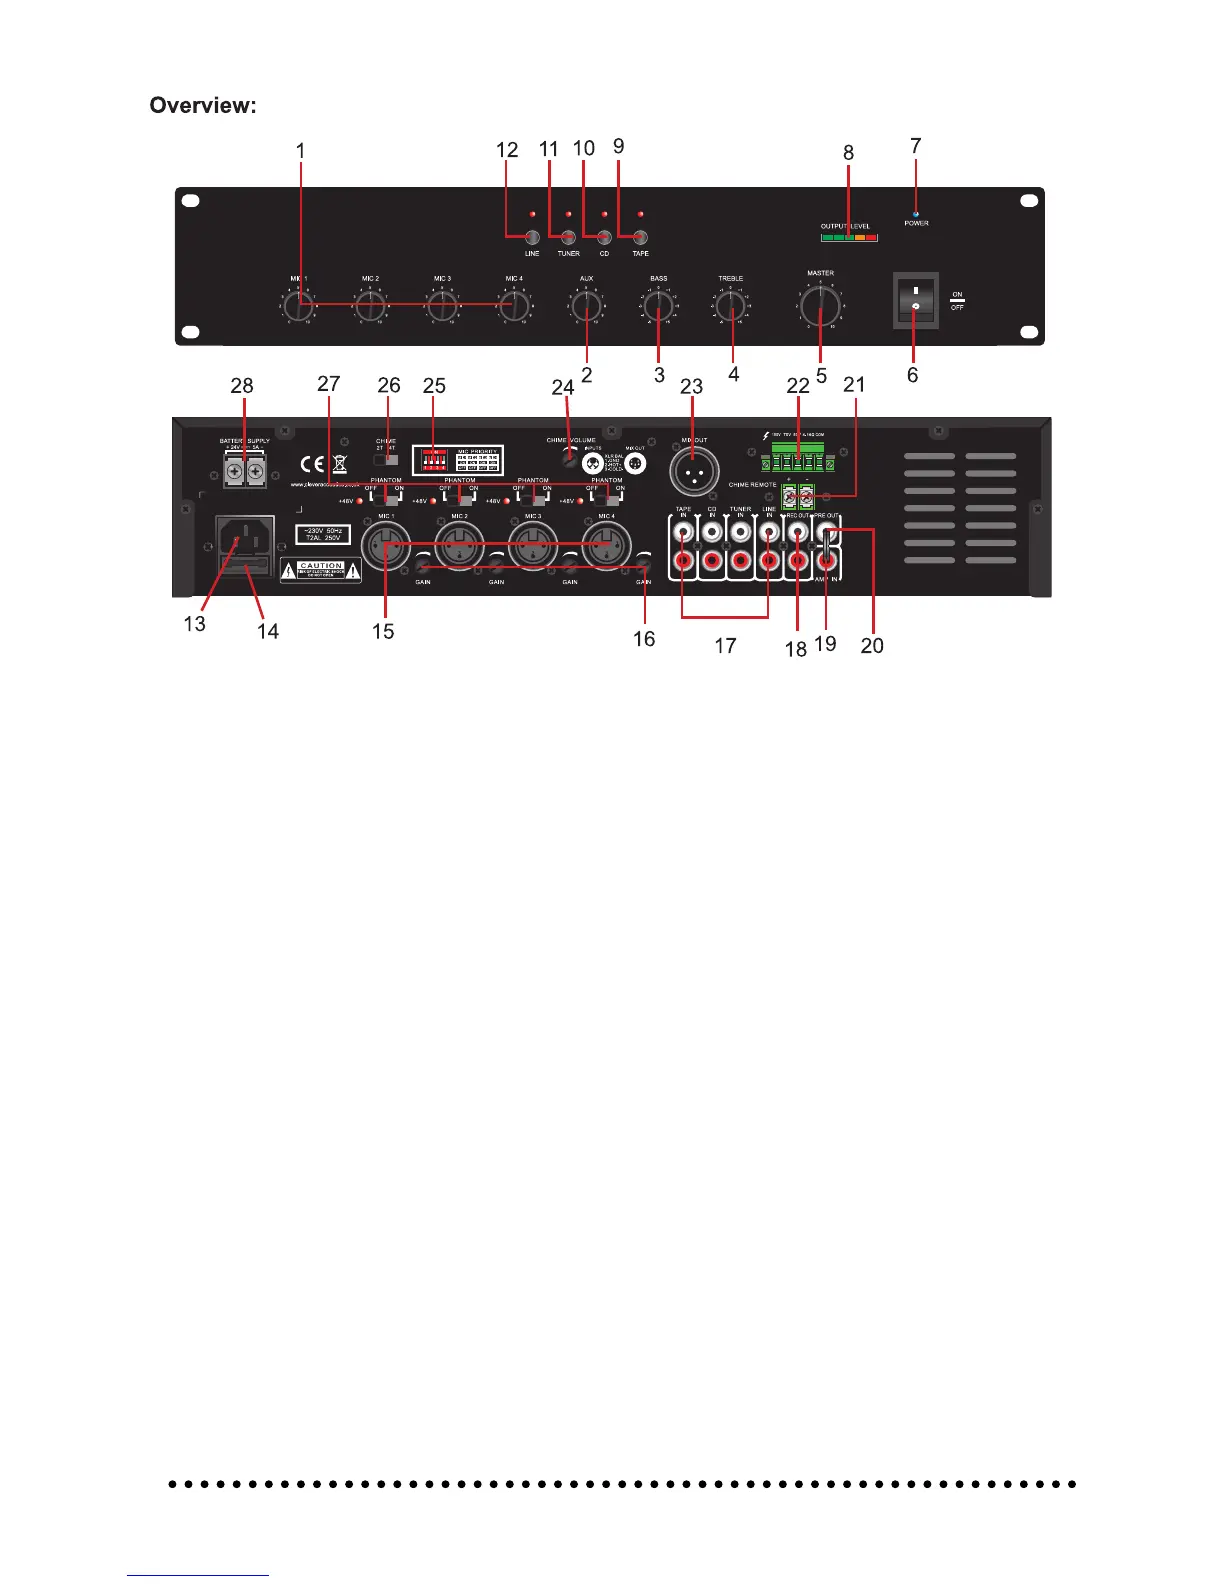
Identication:
1. MIC 1/2/3/4 Volume Control:
Level (volume) control of each individual microphone input.
2. Aux Volume Control:
Level (volume) control of the Line, Tuner, CD and Tape inputs.
3. Bass Tone Control:
Adjust clockwise to increase or anti-clockwise to decrease the low frequency (bass) contour for
the overall system.
4. Treble Tone Control:
Adjust clockwise to increase or anti-clockwise to decrease the high frequency (treble) contour
for the overall system.
5. Master Volume Control:
Level (volume) control for the overall system. Turn clockwise to increase the volume, turn anti-
clockwise to decrease the volume.
6. Power On/Off Switch:
Switch to the “I” position to switch the amplier on, switch to the “O” position to switch the
amplier off. The amplier should be powered off while before any connections are made.
7. Power LED:
Indicates the mixer amplier is powered on and ready for use. If the Power LED is not lit please
check the fault nding table in this manual.
8. Output Level Indicator:
Five segment LED indicator array to indicate the output state of the amplier. During normal
operation the Green LED’s should illuminate with only occasional illumination of the Orange
segment. Should the Red (Peak) LED illuminate the output level of the amplier needs to be
reduced using the Master Volume Control (5).
9. Tape Selector Switch:
Press to select Tape input as music (AUX) source. Pressing this selector switch will release the
other AUX inputs.
10. CD Selector Switch:
Press to select CD input as music source. Pressing this selector switch will release the other
AUX inputs.
5
 Loading...