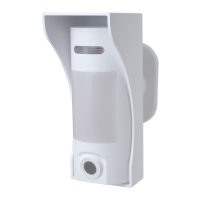
Outdoor PIR Motion Sensor Camera 862EX
862EX is an outdoor passive infrared (PIR) motion sensor camera. It is capable of sending wireless signals and captured
images (picture quality of up to 640 x 480 pixels) to the Control Panel upon movement detection.
Featuring night illumination capability, with UV resistant housing, and waterproof to IP45 standard, 862EX is ideal for backyards,
lawns, gates, outdoor corridors and hallways.
The outdoor PIR Camera is designed to give a typical detection range of 10 meters when mounted at 2 meters above ground. It
provides pet-immunity up to 60 kilos with two selectable sensitivity levels to accommodate different environments.
862EX is also compatible with Climax’s Repeater RP-29/Router RMB-29, which can further extend the RF communication
range into hard-to-reach areas.
The 862EX Series includes the following models:
862EX – PIR motion sensor camera with flash LED
862EX-IL – PIR motion sensor camera with Infrared LED
1. Flash LED / Infrared LED
The Flash LED (For 862EX) or Infrared LED (For 862EX-IL) delivers sufficient light for image capture under low
lighting condition.
2. LED Indicator (Red)
The LED indicator is used to indicate the system status.
3. IR Sensor
The sensor is intended to detect moving objects.
4. PIR Camera Lens
5. Test&Learn Button
-Press and hold the button for 3 seconds to send a learn code, and then release the button when Red LED lights up.
-Press the button once to enter test mode for 10 minutes.
-Press the button once to send a learn code to the repeater/router.
6. Internal Tamper
7. DIP Switch Block
There are 8 DIP Switches for setting the function & detection sensitivity levels.
8. Battery Compartment
9. Mounting Bracket
When enabled, the LED Indicator will light up in the following conditions:
⚫ When the Tamper Switch is triggered, the LED will flash for 6 times to indicate it is transmitting “Tamper” signal.