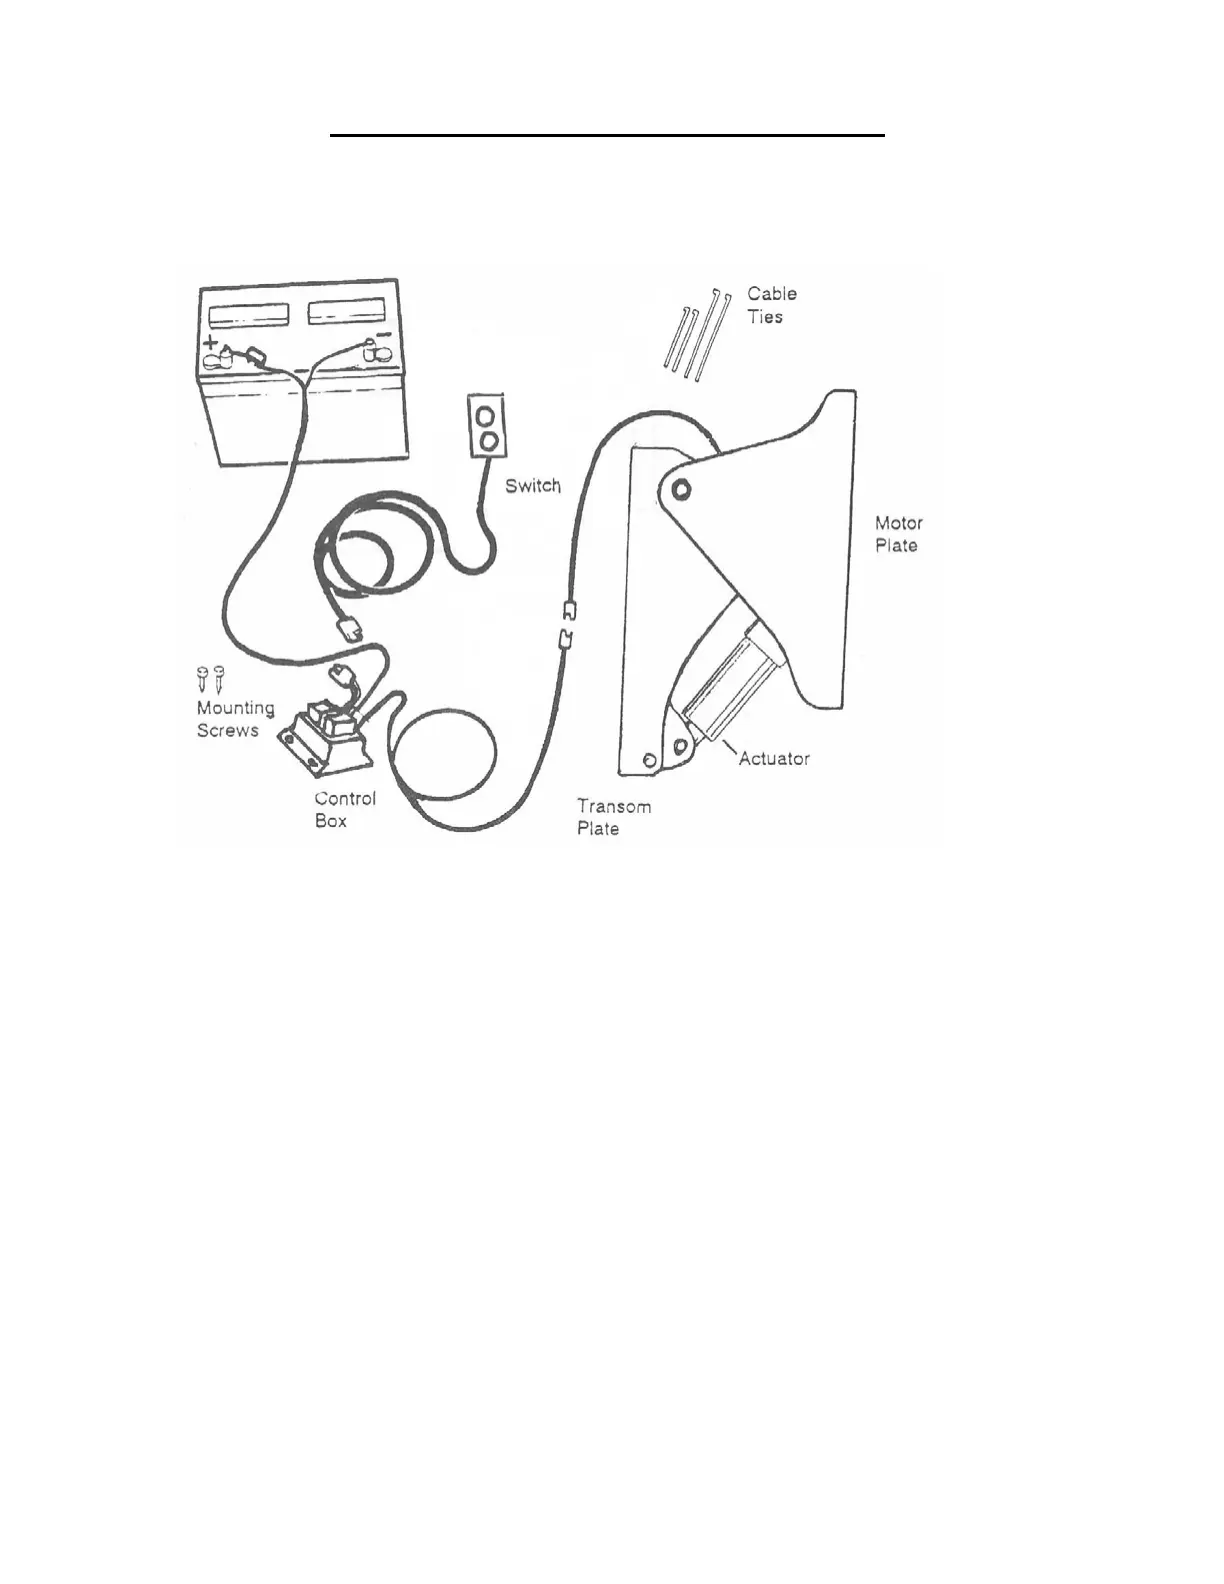
ELECTRICAL CONNECTIONS
This unit is designed to operate off of a standard 12 volt battery and is generally connected to
the boats main starting battery. Follow the illustration and instructions below:
1. Mount the electrical control module inside the boat using the two ½ inch screws
provided
2. The push button switch can be mounted in any convenient location near the drivers’
seat. For tiller operated motors, the switch can be strapped to the tiller arm with ca-
ble ties.
3. Run the three pronged switch lead to the control relay module and the two pronged
lead from the control module to the bracket.
4. Apply a small amount of dielectric grease to each of the connectors and plug them
together. (It is also recommended that these connections be wrapped with a water-
proof tape or shrink tube applied
5. After all connections are made, connect the ring terminal leads to the battery. Con-
nect the red lead to the positive (+) terminal and the black lead to the negative (-)
terminal.
6. Test the unit by running it up and down to make sure that there is adequate slack in
the leads. Then using the cable ties supplied, secure all of the wiring to make sure it
does not get pinched during operation.