This document provides assembly instructions for the Coaster Fine Furniture Desk/Chair, model number 800778. It includes a parts identification list, hardware identification list, and step-by-step assembly instructions with accompanying diagrams.
Function Description:
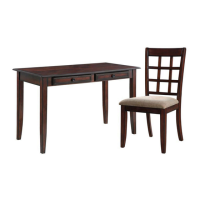
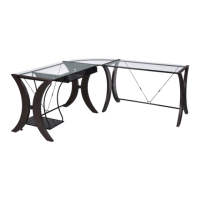
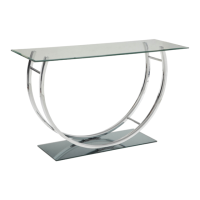
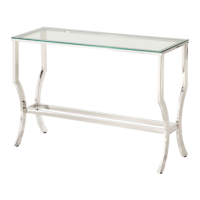
The Coaster Fine Furniture Desk/Chair (model 800778) is a furniture set designed for home use, consisting of a desk and a matching chair. The desk provides a flat surface for various tasks, likely featuring drawers for storage. The chair is designed to provide seating comfort and support, complementing the desk in a functional workspace or study area. This product is specifically intended for residential use and is not suitable for commercial establishments.
Important Technical Specifications:
Desk Components (Parts Identification):
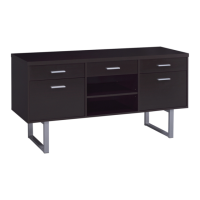
- A: TOP - 1 piece. This is the main surface of the desk.
- B: DESK LEGS - 4 pieces. These support the desk top.
- C: DRAWER - 2 pieces. These provide storage within the desk.
Chair Components (Parts Identification):
- E: SEAT - 1 piece. The base structure of the chair.
- F: CHAIR LEGS - 2 pieces. These support the chair seat.
- G: CUSHION - 1 piece. Provides padding for the chair seat.
- D: CHAIR BACK - 1 piece. Provides back support for the chair.
Hardware Identification:
The assembly requires a specific set of hardware components:
- 1: WRENCH 5MM - 1 piece. This is the primary tool for tightening bolts.
- 2: BOLT 5/16" DAL×2-1/8" - 8 pieces. Used for attaching desk legs to the table top.
- 3: BOLT 5/16" DAL×3" - 4 pieces. Used for assembling the seat to the chair back.
- 4: BOLT 5/16" DAL×2-1/4" - 4 pieces. Used for attaching chair legs to the seat box.
- 5: BOLT 5/16" DAL×1-1/2" - 1 piece. Used for inserting into center holes of the seat frame.
- 6: LOCK 5/16"DAL - 17 pieces. These are lock washers, used in conjunction with bolts to prevent loosening.
- 7: WRSHER 5/16" DAL - 17 pieces. These are flat washers, used with bolts to distribute pressure and protect surfaces.
- 8: SCREW 4mm×5/8" - 4 pieces. Used for bolting the seat to the cushion.
Usage Features:
Assembly Tips:
- Hardware Sorting: Before starting assembly, users are advised to remove all hardware from the box and sort them by size. This helps in easy identification and prevents confusion during the process.
- Parts Verification: It is crucial to check that all hardware and parts listed in the identification sections are present before beginning assembly. This ensures a complete and smooth assembly process.
- Sequential Assembly: The instructions emphasize following the attached steps in the numbered sequence. This approach is designed to ensure a fast and easy assembly process, minimizing errors and potential difficulties.
Warning!
- No Repairs or Modifications: Users are explicitly warned against attempting to repair or modify any parts that are broken or defective. In such cases, the instruction is to contact the store immediately for assistance. This ensures safety and maintains product integrity.
- Intended Use: The product is strictly for home use only. It is not intended for commercial establishments, indicating that its design and durability may not withstand the rigors of commercial environments.
Step-by-Step Assembly Process:
Desk Assembly (Step 1):
- Preparation: The first step involves placing the table top (Part A) upside down on a soft, non-abrasive surface. This is recommended to be done by two people to prevent damage and ensure stability.
- Leg Attachment: The desk legs (Part B) are then bolted to the table top. This is achieved using specific hardware: #2 bolts, #6 lock washers, and #7 flat washers.
- Tightening: The connections are to be tightened using the provided #1 wrench. The diagram illustrates how the bolts, lock washers, and flat washers are used to secure the legs to the desk top, with the drawers (Part C) already integrated into the desk frame.
Chair Assembly:
Step 1 (Seat to Cushion):
- Connection: The chair seat (Part E) is bolted to the cushion (Part G).
- Hardware: This step uses #8 screws.
- Tightening: The connection is tightened with the #1 wrench. The diagram shows the screws being inserted from the bottom of the seat into the cushion.
Step 2 (Legs to Seat Box):
- Connection: The chair legs (Part F) are bolted to the seat box (Part E), which now includes the cushion.
- Hardware: This step requires #4 bolts, #6 lock washers, and #7 flat washers.
- Tightening: The connections are tightened using the #1 wrench. The diagram shows how the legs attach to the sides of the seat box.
Step 3 (Seat to Chair Back):
- Chair Back Attachment: The assembled seat (with cushion and legs) is then attached to the chair back (Part D).
- Hardware for Chair Back: This connection uses #3 bolts, #6 lock washers, and #7 flat washers. These are tightened with the #1 wrench.
- Center Hole Bolt: Additionally, a #5 bolt, #6 lock washer, and #7 flat washer are inserted into the center holes of the seat frame. This is also tightened with the #1 wrench. The diagram provides a detailed view of how the chair back connects to the seat frame, showing the placement of bolts, washers, and the central bolt.
Maintenance Features:
While the document does not explicitly detail maintenance features, the warning against repairing or modifying broken/defective parts implies that for any issues, professional assistance or replacement parts from the store should be sought. This suggests that user-level maintenance is limited, and the focus is on proper assembly and handling to ensure longevity. The use of durable materials and specific hardware (like lock washers) is intended to maintain the structural integrity of the furniture over time. Regular cleaning of the surfaces as appropriate for fine furniture materials would be implied for general upkeep.