Do you have a question about the Coaster 800446 and is the answer not in the manual?
Essential guidance for assembly, including preparation, safety precautions, and product usage guidelines.
Visual guide to all individual parts required for assembling the computer desk, labeled A through T.
Identification of all hardware components, including bolts, screws, wrenches, and floor levelers, labeled 1 through 11.
Detailed step-by-step visual instructions for constructing the computer desk, covering all assembly stages.
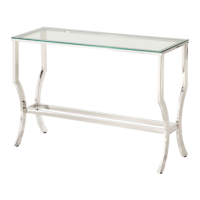
Detailed product dimensions and specifications for the computer desk, including overall size and glass measurements.
This document provides assembly instructions for the Coaster Fine Furniture Computer Desk, model 800446. The manual emphasizes a structured approach to assembly, ensuring that users can efficiently and correctly put together the furniture. It is designed for home use and explicitly states that it is not intended for commercial establishments.
The assembly process is broken down into several steps, each with clear visual aids and a list of required parts and hardware. The manual begins with general assembly tips, advising users to remove and sort hardware by size, verify that all parts are present before starting, and follow the instructions sequentially for a fast and easy assembly. A crucial warning is included, cautioning users against attempting to repair or modify broken or defective parts and instead directing them to contact the store immediately. The estimated assembly time for the computer desk is 70 minutes.
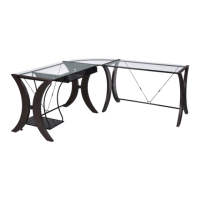
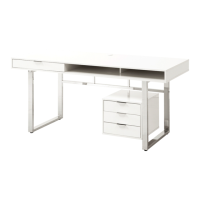
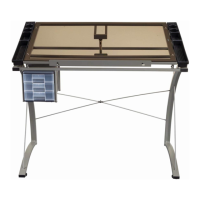
The computer desk is designed with versatility in mind, offering two distinct assembly options (Option 1 and Option 2) for various stages of the build. This flexibility allows users to configure the desk to best suit their space and preferences. The desk features a combination of metal framing and glass tops, suggesting a modern and sleek aesthetic. The structural components, such as middle, right, and left legs, crossbars, and wire supports, are made of metal, providing stability and durability. The use of glass for the top surfaces indicates a design that aims for a light and open feel, potentially making smaller spaces appear larger.
The parts identification section is comprehensive, listing all components with their corresponding letters and quantities. Key structural parts include various crossbars (Crossbar 1, 2, 3, 4, Back Bottom Crossbar), which are essential for connecting the legs and forming the desk's frame. Wire supports (Back Long Wire Support, Back Short Wire Support) are also included, likely for added stability or cable management. The desk incorporates a keyboard tray, indicated by "Keyboard," "Keyboard Right Glide," and "Keyboard Left Glide," suggesting an ergonomic design for computer use.
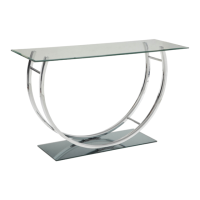
For the glass components, the manual lists "Top Glass" and "Corner Glass," indicating a multi-piece glass surface, possibly forming an L-shaped or corner desk configuration. The presence of "Corner Glass Back Support" and "Corner Glass Front Support" further supports the idea of a corner-oriented design, providing specific support for the glass in that section.
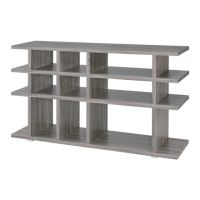
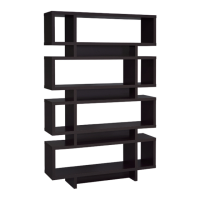
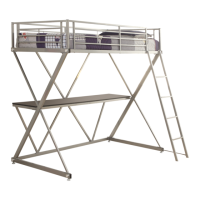
The desk also includes a tower shelf system, with "Tower Shelf Front Support Leg," "Tower Shelf Back Support Leg," and "Tower Shelf." This integrated shelving unit suggests additional storage or display space, enhancing the desk's functionality.
The hardware identification section is equally detailed, listing various types of bolts, screws, and specialized tools. These include "Bottom Support Allen-Bolt," "Allen-Bolt Large," "Allen-Bolt Small," "Allen-Bolt Medium," "Connecting Bolt," and "Bolt." The inclusion of "Screw" indicates points where smaller components are attached. Specialized hardware like "Suction Cup" is listed, which is typically used to secure glass tops to the frame, preventing slippage and protecting the glass. "Floor Leveler" components are provided, allowing users to adjust the desk's height slightly to compensate for uneven floors, ensuring stability and preventing wobbling. The manual also includes the necessary tools for assembly: a "Wrench" and an "Allen Wrench," ensuring that users have everything they need to complete the build without requiring additional tools.
The assembly steps are presented with clear diagrams, showing how each part connects. For instance, Step 1 illustrates the initial assembly of the legs (A, B, C) with crossbars (J, K) using specific bolts (3). The diagrams for Option 1 and Option 2 show alternative orientations or configurations for these initial steps, reinforcing the desk's adaptable design. Step 2 focuses on attaching the wire supports (M, N) and turnbuckles (L) to the frame, likely for structural integrity and tensioning.
Step 3 involves installing the keyboard tray components (D, E, F) using screws (5) and bolts (6). This step highlights the desk's functionality for computer users, providing a dedicated space for the keyboard. Step 4 details the assembly of the tower shelf system, showing how the tower shelf (R) is supported by its legs (Q, S) and secured with bolts (2) and screws (7, 9). This adds a vertical storage element to the desk, useful for computer towers, books, or other items.
Step 5 and Step 6 continue with the assembly of the main desk frames, connecting additional crossbars (G, H) and wire supports (M, N) to the legs (A, B, C). These steps further solidify the desk's structure and prepare it for the glass tops. The final assembly steps, Step 7 and Step 8, involve placing the glass tops (T, U) onto the completed frame, securing them with suction cups (8) and connecting bolts (7) where applicable. The "COMPLETE" designation in Step 8 signifies the end of the assembly process, presenting the fully constructed computer desk in both Option 1 and Option 2 configurations.
The overall design of the computer desk, as depicted in the manual, suggests a functional and aesthetically pleasing piece of furniture suitable for a modern home office or study area. The combination of metal and glass, along with integrated features like a keyboard tray and tower shelf, aims to provide a comprehensive workspace solution. The detailed instructions and inclusion of all necessary hardware and tools underscore a user-friendly assembly experience, allowing individuals to build the desk with confidence. The emphasis on "Fine Furniture for every stage of life" in the manual's cover page suggests a product designed for longevity and adaptability to changing needs.
| Category | Indoor Furnishing |
|---|---|
| Shape | Round |
| Diameter | 4 inches |
| Finish | Smooth |
| Quantity | 4 |