20
32
54
1
cobra
®
2t, 4t, 8t and minicobra
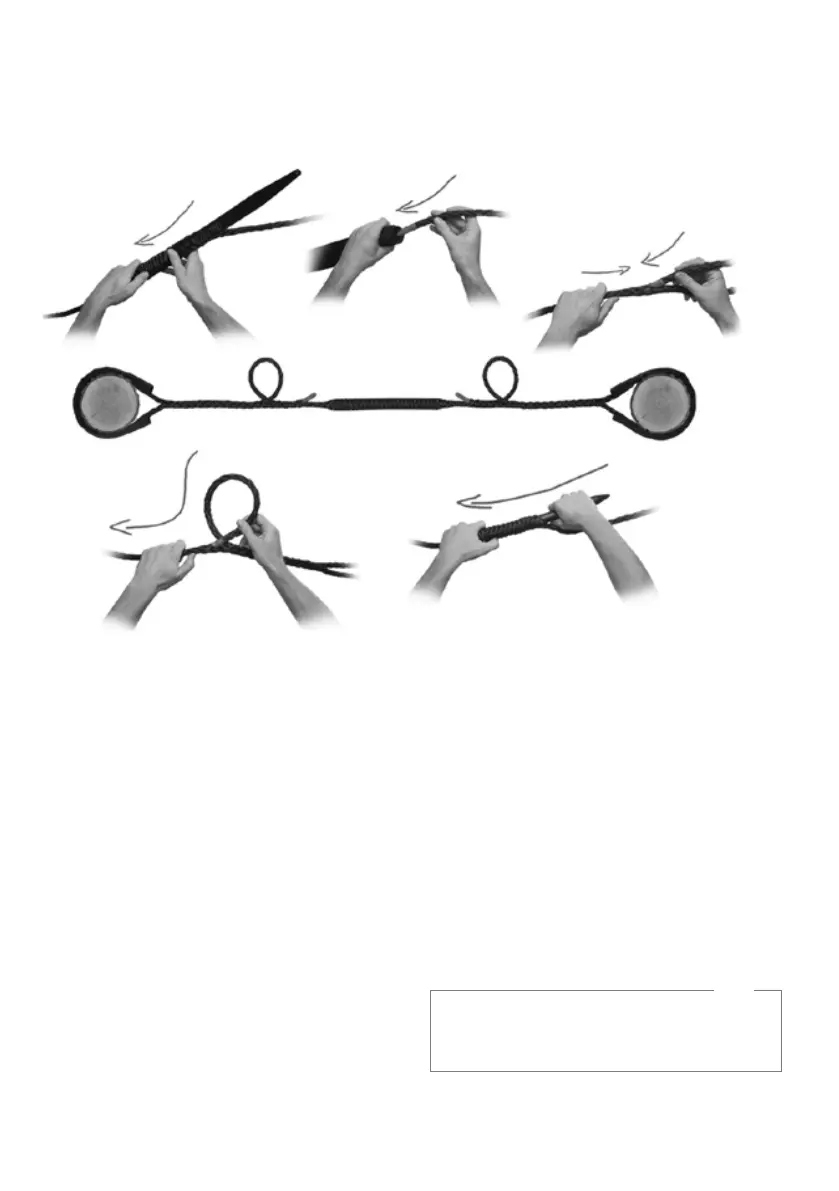
Installation in six easy steps:
1. INSERT EXPANSION INSERT
Choose the appropriate expansion insert length (=
at least 2/3 the circumference of the branch). Grasp
the cable at the branch circumference distance plus
20 cm (8 inches) from the end of the cable and insert
the expansion insert through the mesh.
2. FIT ANTI-ABRASION HOSE
Cut the anti-abrasion hose to the required length
(minimum length = branch circumference) and slide it
over the cable in the expansion insert area.
3. MAKE A QUICK SPLICE
Wrap the cable around the branch, then push the
end of the cable approx. 40 cm/16 inches (mini,
2t and 4t) or 50 cm/20 inches (8t) into the cable
(distance from branch = ½ its diameter) and guide it
out again.
4. MAKE GROWTH RESERVE LOOP
Make a loop and insert the cable back in by about
10 cm/4 inches (mini, 2t, 4t) or about 15 cm/6 inches
(8t). Then pull out the end of the cable.
5. INSERT SHOCK ABSORBER
Grasp the cable at any point and insert the shock
absorber.
6. CREATE ABUTMENT
Repeat steps 1-4 on the abutment.
Growth reserve loop
Shock absorber
Expansion insert
and anti-abrasion
hose
End cap
For long cabling paths (more than 8 m/26 ft), we
recommend that you do not use a shock absorber.
Note
 Loading...