3. Panel Illustrations and Descriptions
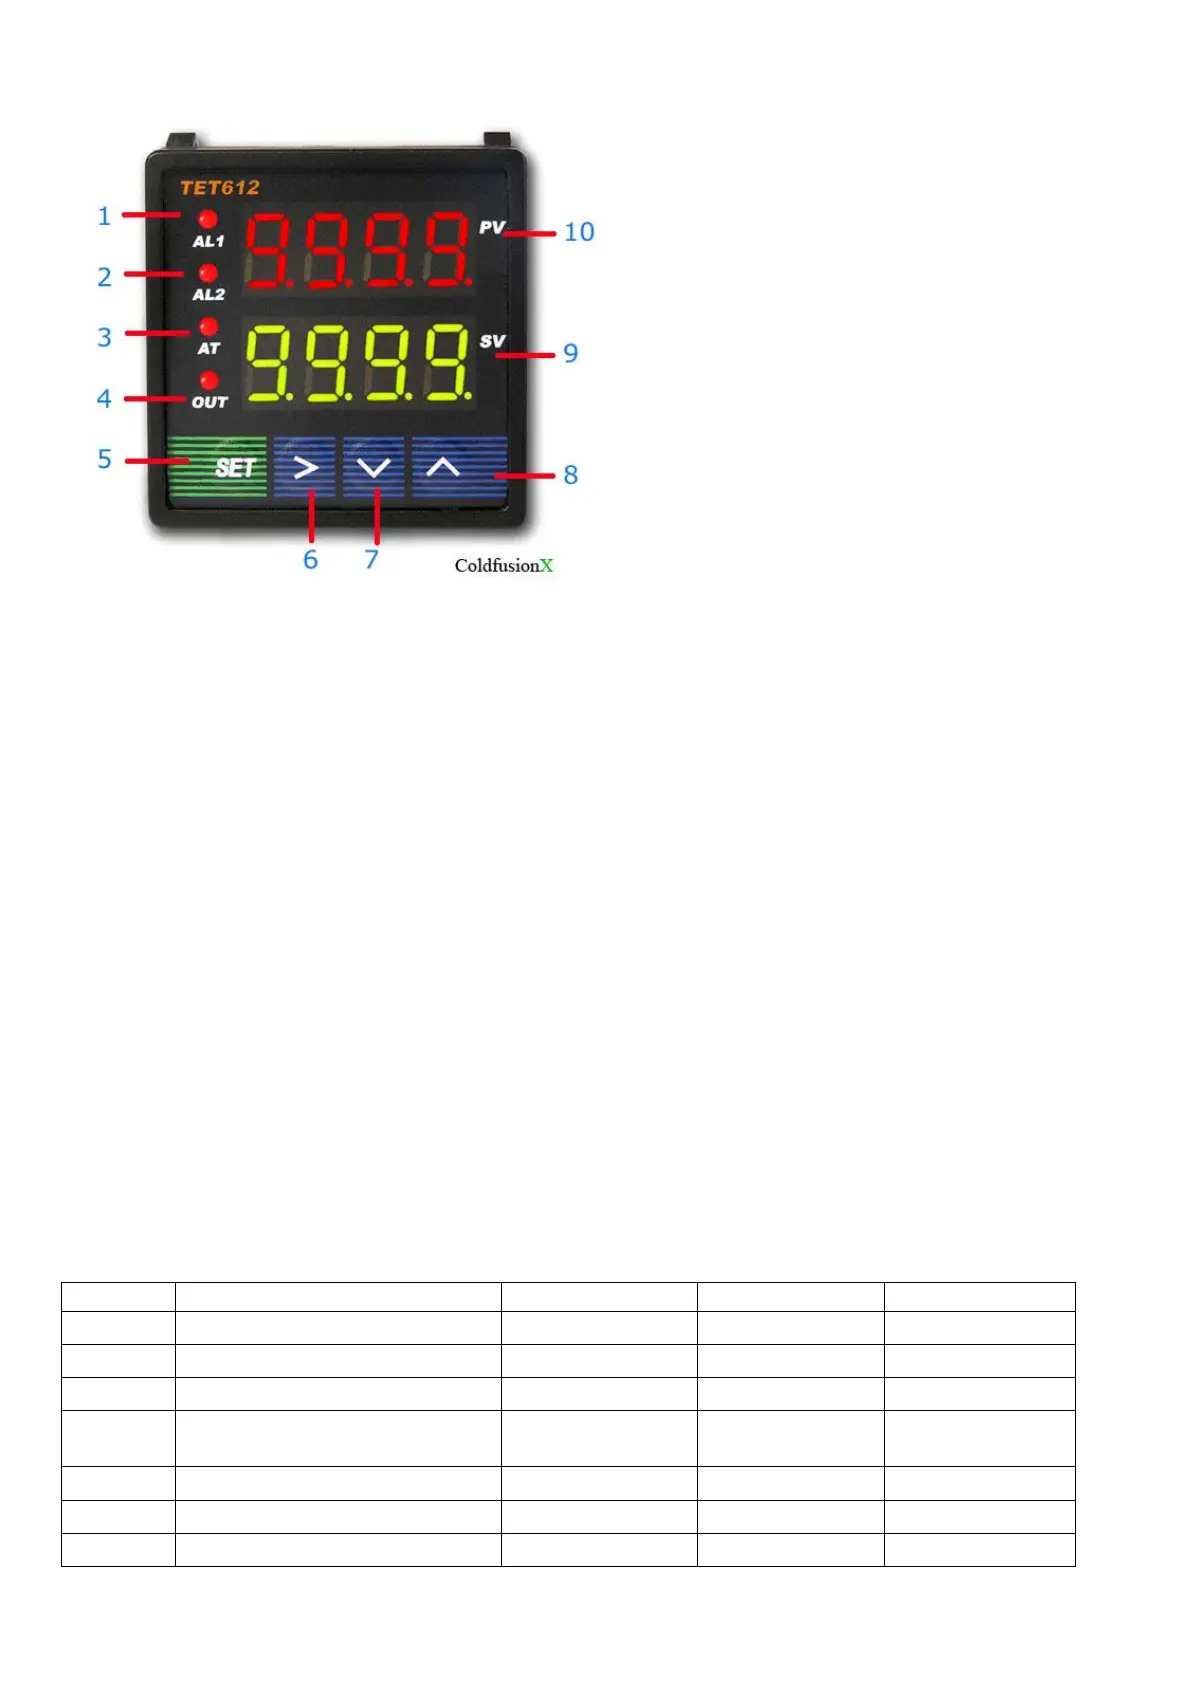
Figure 1
1 -- AL1, relay J1 indicator.
2 -- AL2, relay J2 indicator.
3 -- AT, blanking during auto tuning process.
4 -- Out, output indicator.
5 -- Setting / Confirm.
6 -- Digit select / Auto tuning.
7 -- Select next parameter / value increment.
8 -- Selection previous parameter / value decrement.
9 -- Target value.
10-- Current value.
4. Parameter Setting
i Press (SET) to enter setting mode, enter ”0089”, then press (SET) again.
ii Press (v) and/or (^) and then (SET) to select parameters.
iii Press (SET) to confirm entry or to select
iv Press (^) to until “End” appear in red display to exit parameter setting loop.
a) Initialization parameter setting loop.
Table 1. Initialization Parameters:
Symbol Description Range Default Comment
Inty
Temp. sensor See table 2 Pt10.0
Outy
Method of controlled output 0,1,2,3,4 2 Note 1
Hy
Step-Type Feedback 0-9999 0.3
PSb
Temp sensor error
correction coefficient
-1000~1000
deg C
0
Rd
Heating=0;Cooling=1 0,1 0
CorF
Celsius=0;Fahrenheit=1 0,1 0
End
Exit
 Loading...