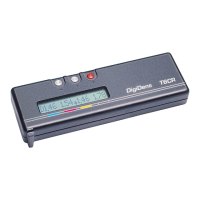
Operating manual DigiDens T6CR
The DigiDens T6CR is a robust and precise uni-
versal densitometer for transparent b/w-film and
colour control fields on reflection media. With
these capabilities it is perfect for the reproduction
field and printing houses. Due to its latest sensor
and microprocessor technology it is small and
handy in size, exceptional in precision and very
easy to use.
You will find more technical data at the end of
this manual.
The DigiDens T6CR possesses the following
important elements:
- 3 Pushbuttons M, C, P,
- 16-digit LCD-display,
- Lightsensor,
- Battery case for 3 mignon cells
In both modes (reflection and transmission) push-
button M, C and P, are used for 2 functions each.
The second function is initiated by pressing the
button for a longer period of time (>4 seconds).
Pressing the red pushbutton P (power) switches
between colour reflection (‘R’) and transmission
(‘T’). The second function of the red pushbutton
P
switches the device on or off.
The center button C (calibrate) calibrates the
device. Second function is the menue mode to
modify some parameters.
Pressing button M (measure) initiates the measu
-
reing process. Second function is the switch to
continuous mode (measuring continuously) in
transparent mode and to store a reference colour
in colour reflection mode..
The measured value and the parameter modifica-
tion is displayed on the 16-digit LCD-display.
The precise state of the art light sensor measu-
res densities up to over density 6 in the transmis-
sion mode. The strong and constant reflection
colour light sources allow measurements up to
more than density 2.5 in colour reflection mode.
The accuracy of the measurements is excellent.
The device switches off automatically, if no button
is pressed within 10 minutes. This feature helps
minimizing battery consumption. The power sour-
ce are 3 mignon cells (batteries or accumulators).
The operating procedure in transmission
mode is different from the operating procedu-
re in colour reflection mode. For that reason
the following description on this page descri-
bes the transmission mode only. You find the
description of the colour reflection mode on
the backside of this leaflet.
Transmission mode:
The functions in details:
Button P:
The DigiDens T6CR is switched on with this but-
ton. If you switch on the device, you first will see
the indication ‘Wait’ to hold the button. If you
release the button before the display switches to
‘DigiDens Cal’, the device switches off (to pre-
vent the device from being switched on accident-
ly). Right to the ‘Wait’ you find the version num-
ber of the software (e.g. V5.1).Now the device is
ready to use.
If the device is currently in the colour reflec-
tion mode state, press the button P until you
see ‘Cal T’ on the display, indicating that the
device is now in transmission mode (to mea-
sure transp
arent films)
(If you want to switch to colour reflection mode
and the device is currently in this transmission
mode state, press the button P shortly.
In this case see further information on the back of
this page)
The switch of
f is also done with this button.
Keeping the button pressed, (finally) leeds to
‘Down’. Now you can release the button and the
device is switched off.
Button C:
With this center button C the calibration is done.
The second function is the menue function to
modify some parmeters...
Calibration for the transmission mode ‘T’:
Mark a bright area of your light table with a circle
as a measuring area. Inside this circle you do
your calibration. Make sure, that ‘DigiDens’ is in
transmission mode ‘T’. Position the measuring
spot of ‘DigiDens’ onto clear film on the marked
measuring area. Press button C for less than 3
seconds to calibrate. Now the calibration is done.
Menue modes:
If you hold the button C for longer than 4
seconds, the menue mode is initiated. This mode
enables the user to modify some parameters.
The first step is
DotGain (Soft Dot):
You see ‘DotGain’ followed by ‘T’ or ‘R’ on the
display (depending in which mode you currently
are) and the percentage of Dotgain for the middle
tones (around 50%). Factory setting is 0.0%.
With button M you can increase this value in
steps of 0.5%. With button
P you can decrease
this value in steps of 0.5%.
Sens in transmission mode T (Version 3.0):
The Sens parameter varies the sensitivity. The
value is adjustable between 1 and 40. The fac-
tory setting is individual to the sensor (see bat-
tery cover inside). You also may use this feature
to adjust to different light tables. There is the rela-
tion: Increasing sensitivity results in falling accu-
racy. Increase this value only if you need to read
very high densities. The brighter your light sour-
ce, the wider the density range (the better).
Pressing button C again leads to the next para-
meter (step3) Slope adjustment:
The slope adjustment feature enables the user to
adjust the density of ‘DigiDens’ to another densi-
tometer. Despite the precision of ‘DigiDens’ ,
there might be a need to vary the density values
slightly for compatibility purposes. The slope
value can be varied between 1 and 200. The fac-
tory setting is 100, which means original slope.
With button M you can increase the slope, each
step increases the density about 0.33% (e.g.
density 3.00 is increased to 3.01 by one step).
With button P you can decrease the slope in the
same way.
Pressing button C again leads to the next para-
meter (step4) Display (only valid for transmis-
sion mode):
This parameter varies the display of the measu-
red values.
The values 1 to 7 represent
1. show density and percentage, density
first
2. show percentage and density, percentage
first
3. show percentage only
4. show density only
5. like 1, percentage for negative measurement
6. like 2, percentage for negative measurement
7. like 3, percentage for negative measurement
Factory setting is value 1. With button M you can
increment this value, button P decrements this
value.
Pressing the button C for a longer period of time
(>4 seconds) leaves the menue mode and saves
the current parameters (you see ‘Save’ on the
display). If you want to leave the menue mode
without saving the parameters, switch off the
device by pressing button P for a longer period of
time until you see ‘Down’ on the display.
Button M:
This button is the measuring button. In the mea-
suring mode (not menue mode, where button M
is the increment button) button M initiates the
measuring process. It might take 1 to maximum 8
seconds until the new values appear on the dis-
play. During this time a ‘w’ for wait overloads the
mode letter ‘T’ to indicate, that the measuring
process is in progress. Coming close to the sen-
sitivity limit of the DigiDens T6CR displays a > to
indicate, that the density may be higher than dis-
played.
The longer periods between 2 and 8 seconds
only will appear in very dark areas (e.g densities
over 4 ) and only in transmission mode. Pressing
the button M for a longer period of time will
switch to continuous mode (only in transmission
mode). In this mode the ‘DigiDens’ measures
continuously without the need to press button M
for every measurement. To leave the continuous
mode, press any button within this mode.
The 16 digits of the LCD-display allow a guided
and simple operation of ‘DigiDens T6CR’
The density is leaded by the letter ‘D’, the per-
centage is trailed by the symbol ‘%’.
The rightmost letter is the mode letter ‘T’ for
transmission.
The continuous mode is indicated by a ’c’ left to
the mode symbol. If the batteries go low, an indi-
cation ‘e’ for empty will be seen.
If you want the default parameters (factory set-
tings) reactivated, then with button P you have to
press button M and C simultanuously when swit-
ching on the device until ‘DigiDens Cal’ shows
an additional ‘r’ for reset. This lasts about 15
seconds.
Technical data:
- density max transmission > 6 D
identical to > 120 dB
- deviation density trans. (D<5) +- 0,02 D
- deviation percentage trans. +- 0,5 %
- density reflection > 2.5 D
- dev. colour density reflection +- 0,02 D
- dev. colour percentage refl. +- 1 %
- about 200 000 measurements transmission
50 000 measurements reflection
with 1 set of batteries (or accus)
- Input voltage 2.8 - 5.0 volts
- 3 x 1,5 Volt Mignon batteries
or
- 3 x 1,2 Volt Mignon accus
- measuring spot diameter 2,5 mm
To change batteries, open the battery case by
unscrewing the battery cover. Please place the
batteries carefully in the right direction (as shown
by the battery symbols) into the battery case.
To let the device always supply reliable values,
keep the area around the measuring spot clean.
T
o avoid unwanted infrared influence (in density
ranges higher than 5 is some despite the IR-
blocking filter), follow this advice:
Don’t expose your DigiDens T6CR to heat and in
particular: don’t leave the DigiDens T6CR and
the films you want to measure on the light
t
able while not using.
Measuring on a light table means relying on
the light source of this table. Check from time
to time if the light source is still stable.
The power source (batteries or accumulators)
should be checked from time to time.
Beside cleaning frequently, no further maintenan-
ce is necessary. The internal colour light sources
are maintenance free.
This product is subject to change without notice
ColorPartner GmbH
Holzkoppelweg 5
24118 Kiel
Germany
M C P