The LDHD2AZW needs to be paired before installation.
1. While next to the home controller or security system,
slide the top cover open to expose the battery pull tab, pull
the plastic tab to activate the sensor, slide the top cover to
the closed position (Figure 1).
2. The LED indicator will be lit green for two seconds
while the device is booting.
3. Once booted the LED will blink green three (3) times
every five (5) seconds while scanning for a network.
4. If a network is not found after approximately ten (10)
minutes, the sensor will go into sleep mode. To restart the pairing process, tamper the sensor by
sliding the battery cover open and then closed or create a zone event by placing the magnet near the
sensor and then move it more than 3" away from the sensor.
5. Once the device has been discovered by the controller the sensor will need to be faulted or restored
using the magnet in order to complete the enrollment.
6. After the sensor is successfully paired to the home controller or security system it is ready for
installation. Follow the steps in the installation section.
NOTE: The LDHD2AZW is for indoor use only – it MUST be installed indoors.
NOTE: This LDHD2AZW shall only be installed on painted wood and steel surfaces for UL
applications.
1. Once paired the LED will blink either a red, green, or amber color providing a visual indicator of the
communication performance with the home controller or security system. Move the sensor to the
intended location of installation. If the LED is slowly blinking green you have good communication
with the home controller or security system and can proceed with the remainder of the installation
process. Double-blinking amber indicates the sensor can communicate, however, look at improving
the communication by alternating the location of the sensor on the door or window. Fast blinking red
indicates the sensor cannot be installed at this location.
Note: The LED will illuminate for three (3) minutes after the initial pairing process. If additional
time is needed to position the sensor, slide the top cover open and then closed and the LED will
illuminate for an additional thirty (30) seconds.
2. Please make sure that the sensor and magnet is located less than 0.25" from each other. For optimal
performance, it is highly recommended to install the LDHD2AZW on the fixed frame and the
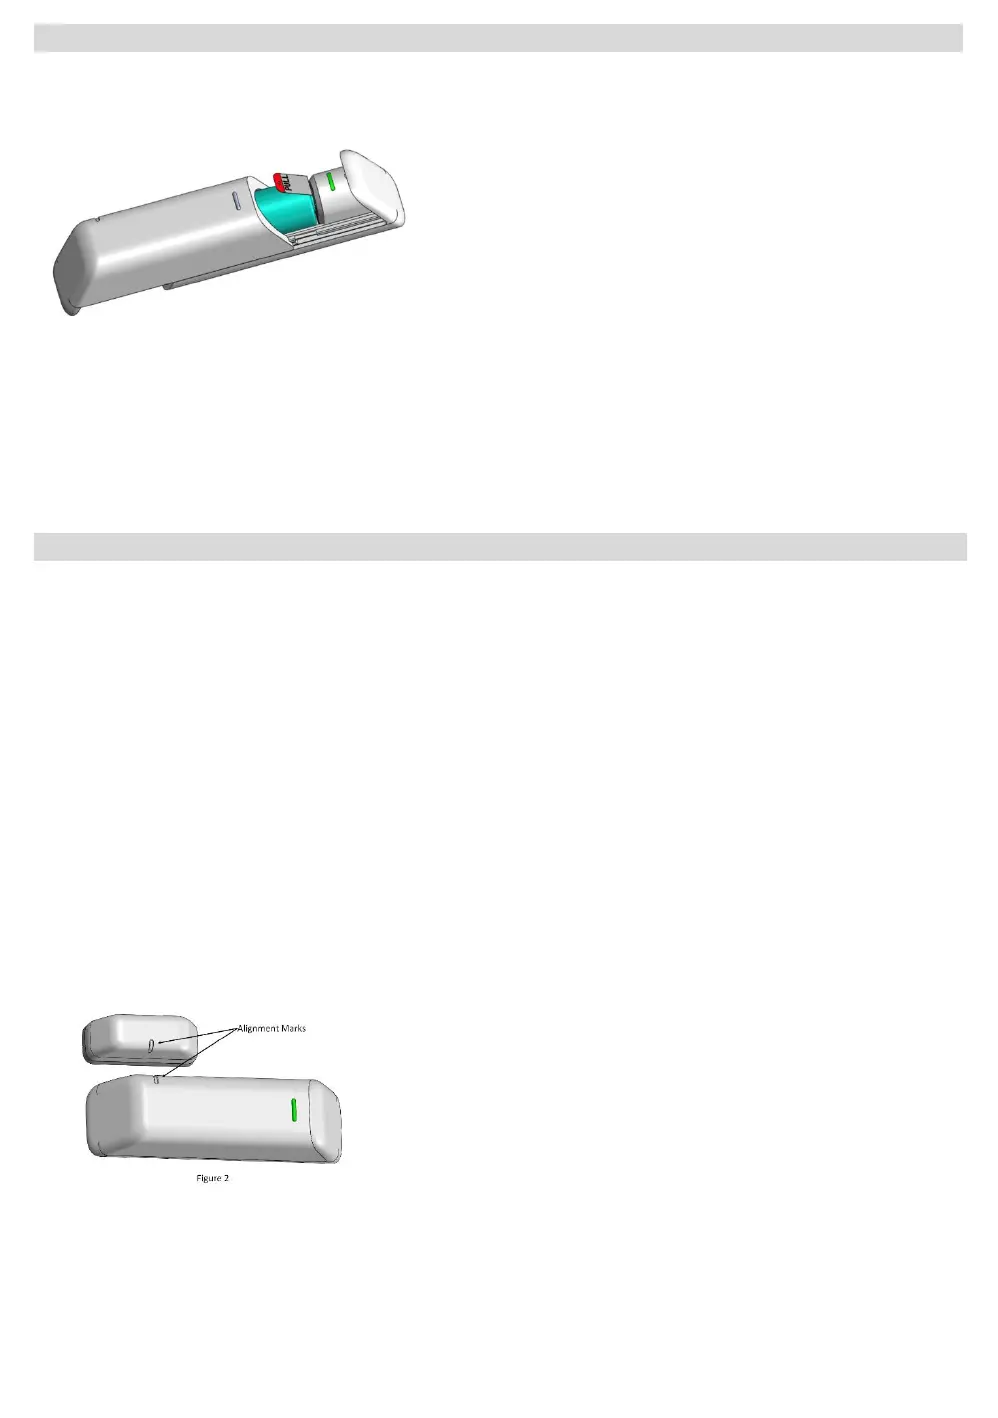
magnet on the moving part of the door/window. Place
the sensor near the top of the door/window close to the
opening edge of the door/window. When mounting the
sensor and magnet ensure the marks on the sensor and
magnet are aligned (Figure 2). The LED on the sensor
should be positioned at the top when possible. Ensure
you have space to slide open the battery door when
positioning the sensor.
3. Peel the paper off one side of the double-sided tape provided, attach to the back of the sensor and
press firmly for a few seconds. Then peel the paper off the back of the sensor and position the sensor
to the door/window fixed frame. Be sure to position the sensor in the location you have verified to
provide good communication with the home controller or security system. Press firmly with 15 psi
for a few seconds.
 Loading...