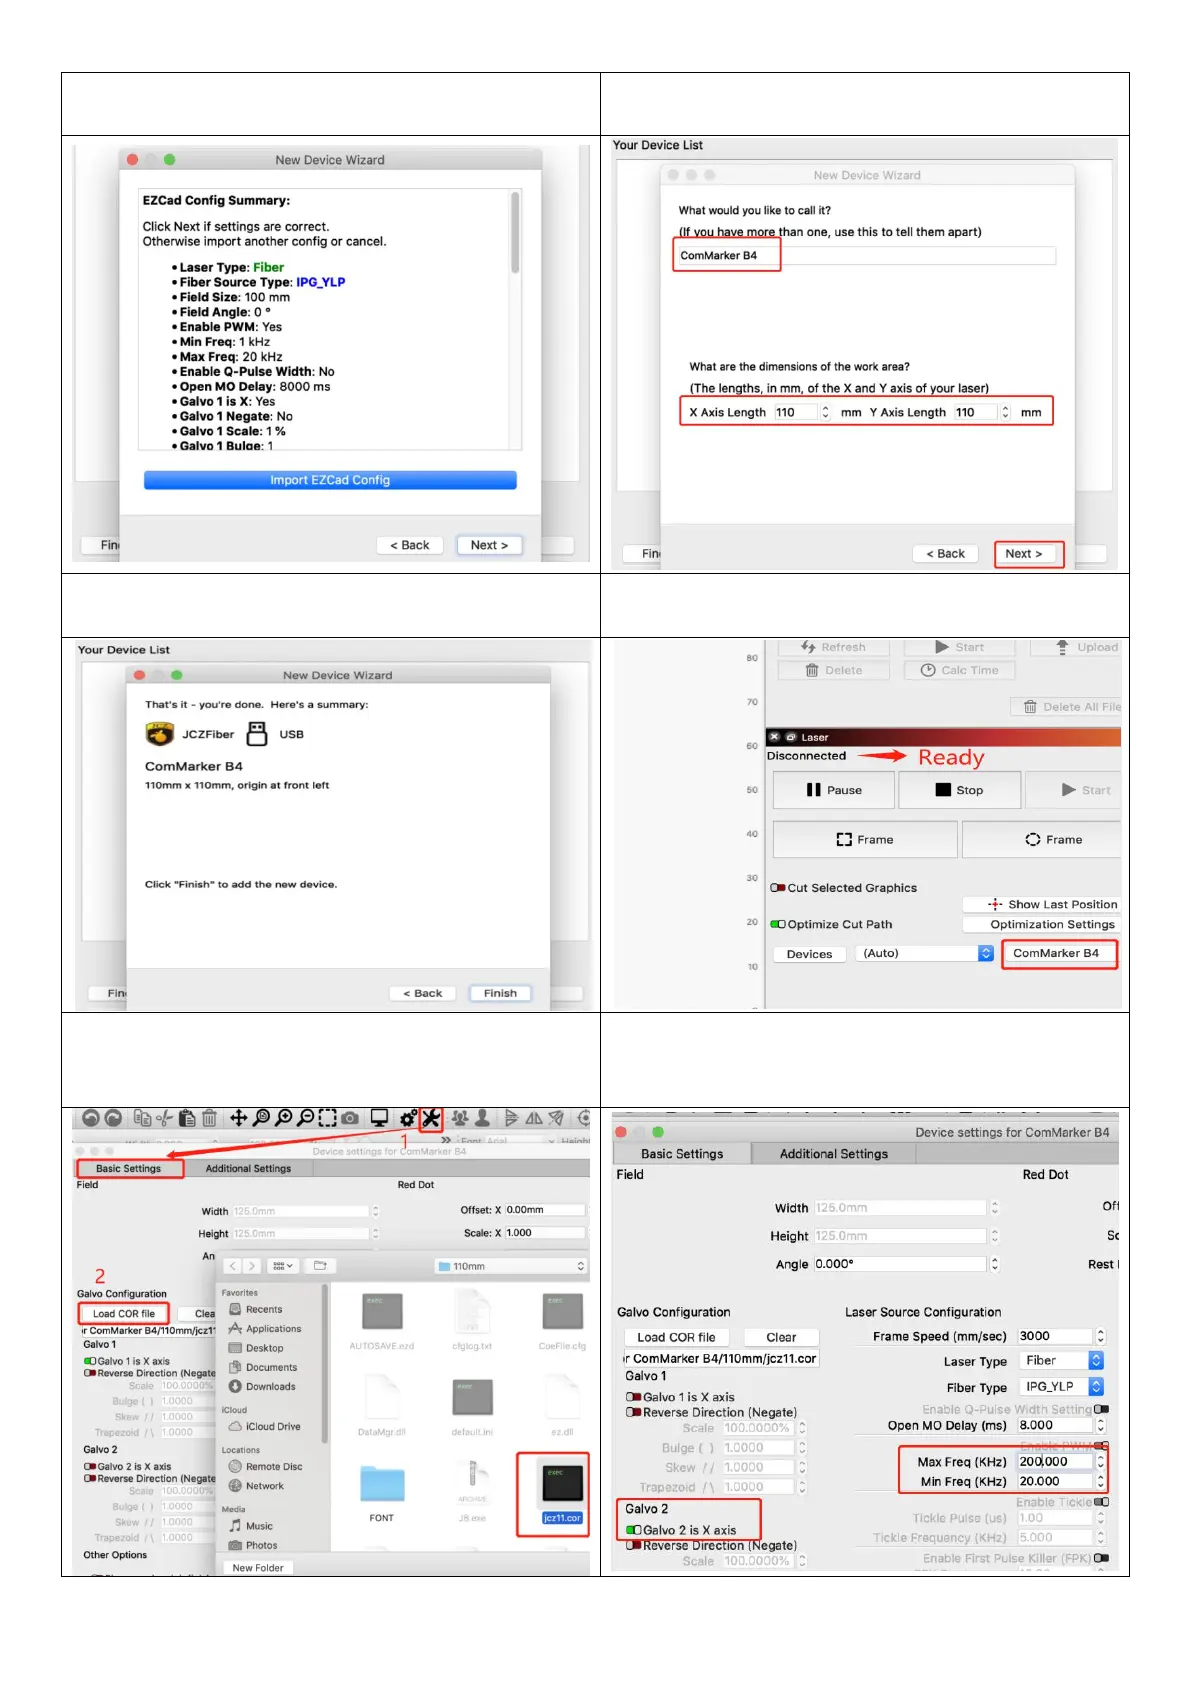
7.You can see the following window if everything goes right,
and click “next”
8. Change the name if necessary, and input the right X and
Y Axis Length according to the lens. Click “next”
9.Click “finish” and it will in the device list
10. The status will change into “Ready” when the machine
is on and connected via USB
11. Go to “Basic Settings” from “Device setting” button, click
“Load COR file”, Select “EZCAD for ComMarker
B4”--->“110mm”, Choose file “JCZ11.cor”, Click “OK”
12. Change the setting of Freq “Min 20” and “Max 200”.
Switch on “Galvo 2”. And it is ready to control the machine
with Lightburn software.
 Loading...