id8 data sheet – V1.0/1023 commend.com P 12 / 12Subject to change without notice.
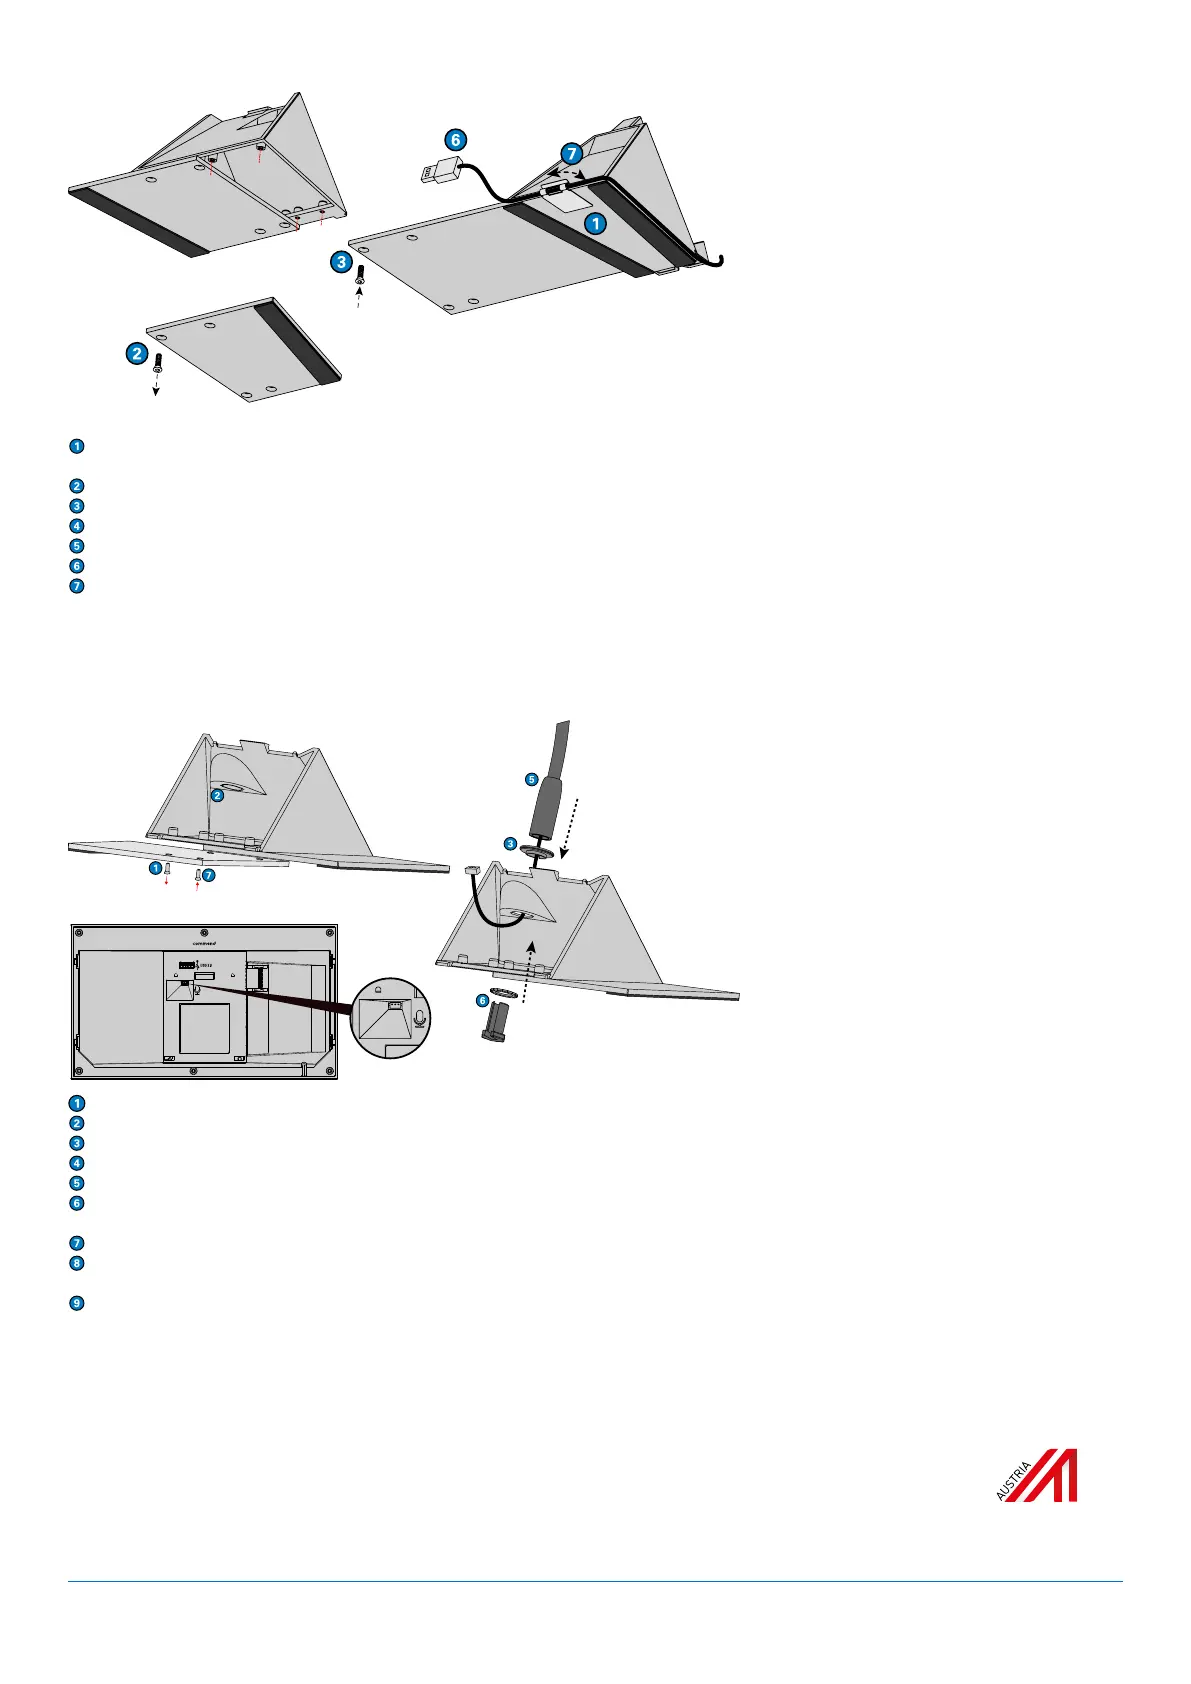
DESK MOUNTING WITH ID8 DKHS
Remove the protection film from the adhesive strip and stick the cable clip on the desk kit in a way that the cut-out
border forms a line with the housing (see illustration above).
Remove one of the bottom plates from the desk kit ID8 DK by unscrewing the 4 torx screws (see illustration above).
Install the desk kit ID8 DKHS to the desk kit ID8 DK using the same screws.
Put the device onto the desk kit, lower end first.
Press the device onto the desk kit so that it snaps in place.
Connect the cable of handset HS-USB1 to the device.
Bend open the cable clip, guide through the USB cable of the handset and bend back the cable clip so that the USB
cable is fixed.
DESK MOUNTING WITH ID8 GM
For easier access, remove one of the bottom plates of the ID8 DK by unscrewing the 4 torx screws (see illustration above).
Remove the break-away on the desk kit ID8 DK by pushing and twisting.
Place the cover disk on the outside of the opening.
Guide the cable of the gooseneck microphone through the opening from above.
Guide the cable of the gooseneck microphone through the toothed washer and hollow adjustment screw.
Push the adjustment screw from below through the opening on the desk kit and through the cover disk. Screw the adjustment screw into the thread
on the bottom of the gooseneck microphone. Hold the gooseneck microphone firmly and fasten the adjustment screw using a 13mm (0.51 in) wrench.
Mount the bottom plate using the 4 torx screws.
Connect the cable of the gooseneck microphone to the rear of the device. If necessary, use a tool (i.e. a screwdriver) to gently push the plug in. Make
sure the pinholes match the position of the pins.
Put the device onto the desk kit, lower end first. Press the device onto the desk kit so that it snaps in place.
NOTE:
To prevent overextension and avoid premature wear, the gooseneck must not be bent more than 90°.
Commend products are developed and manufactured by Commend International in Salzburg, Austria. Our development and
manufacturing processes are certified in accordance with EN ISO 9001:2015. Since mid-2020 Commend International GmbH
has been EN ISO 27001:2013 certified throughout.
For reasons of technical further development, the design and/or specifications of products are subject to change without prior
notice. All errors excepted.
OBS
ESSIVE
ABOUT
QUAL
ITY
 Loading...