Chapter
1:
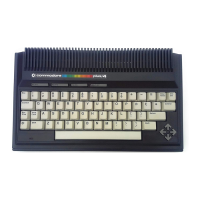
Introducing the
VIC
20
Computer
35
5.
Turn
on
the
1515
Graphic Printer. The red power light
on
the
top
of
the printer should glow
and
the print head should travel
to
the center
of
the carriage
and
return
to
the left.
6. Move the switch
on
the back
of
the printer marked T -5-4 to the
"T"
position (Figure 1-15). The printer should begin printing the entire
VIC
20
character set.
The printer should continue printing this until you either
turn
the
power
OFF
or
switch the T-5-4 switch
to
"4"
or
"5."
7.
Move the T-5-4 switch
to
the
"4"
position. The printer should stop
printing the test printout.
If
the printer does not operate as described above, recheck all your
connections and repeat the procedure described above.
If
you are still
unsuccessful, consult your Commodore dealer.
Installing
the
Ribbon
Perform the following steps
to
install the printer ribbon:
1.
Lift off the clear plastic sound cover (Figure 1-16).
2.
Remove the brown front cover by pressing
up
and
in
on
the two
thumb rests molded into the cover.
3.
The small
tab
on
each ribbon cassette should face forward. Making
sure
that
the ribbon
is
not
twisted (as shown in Figure 1-17), rock
each rib
bon
cassette
to
the outside
of
the machine
and
press it down
into position.
4.
Rotate the ribbon cam
out
ofthe
way
and
feed the ribbon between
the cam
and
its backing plate (Figure 1-18).
5.
Replace the front cover
and
the clear sound cover.
To remove a ribbon, simply reverse the above procedure.
Paper
InserHon
The
1515
Graphic Printer uses a continuous form
that
can be from 4.5
to 8 inches wide.
It
is
sprocketed
on
both sides and can have as many as three
parts (one original
and
two copies) as long as the total thickness does
not
exceed 0.2 mm.