4
ASSEMBLY
Choosealevel,clearedassemblyareaandget
afriendtohelpyouputyoursmokertogether.
Laycardboarddowntoprotectsmokernish
andassemblyarea.
CAUTION:Somepartsmaycontainsharp
edges.Wearprotectiveglovesifnecessary.
NOTE:Withthehelpofafriend,turnthesmoker
cabinetupsidedown.
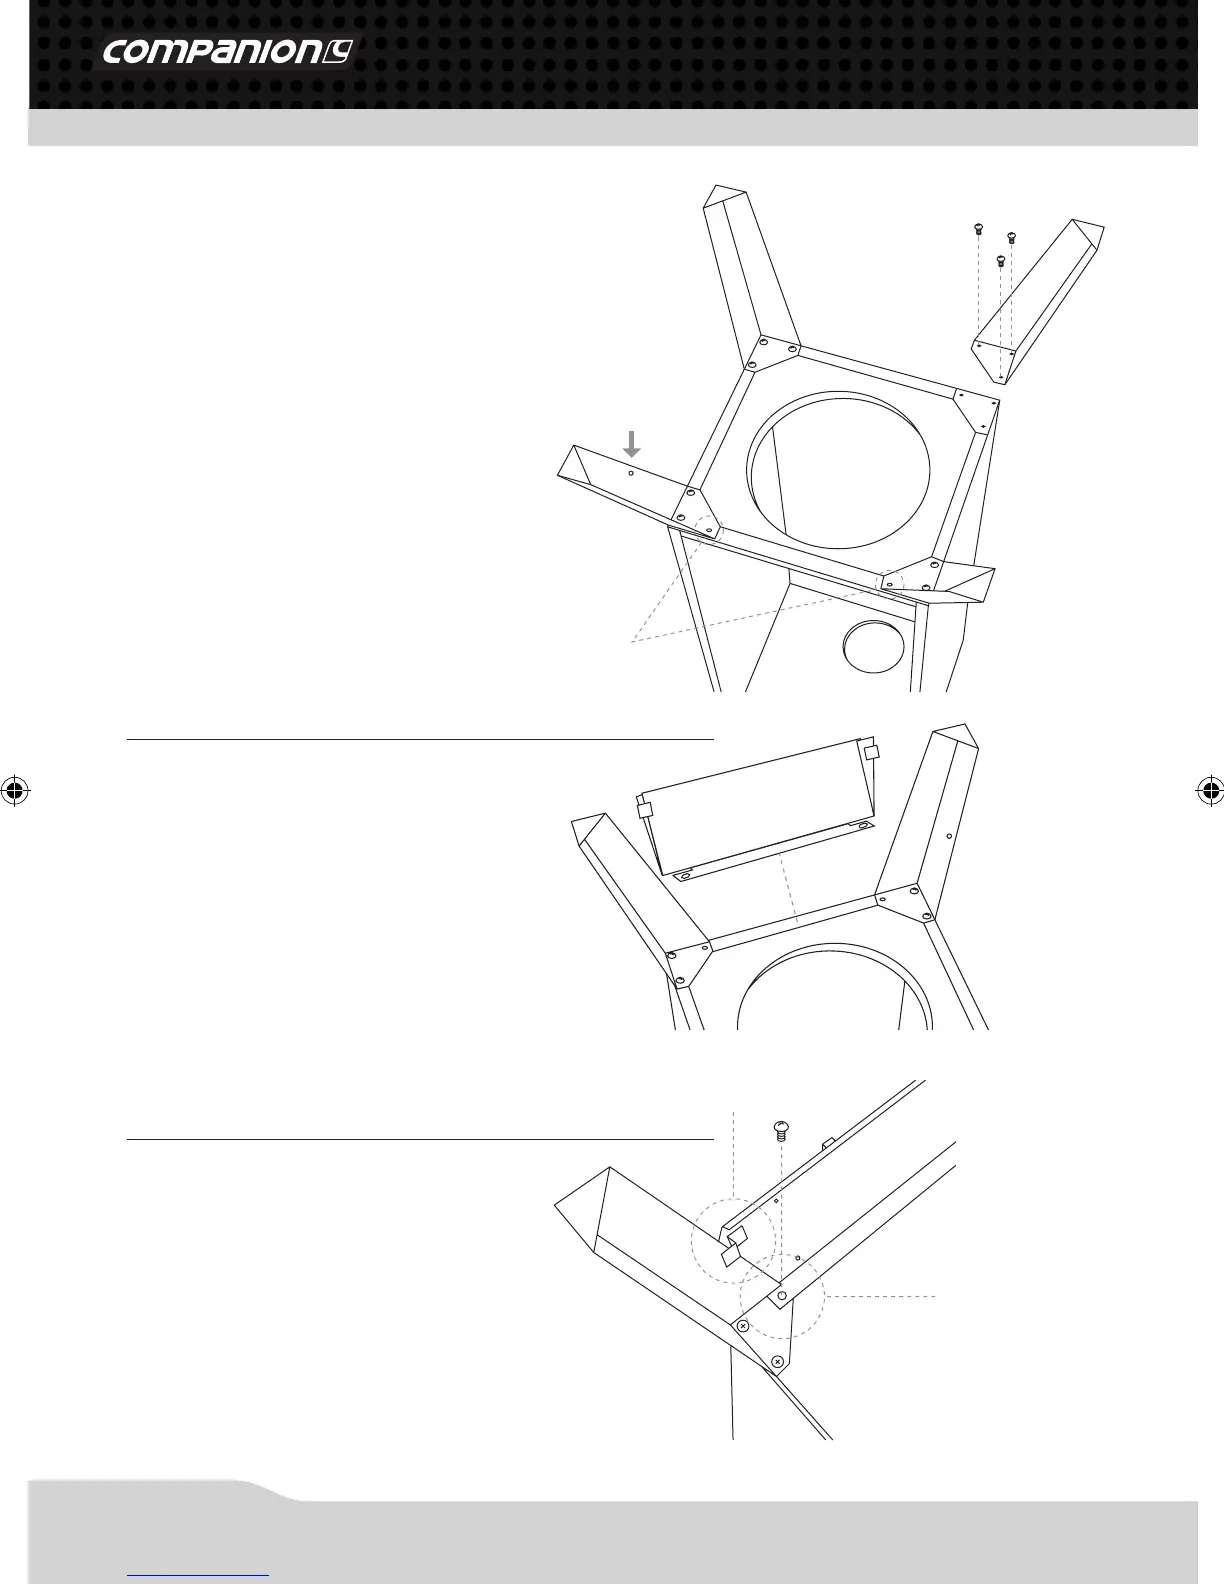
Step 1
Lineupholesoflegandcabinet,andattach
withM6x16mmbolts;nutsarepre-weldedto
cabinet.Securelytightenbolts.Attachtheleg
withholeinthemiddleofthelegintheposition
indicatedbythearrowinthegure(rightfront
corner).DONOTyetinsertboltsinlocations
indicatedbycirclesingure.
Step 2
PlacetheControlPanelAssemblybetweenthe
frontlegsasshown.Thereareslotsoneach
sideofthecontrolpanelthattaroundthe
edgesofthelegs.
Step 3
Thetwomountingtabsttotheinsideofthe
legsandlineupwiththeboltholes.Besure
boththesupporttabsonthebacksideofthe
controlpanelarecapturedbehindthelegsas
showntotheright.Insertthetworemaining
M6x16mmboltsthroughthemountingtabs
andtightenthemsecurely.
Bolt Holes
Leg with Hole
Support Tab
Mounting Tab
COM3932_COMP490_smoker_cabinet_pack_manual_ED3.indd 4 13/04/12 2:57 PM