Do you have a question about the Compaq PRESARIO CQ61 and is the answer not in the manual?
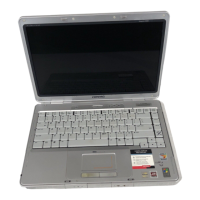
Identifies components located on the top of the laptop.
Details components associated with the laptop's display.
Describes the TouchPad, its buttons, and scroll zone functionality.
Explains the various indicator lights on the computer and their meanings.
Details the function of special keys like Fn, Esc, Windows logo, and function keys.
Identifies the power button, wireless button, and speakers.
Identifies ports and vents located on the front of the computer.
Identifies vents located on the rear of the computer.
Identifies ports and connectors on the right side of the laptop.
Identifies ports and connectors on the left side of the laptop.
Identifies the battery bay, vents, and internal component compartments.
Describes the location and function of the computer's wireless antennas.
Explains the importance of the service tag for ordering parts and support.
Provides an exploded view and part numbers for major computer assemblies.
Lists and illustrates individual parts of the display assembly.
Details various plastic components and their associated part numbers.
Lists specifications and part numbers for hard drives and optical drives.
Lists various small parts like adapters, cables, and kits with part numbers.
Provides a cross-reference of part numbers to their descriptions.
Outlines essential tools, considerations, and guidelines before servicing.
Provides precautions for handling fragile drive components to prevent damage.
Explains electrostatic discharge (ESD) prevention and grounding procedures.
Provides guidelines for safely packaging and transporting computer equipment.
Outlines best practices for setting up and maintaining a static-free workstation.
Details recommended grounding equipment for preventing electrostatic damage.
Provides step-by-step instructions for removing and replacing computer components.
Explains how to use the service tag for part identification and support.
Details the procedure for removing and replacing the laptop's rubber feet.
Provides instructions for safely removing and installing the computer's battery.
Details the procedure for removing and replacing the wireless LAN module.
Provides instructions for removing and replacing the computer's hard drive.
Details the procedure for removing and replacing the modem.
Provides instructions for removing and replacing the real-time clock battery.
Details the procedure for removing and installing memory modules.
Provides instructions for removing and replacing the optical drive.
Details the procedure for removing and replacing the computer keyboard.
Provides instructions for removing and replacing the keyboard cover.
Details the procedure for removing and replacing the power button board.
Provides instructions for removing and replacing the entire display assembly.
Details the procedure for removing and replacing the top cover of the laptop.
Provides instructions for removing and replacing the speaker assembly.
Details the procedure for removing and replacing the Bluetooth module.
Provides instructions for removing and replacing the audio board.
Details the procedure for removing and replacing the USB board.
Provides instructions for removing and replacing the power connector.
Details the procedure for removing and replacing the system board.
Provides instructions for removing and replacing the fan and heat sink assembly.
Details the procedure for removing and replacing the computer's processor.
Provides instructions for removing and replacing the RJ-11 connector.
Explains how to access the computer's BIOS setup utility.
Covers navigation, selection, and basic operations within the Setup Utility.
Instructions for changing the language displayed in the Setup Utility.
Describes keyboard controls for navigating and making selections.
How to view system time, date, and hardware identification.
Steps to reset BIOS settings to factory defaults.
How to exit the Setup Utility with or without saving changes.
Overview of the different menus available in the Setup Utility.
Describes options for viewing system and computer information.
Covers password settings for administrator and power-on access.
Details options for configuring system hardware and boot settings.
Explains how to run system diagnostics tests.
Lists general physical and electrical specifications for the computer.
Details specifications for the LED BrightView display panel.
Details specifications for the CCFL BrightView display panel.
Lists specifications for various hard drive sizes and types.
Details specifications for the optical drive.
Details specifications for the Blu-ray optical drive.
Lists direct memory access controller assignments.
Outlines memory addresses and their system functions.
Lists interrupt request (IRQ) assignments and their system functions.
Lists input/output address ranges and their system functions.
Details specifications and usage for PM2.0×3.0 Phillips screws.
Details specifications and usage for PM2.5×3.0 Phillips screws.
Details specifications and usage for PM2.5×5.0 Phillips screws.
Details specifications and usage for PM2.5×5.0 captive screws.
Details specifications and usage for PM2.5×5.5 captive screws.
Details specifications and usage for PM2.5×6.5 Phillips screws.
Details specifications and usage for PM2.5×11.0 captive screws.
Details specifications and usage for PM2.5×15.0 captive screws.
Details specifications and usage for PM3.0×3.5 Phillips screws.
Introduces system backup and recovery concepts and HP recommendations.
Provides instructions for creating recovery discs for system restoration.
Explains methods and best practices for backing up system data and files.
Guides the user through using Windows built-in backup features.
Explains how to create and use system restore points to revert changes.
Outlines procedures for recovering the system using Recovery Manager.
Steps for restoring the system using created recovery discs.
Instructions for system recovery using the recovery partition.
Details the pinout for the audio-in (microphone) jack.
Details the pinout for the audio-out (headphone) jack.
Explains the pin assignments for the external monitor (VGA) port.
Details the pin assignments for the HDMI port.
Explains the pin assignments for the RJ-11 modem connector.
Details the pin assignments for the RJ-45 network connector.
Explains the pin assignments for the USB ports.
Lists general requirements applicable to all power cord sets.
Details country-specific requirements for power cord certifications and types.
Provides guidance on proper disposal of end-of-life batteries.
Explains disassembly and handling precautions for the display assembly for recycling.
| Processor | Intel Pentium Dual-Core T4200 |
|---|---|
| Processor Speed | 2.0 GHz |
| RAM | Up to 4GB DDR2 |
| Storage | 250 GB HDD |
| Display | 15.6-inch, 1366 x 768 pixels |
| Graphics | Intel GMA 4500M |
| Operating System | Windows Vista Home Premium |
| Optical Drive | DVD±RW |
| Wireless | 802.11b/g |
| Ports | 3 x USB 2.0, HDMI, VGA, Ethernet |
| Battery | 6-cell lithium-ion |
| Weight | 2.68 kg |