Do you have a question about the CONCORD Aracruz 52AC and is the answer not in the manual?
Essential electrical safety measures, including power shutoff and code compliance.
Guidelines for selecting a suitable installation location and ensuring proper outlet box support.
Warnings about moisture exposure, warranty voiding, and general user caution.
Loosening canopy mounting screws to facilitate easier ceiling canopy attachment.
Attaching the mounting bracket securely to the junction box, ensuring stability.
Positioning electrical wires and adapting for extended support rods during bracket installation.
Installing the motor housing onto the motor by aligning keyways and inserting screws.
Loosening coupler set screws and removing the safety screw for rod insertion.
Placing the coupler cover, rubber canopy ring, and ceiling canopy onto the assembly.
Feeding wires through the support rod and threading it into the coupler.
Inserting bulbs into the fan sockets after removing the dust cover.
Properly seating the fan's half ball into the mounting bracket's keyway.
Trimming the electrical lead wires to an appropriate length.
Connecting the fan's green ground wire to the junction box ground wire.
Connecting fan motor and light wires (black, blue, white, orange) to junction box wires.
Ensuring secure wire connections with wire nuts and organizing wires in the box.
Sliding the ceiling canopy and rubber cover into place over the mounting bracket.
Fastening fan blades to blade arms using screws and pads, avoiding overtightening.
Ensuring the blade arm is held with its decorative side facing downwards during assembly.
Removing rubber blocks from the motor face that stabilize it during shipment.
Attaching fan blades to the motor face to ensure balance and prevent wobble.
Mounting the switch housing plate onto the fan, aligning keyway holes.
Connecting color-coded wire connectors between the switch housing and motor.
Aligning the switch housing with mounting plate screws and tightening them.
Confirming all safety pins, set screws, connections, clearance, and rotation are correct.
Attaching decorative pull chain tassels to the switch housing.
Diagrams showing wiring for fan control with wall switches and optional light fixtures.
Critical note to use only wall switches designed specifically for ceiling fans.
Instructions on how to control fan speed using a wall switch.
Operating the fan speed using the pull chain on the switch housing.
Using the slide switch for forward (down) or reverse (up) airflow.
Instructions for cleaning the fan housing and blades.
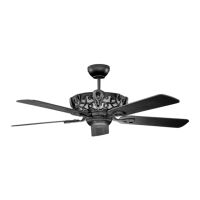
| Model | Aracruz 52AC |
|---|---|
| Blade Size | 52 inches |
| Number of Blades | 3 |
| Mounting Type | Ceiling |
| Category | Fan |