0504
Product Assembly cont.
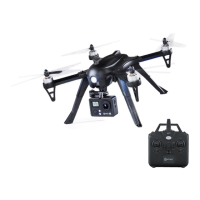
Protection Guard Installation
After releasing the two
screws from the bottom of
the motors, install the
protection guard on the
corresponding position and
fix the screws in clockwise
rotation.
Insert the high landing gear
plug into the socket located
at the bottom of the aircraft,
align the 2 screw positions
and fix the high landing gear
in place by rotating
clockwise.
High Landing Gear Installation
The battery housing is located on the bottom of the drone. Push the
battery in and then plug the power cable into the drone to power on
the drone. See pictures below.
Drone Battery Installation
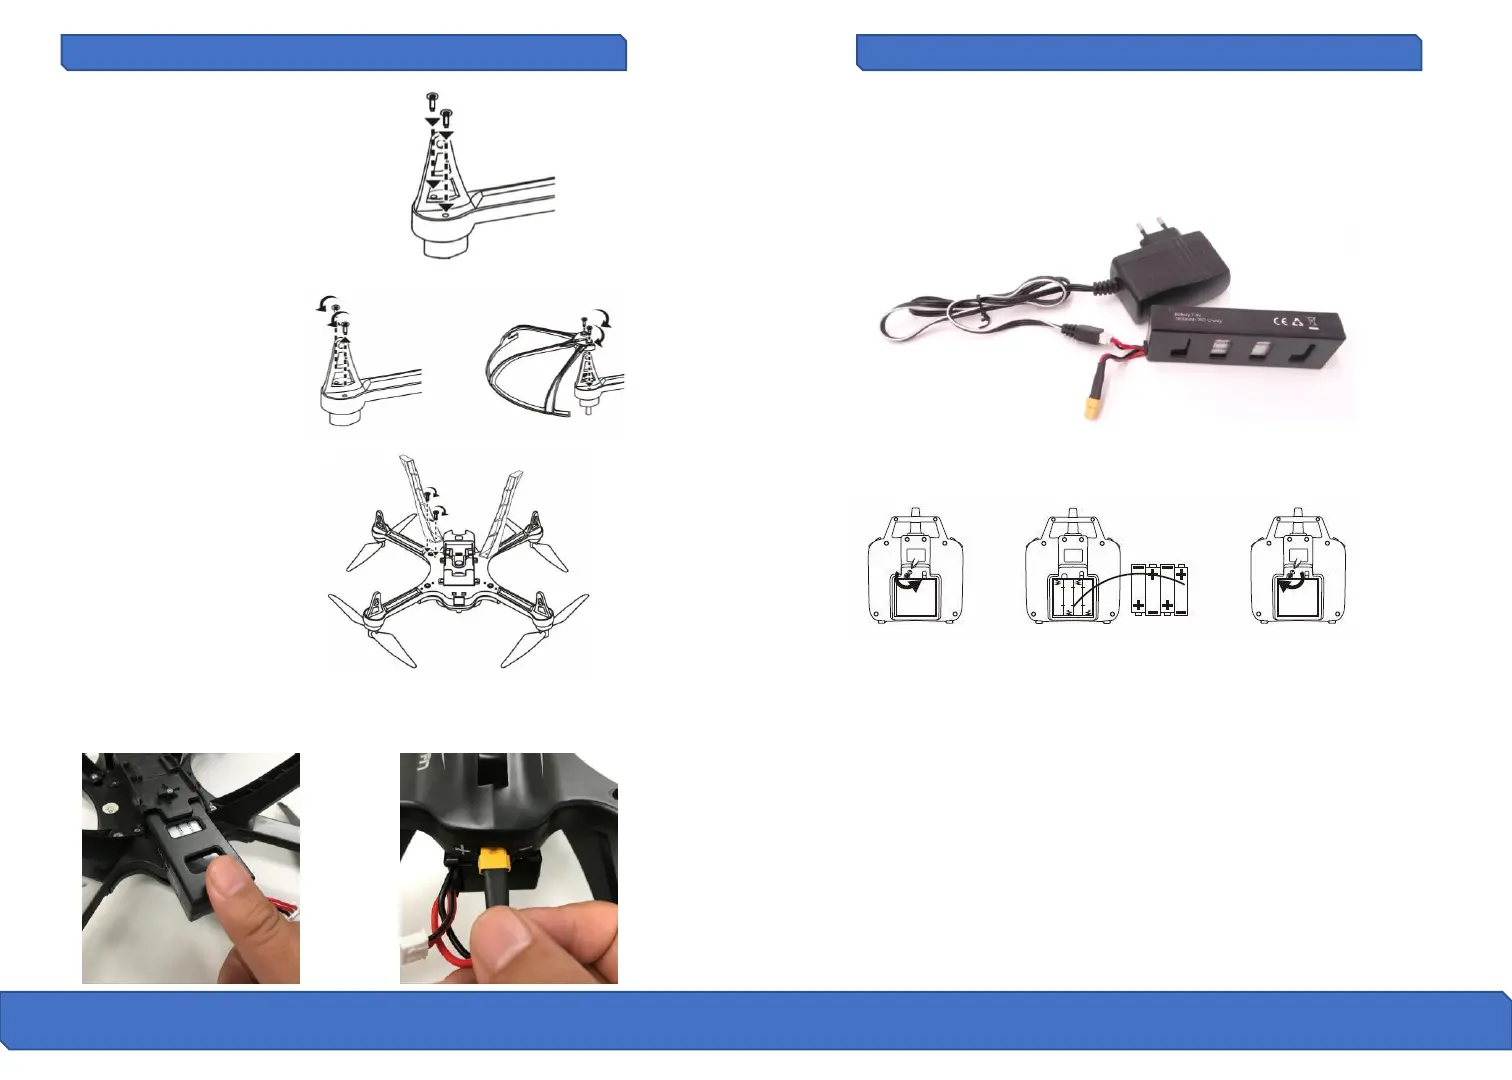
Remote Battery Installation
Unscrew counterclockwise to open the battery compartment cover and
install 4x AA batteries into the battery compartment according to the
given polarity. Screw clockwise to close the battery compartment
• Insert batteries with the correct polarity
• Non-rechargeable batteries are not to be used, the remote needs 4 x
AA batteries to work.
• Do not mix old and new batteries
• Do not mix alkaline, standard (carbon zinc), or rechargeable (nickel-
cadmium) batteries
• Exhausted batteries are to be removed from the device
• The supply terminals are not to be short-circuited.
The battery can be charged by plugging in the white tipped cable into
the supplied charger. The charger light will remain red while charging
and turn green when the battery is fully charged. Charge time is 3.5 hrs.
Drone Battery Charging
Product Assembly cont.
Short Landing Gear Installation
Locate the short landing gear
and supplied screws located
in your hardware kit bag.
Place the landing gear in
place and screw clockwise to
install.