AssemblyInstructions
Unpacktheheaterandmakesureitis
undamagedandallcomponentsare
present.
Your heater be assembled for either
the Portable or Wall Mounting option
before use, and not be free standing.
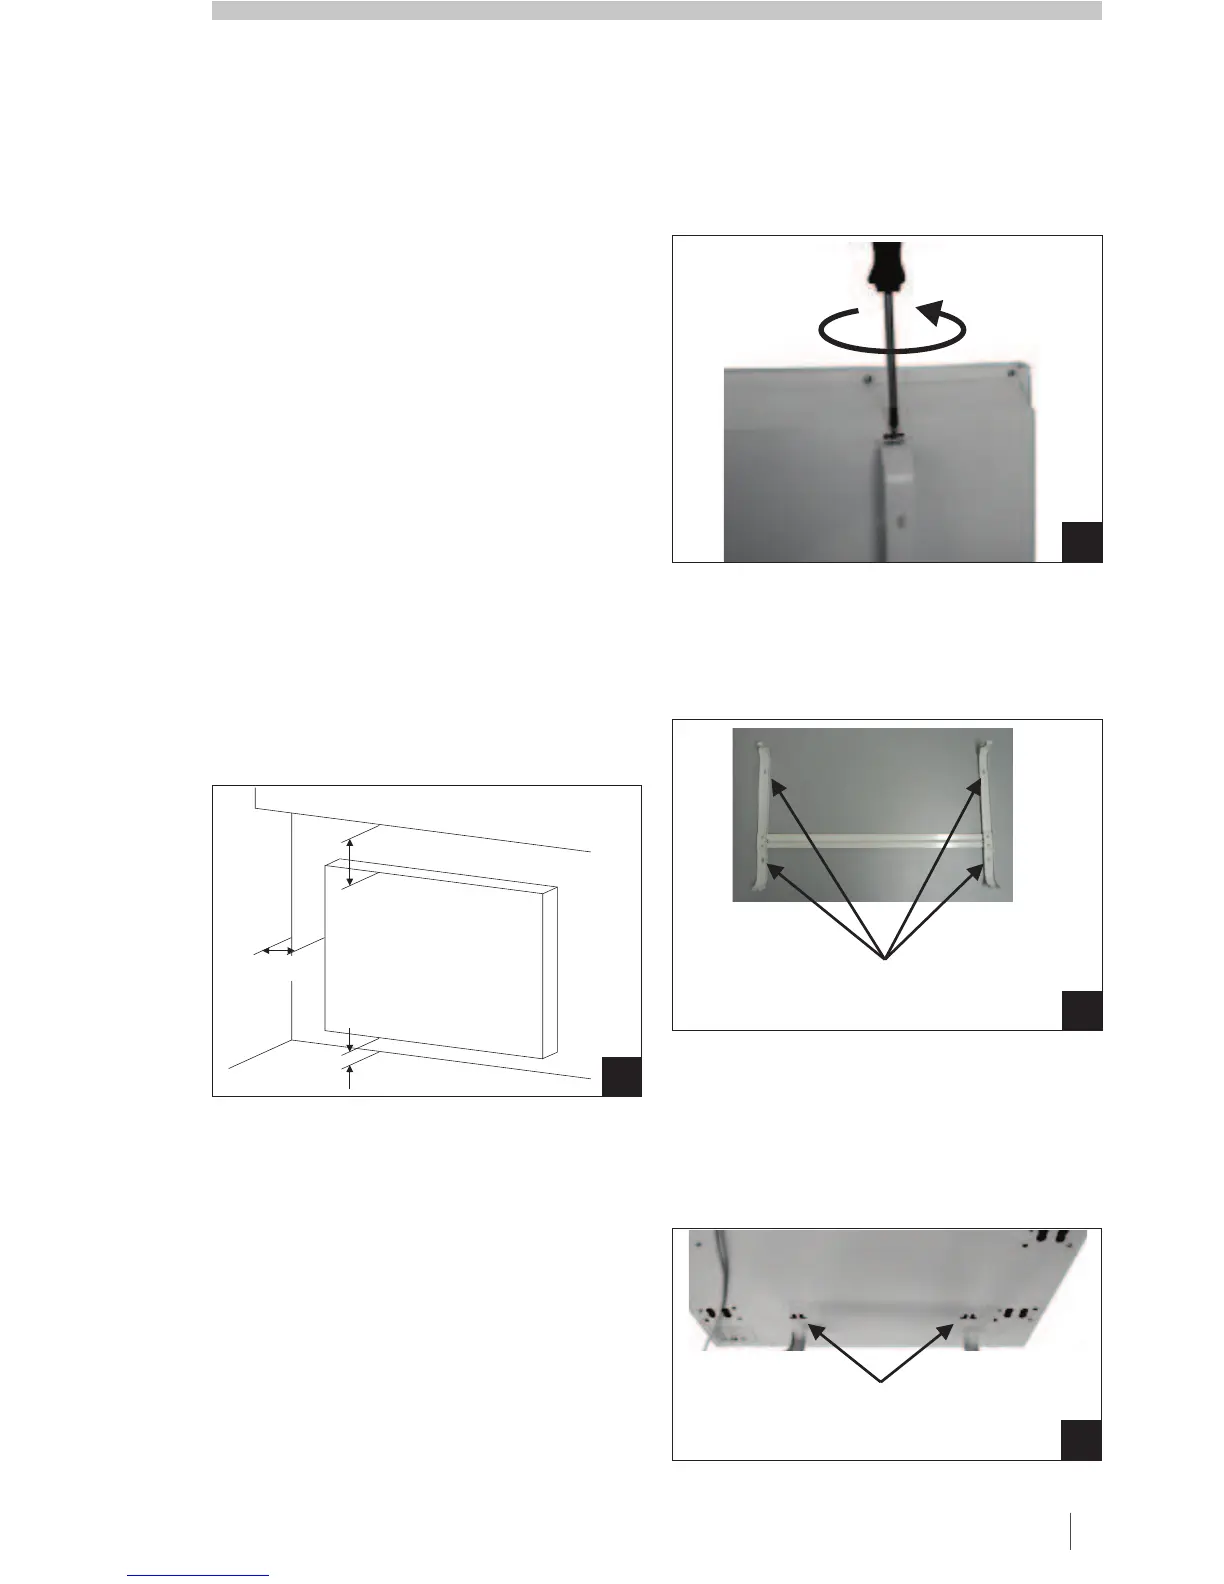
Turntheheater
upsidedownandassemblethetwoleg
supportsbyunscrewingandthenre-
fixingwiththewing-nutasshown(Fig.
1-3).Ensurebothwing-nutsare
tightenedfirmlyandthecastorsare
securebeforeusingtheheater.
Note: the longer leg section is at the rear
of the heater as shown.
must
Portable Assembly:
Fixthewallbracketsecurelytothewall
throughthe4screwholesprovided(Fig
6).
Raise the heater onto the bracket,
engaging the 2 bottom tabs of the wall
bracket first. Ensure the bottom tabs
slide up into the heater rear panel and
lock into place (Fig 7).
ComponentList
A FrontPanel
B ControlPanel
C DisplayPanel
D PowerSwitch
E RatingPlate
F LegSupport(x2)
G BackPanel
H WallMountingBracket
I PowerCord
J RemoteControl
2
CPHSeriesPortableHeaters
ASSEMBLY
B
D
E
H
A
F
J
C
G
I
WallMounting Assembly
NOTE:thewallmountingbracket
suppliedwiththeheatermustbeused.
Becausewalltypesdiffer,mounting
hardware(screwsandwallanchors)are
notsuppliedandwillneedtobe
purchasedfromyourlocalhardware
retailer.Pleaseusethefollowingfixed
weightsasaguide:-
ModelCPH01B/W/M: 9.3kg
ModelCPH02B/W/M: 12.6kg
Thereare4fixingpointsthatmustbe
used.
Theheatermustbepositionedsoit
complieswiththeminimumclearances
showninFig4.
Loosenthe2screwsfromthetopofthe
mountingbracket(referFig5),then
pushdownonthetopandbottomtabs
toreleasethemountingbracketfrom
therearpanel
ASSEMBLY cont.
®
SEELEY INTERNATIONAL – OWNER’SMANUAL 3
3
1
2
1
Longerleg
sectiontothe
heater’srear
4
450mm
150mm
250mm
5
6
4fixingpoints
/screwholes
7
Engagebottom
tabsfirst
 Loading...