6
ENGLISH (en)
inset
™
- Preparation and insertion
Read all instructions carefully before using the inset™. For information about pump therapy, possible
errors, and potential risks and their causes, consult your pump manufacturer’s instructions for use before
connecting the infusion set. When using inset™‚ follow proper hygiene procedures. Please see the
corresponding illustrations on page 8-10.
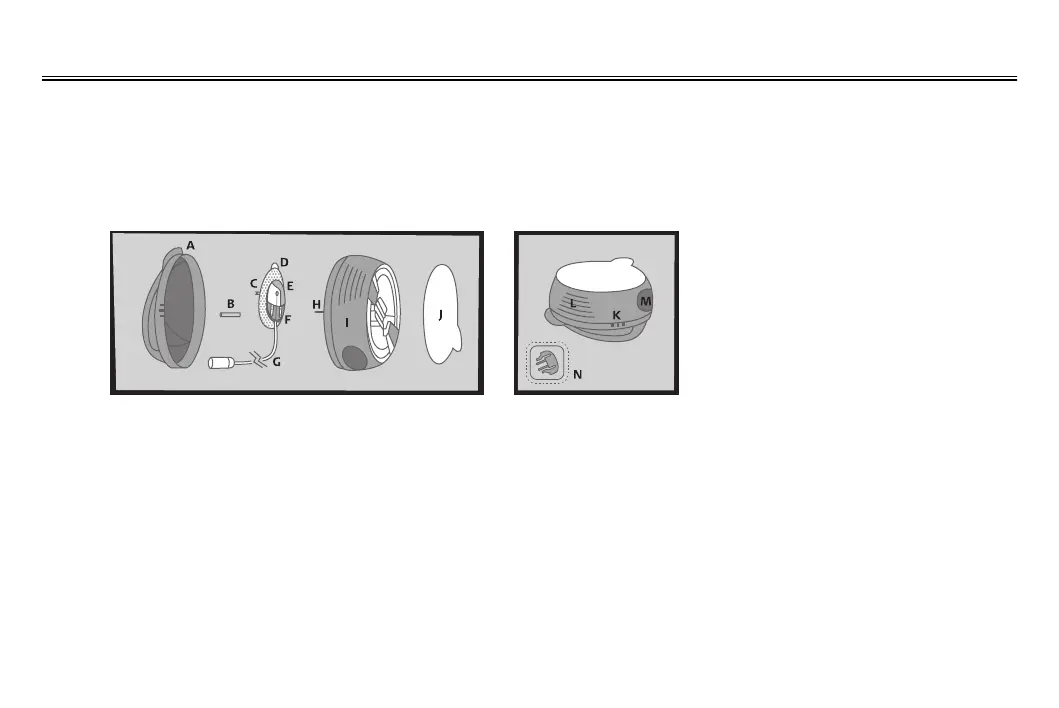
[A] Lid
[B] Needle guard
[C] Soft cannula
[D] Adhesive tape
[E] Cannula housing
[F] Connector needle
[G] Tubing
[H] Introducer needle
[I] Serter
[J] Sterile paper
IMPORTANT NOTE!
[K] Three raised dots – press here when
lifting the lid off (see Figure 6)
[L] Lined indentations – press here when
loading inset
TM
(see Figure 10)
[M] Round Indentations – press here
simultaneously when releasing inset
TM
(see Figure 12)
[N] Disconnect cover (see Figure B)
CONTENTS
1 Wash your hands before inserting the
infusion set.
2 Suggested insertion sites. Choose an
insertion site as recommended by your
healthcare provider. Do not use an area
right next to your previous infusion site.
3 Clean the area for insertion with a
disinfectant as directed by your
healthcare provider. Be sure the area is
air dry before inserting the infusion set.
4 Pull the red tape to remove the seal.
5 Remove the sterile paper.
6 Press the three raised dots on each
side of the lid firmly with one hand and
lift up the lid with the other hand.
CAUTION: Be careful not to bend or
touch the introducer needle when
preparing the serter and infusion set.
IMPORTANT NOTE! If the infusion set
is not securely placed in the serter with
the needle pointing straight ahead prior
to insertion, pain or minor injury may
occur. To avoid this, please ensure that
the following steps are taken gently so
 Loading...