Do you have a question about the Convex OUTDOOR ACRYLIC and is the answer not in the manual?
Decide mirror location for maximum vision and fix the J-Bracket to wall or ceiling securely.
Unscrew the adaptor, thread it into the mirror back, and peel protective film from the mirror edge.
Slide mirror onto J-Bracket, adjust position, tighten locking bolt, and ensure outdoor arrows point up.
Completely remove the protective film from the mirror once it is securely in position.
Attach U-Bolts around the pole and through the J-Bracket and U-Bolt Flat plate.
Thread washers and nuts onto the U-Bolt and tighten them securely.
Unscrew mirror adaptor, thread into mirror back, and peel protective film from mirror edge.
Slide mirror onto J-Bracket, adjust, tighten, ensure arrows point up, and remove all protective film.
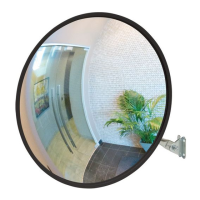
The provided manual describes the installation and features of a Convex Mirror, designed for both outdoor and general use. The mirror is available in various sizes, including 450mm, 600mm, and 900mm, and is constructed from acrylic, making it suitable for outdoor environments.
The primary function of the Convex Mirror is to provide an expanded field of vision, enhancing safety and visibility in various settings. It is particularly useful for monitoring blind spots, improving situational awareness in driveways, intersections, warehouses, or other areas where direct line of sight is limited. The convex shape of the mirror allows for a wider viewing angle compared to a flat mirror, enabling the user to see objects and movement from multiple directions simultaneously.
Material: The mirror is made from acrylic, a durable and lightweight plastic material known for its impact resistance and suitability for outdoor conditions. Acrylic is less prone to shattering than glass, making it a safer option for public or high-traffic areas.
Sizes: The mirror is available in three primary sizes:
Mounting Hardware: The mirror utilizes a "J-Bracket" system for mounting. This bracket is designed to be fixed to a wall or ceiling. For pole mounting, an optional "U-Bolt Kit" is available (purchased separately). The U-Bolt Kit includes U-Bolts and a U-Bolt Flat plate, which secure the J-Bracket to a pole.
Adaptor: An adaptor is used to connect the mirror to the J-Bracket. This adaptor threads into the back of the mirror and then slides over the J-Bracket. A locking bolt on the adaptor ensures the mirror is securely held in position once adjusted.
Outdoor Installation Feature: For outdoor use, the mirror incorporates a specific design feature to manage moisture. The back of the mirror has arrows indicating the "UP" direction. When installed correctly with these arrows pointing upwards, a vent hole located at the bottom of the mirror allows any accumulated moisture to drain, preventing condensation or water buildup that could obscure the view.
Versatile Mounting Options:
Adjustable Viewing Angle: The design allows for easy adjustment of the mirror's position after installation. Users can slide the adaptor and mirror over the J-Bracket and then manipulate the mirror to achieve the desired viewing angle. Once the optimal position is found, the locking bolt on the adaptor can be tightened to secure it.
Protective Film: The mirror comes with a protective film on its surface. This film should be partially peeled off around the immediate edge during installation to allow for proper fitting and then completely removed once the mirror is securely in its final position. This protects the mirror surface from scratches and damage during shipping and installation.
Clear Installation Instructions: The manual provides step-by-step instructions for both wall/ceiling mounting and pole mounting, ensuring a straightforward installation process for users. Diagrams illustrate each step, making it easy to follow.
Moisture Drainage (Outdoor Use): The integrated vent hole, when installed with the "UP" arrows correctly oriented, is a key maintenance feature for outdoor applications. It prevents water accumulation inside the mirror housing, which could otherwise lead to fogging, mold growth, or damage to the mirror's reflective surface over time. This design choice contributes to the longevity and consistent performance of the mirror in varying weather conditions.
Durable Acrylic Material: The use of acrylic as the mirror material inherently contributes to low maintenance. Acrylic is resistant to many environmental factors, including UV radiation (though specific UV resistance levels are not detailed, it generally performs better than glass in this regard), and is less likely to break or chip compared to glass. This reduces the need for frequent replacement due to impact damage.
Easy Cleaning: While not explicitly detailed, acrylic mirrors are generally easy to clean with mild soap and water and a soft cloth, avoiding abrasive cleaners that could scratch the surface. The smooth surface of the mirror minimizes places for dirt and grime to accumulate, simplifying routine cleaning.
Secure Fastening: The locking bolt on the adaptor ensures that once the mirror is adjusted to the desired position, it remains stable and does not require frequent readjustment. This contributes to consistent performance and reduces the need for maintenance interventions to correct mirror alignment.
In summary, the Convex Mirror is a robust and versatile visibility solution, designed with ease of installation, adjustability, and outdoor durability in mind. Its acrylic construction and thoughtful features like moisture drainage make it a practical choice for enhancing safety and observation in a wide range of environments.
| Brand | Convex |
|---|---|
| Model | OUTDOOR ACRYLIC |
| Category | Indoor Furnishing |
| Language | English |