This document provides comprehensive instructions for the installation, use, and maintenance of the Cooke & Lewis CLBUDO89 built-under oven, model V21020 BX220IM.
Function Description
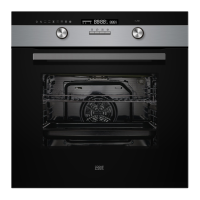
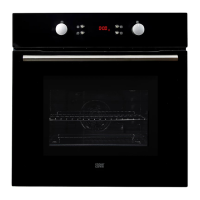
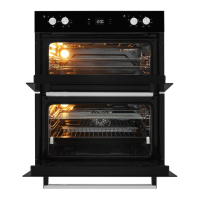
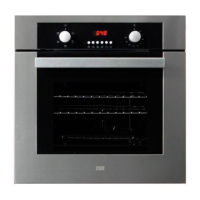
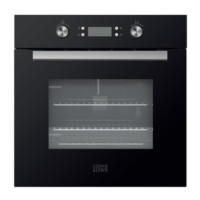
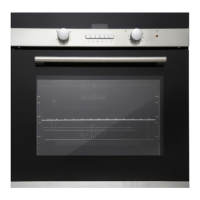
The CLBUDO89 is a dual-oven appliance designed for built-under installation in kitchen units. It features a top oven and a main oven, each with distinct operational modes and controls. The appliance is designed for traditional convection cooking, grilling, baking, and defrosting. It incorporates a control panel with rotary knobs and digital display for setting functions, temperatures, and programming cooking durations and end times.
Important Technical Specifications
- Model: CLBUDO89 (V21020 BX220IM)
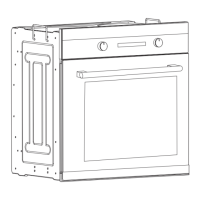
- Installation Type: Built-under oven. Requires installation by a qualified person following manufacturer's instructions.
- Electrical Connection: Class I appliance, MUST be earthed. Connects directly to mains via a double pole switch with a minimum 3 mm contact gap. Requires a 20 Amp Miniature Circuit Breaker (MCB).
- Mains Cable: 3-core, with wires coloured Brown (Live), Blue (Neutral), and Green and Yellow (Earth).
- Power Supply: Must be cut off before installation.
- Dimensions (Installation):
- Minimum opening height: 720 mm
- Minimum opening width: 564 mm
- Minimum opening depth: 550 mm
- Adjacent cabinet panels must be heat-resistant (withstanding at least 120°C).
- Air Circulation: Adequate air circulation is essential for correct operation. Requires a slot cut into the plinth if fitted (minimum 10 mm height, 200 mm width, 3 mm depth from wall). Back panel of the kitchen unit should be removed to ensure adequate air current.
- Oven Lamps: Uses 25-40 W / 220 V-240 V, T300°C G9 halogen lamps for replacement.
Usage Features
Control Panel:
The control panel features:
- Function control knob of Top oven
- Temperature control knob of Top oven
- Control panel (digital display and buttons)
- Function control knob of Main oven
- Temperature control knob of Main oven
- Temperature indicator of Top oven
- Temperature indicator of Main oven
Digital Display Buttons:
- Function button
- Minus button
- Plus button
- Lock button
- Alarm icon
- Cooking duration icon
- Controls locked icon
- Clock icon
- End time icon
Setting the Clock:
- Upon first power-on, the oven beeps and the Clock icon flashes with "0:00".
- Use "+" or "-" buttons to set the time (24-hour format). Holding buttons scrolls quickly.
- The Clock icon stops flashing once set.
- To re-access, press the Function button four times.
Setting the Alarm:
- Press the Function button once; Alarm icon flashes with "0:00".
- Use "+" or "-" buttons to set alarm time (0:01-23:59).
- Oven beeps for two minutes when alarm counts down to "0:00". Any button press stops the alert early.
Setting Cooking Duration (Main Oven Only):
- Press the Function button twice; Cooking duration icon flashes with "0:00".
- Use "+" or "-" buttons to set duration (0:01-23:59).
- Oven switches off and beeps for two minutes after countdown.
- Can be checked/altered by pressing Function button again.
Setting End Time (Main Oven Only):
- Press the Function button three times; End time icon flashes with current time.
- Use "+" or "-" buttons to set end time (up to 23:59).
- Oven enters Standby mode and starts cooking at a calculated time to finish at the set End time.
- Oven switches off and beeps for two minutes after countdown.
- Can be checked/altered by pressing Function button again.
- Note: If Clock is altered, Alarm, Cooking duration, or End time programs are cancelled. If all three are set, only Alarm time is displayed.
Lock Function:
- Press and hold the Lock button for three seconds to freeze the Control Panel. Repeat to unfreeze.
- Oven beeps if any button is pressed while locked. Rotary controls still operate.
Top Oven Operational Modes:
- Oven light: For cleaning.
- Single grill: For small portions, food in centre of trivet.
- Double grill: For larger portions, full width of trivet.
- Convection oven: Traditional convection cooking, roasting, baking.
- Select Convection oven on left rotary control, set temperature. Indicator light shows pre-heating (up to 15 minutes). Light stays on until temperature reached, then cycles on/off. Return both controls to Off after use.
Main Oven Operational Modes:
- Oven light: For cleaning.
- Defrosting and cooling:
- For defrosting: keep door closed, food in centre.
- For cooling prior to refrigeration: leave door open.
- Defrosting times: Small meat/fish (1-2 hours), larger meat/casseroles (3-5 hours). Do not defrost items > 2 Kg.
- Fan assisted oven: For even temperature distribution.
- Select Fan assisted oven on right rotary control, set temperature. Indicator light shows pre-heating (up to 15 minutes). Light stays on until temperature reached, then cycles on/off. Return both controls to Off after use.
General Usage Notes:
- Cookware: Use good quality roasting tins and baking trays. Poor quality cookware can warp.
- Oven Shelves: Always use shelf markings as a guide. Shelves must be level, rear upstand facing upwards.
- Grilling: Do not use aluminium foil in grill tray (fire hazard). Accessible parts may be hot; use oven gloves. Do not lean over door opening.
- Cooling Fan: Thermostat automatically turns cooling fan on/off. Continues operating after cooking.
- Safety: Never put items directly on oven base or cover with foil (overheat risk). Always use grill tray or shelf.
Maintenance Features
General Cleaning:
- Regular cleaning is important to prevent fat/grease build-up and fire hazards.
- Always switch off appliance and allow to cool before cleaning.
- Do not use undiluted bleaches, chlorides, wire wool, or abrasive cleaners on aluminum, stainless steel, plastic/painted parts. Use soft cloth and hot soapy water.
- Take care when cleaning over symbols on front panels to prevent fading.
- For stainless steel-cladded strips, remove white residue with a non-abrasive wipe.
- Do not use steam cleaners.
Specific Surface Cleaning:
- Stainless steel surfaces: Clean with hot soapy water and soft cloth. Stubborn marks with stainless steel cleaner. Sharp objects can mark surface but become less noticeable over time. Wipe spillages immediately. Corrosive foods (vinegar, fruit juices, salt) can mark metal if left.
- Enamel surfaces: Clean with warm, soapy water and clean cloth. For larger fat splashes, use mild cream cleaner. Rinse well and dry with soft towel.
- Glass surfaces: WARNING: Do not use harsh abrasive cleaners or sharp metal scrapers (risk of scratching and shattering). Use clean cloth with hot soapy water or specialist glass cleaner. Rinse and dry.
Cleaning Side Rails and Covers:
- Remove all accessories from oven.
- Carefully remove side rails from covers.
- Remove side covers from oven interior.
- Clean rails and covers with hot soapy water and sponge. Wipe dry.
- Reattach side covers and rails before returning accessories.
Removing Oven Parts for Cleaning:
- Oven Door:
- Open door to maximum angle.
- Pull buckle at door hinge backward.
- Close door to ~30° angle.
- Hold door with one hand on each side, lift up, and slowly pull out.
- Inner Door Glass Panel:
- Open door wide.
- Push clips on left and right sides of door bracket.
- Remove plastic top cover.
- Hold glass and slide out.
- Ensure inner door glass panel is replaced correctly (silkscreen inwards) and pushed fully into stop position.
- WARNING: Do not operate appliance without glass panel correctly fitted. Glass panels are toughened but can break if damaged; replace immediately if damaged.
Bulb Replacement (Cold Oven Only):
- Switch off power at main circuit breaker.
- Carefully unscrew cover counter-clockwise.
- Replace bulb (use 25-40 W / 220 V-240 V, T300°C G9 halogen lamps; handle with soft cloth).
- Screw cover back in place.