11
ASSEMBLY
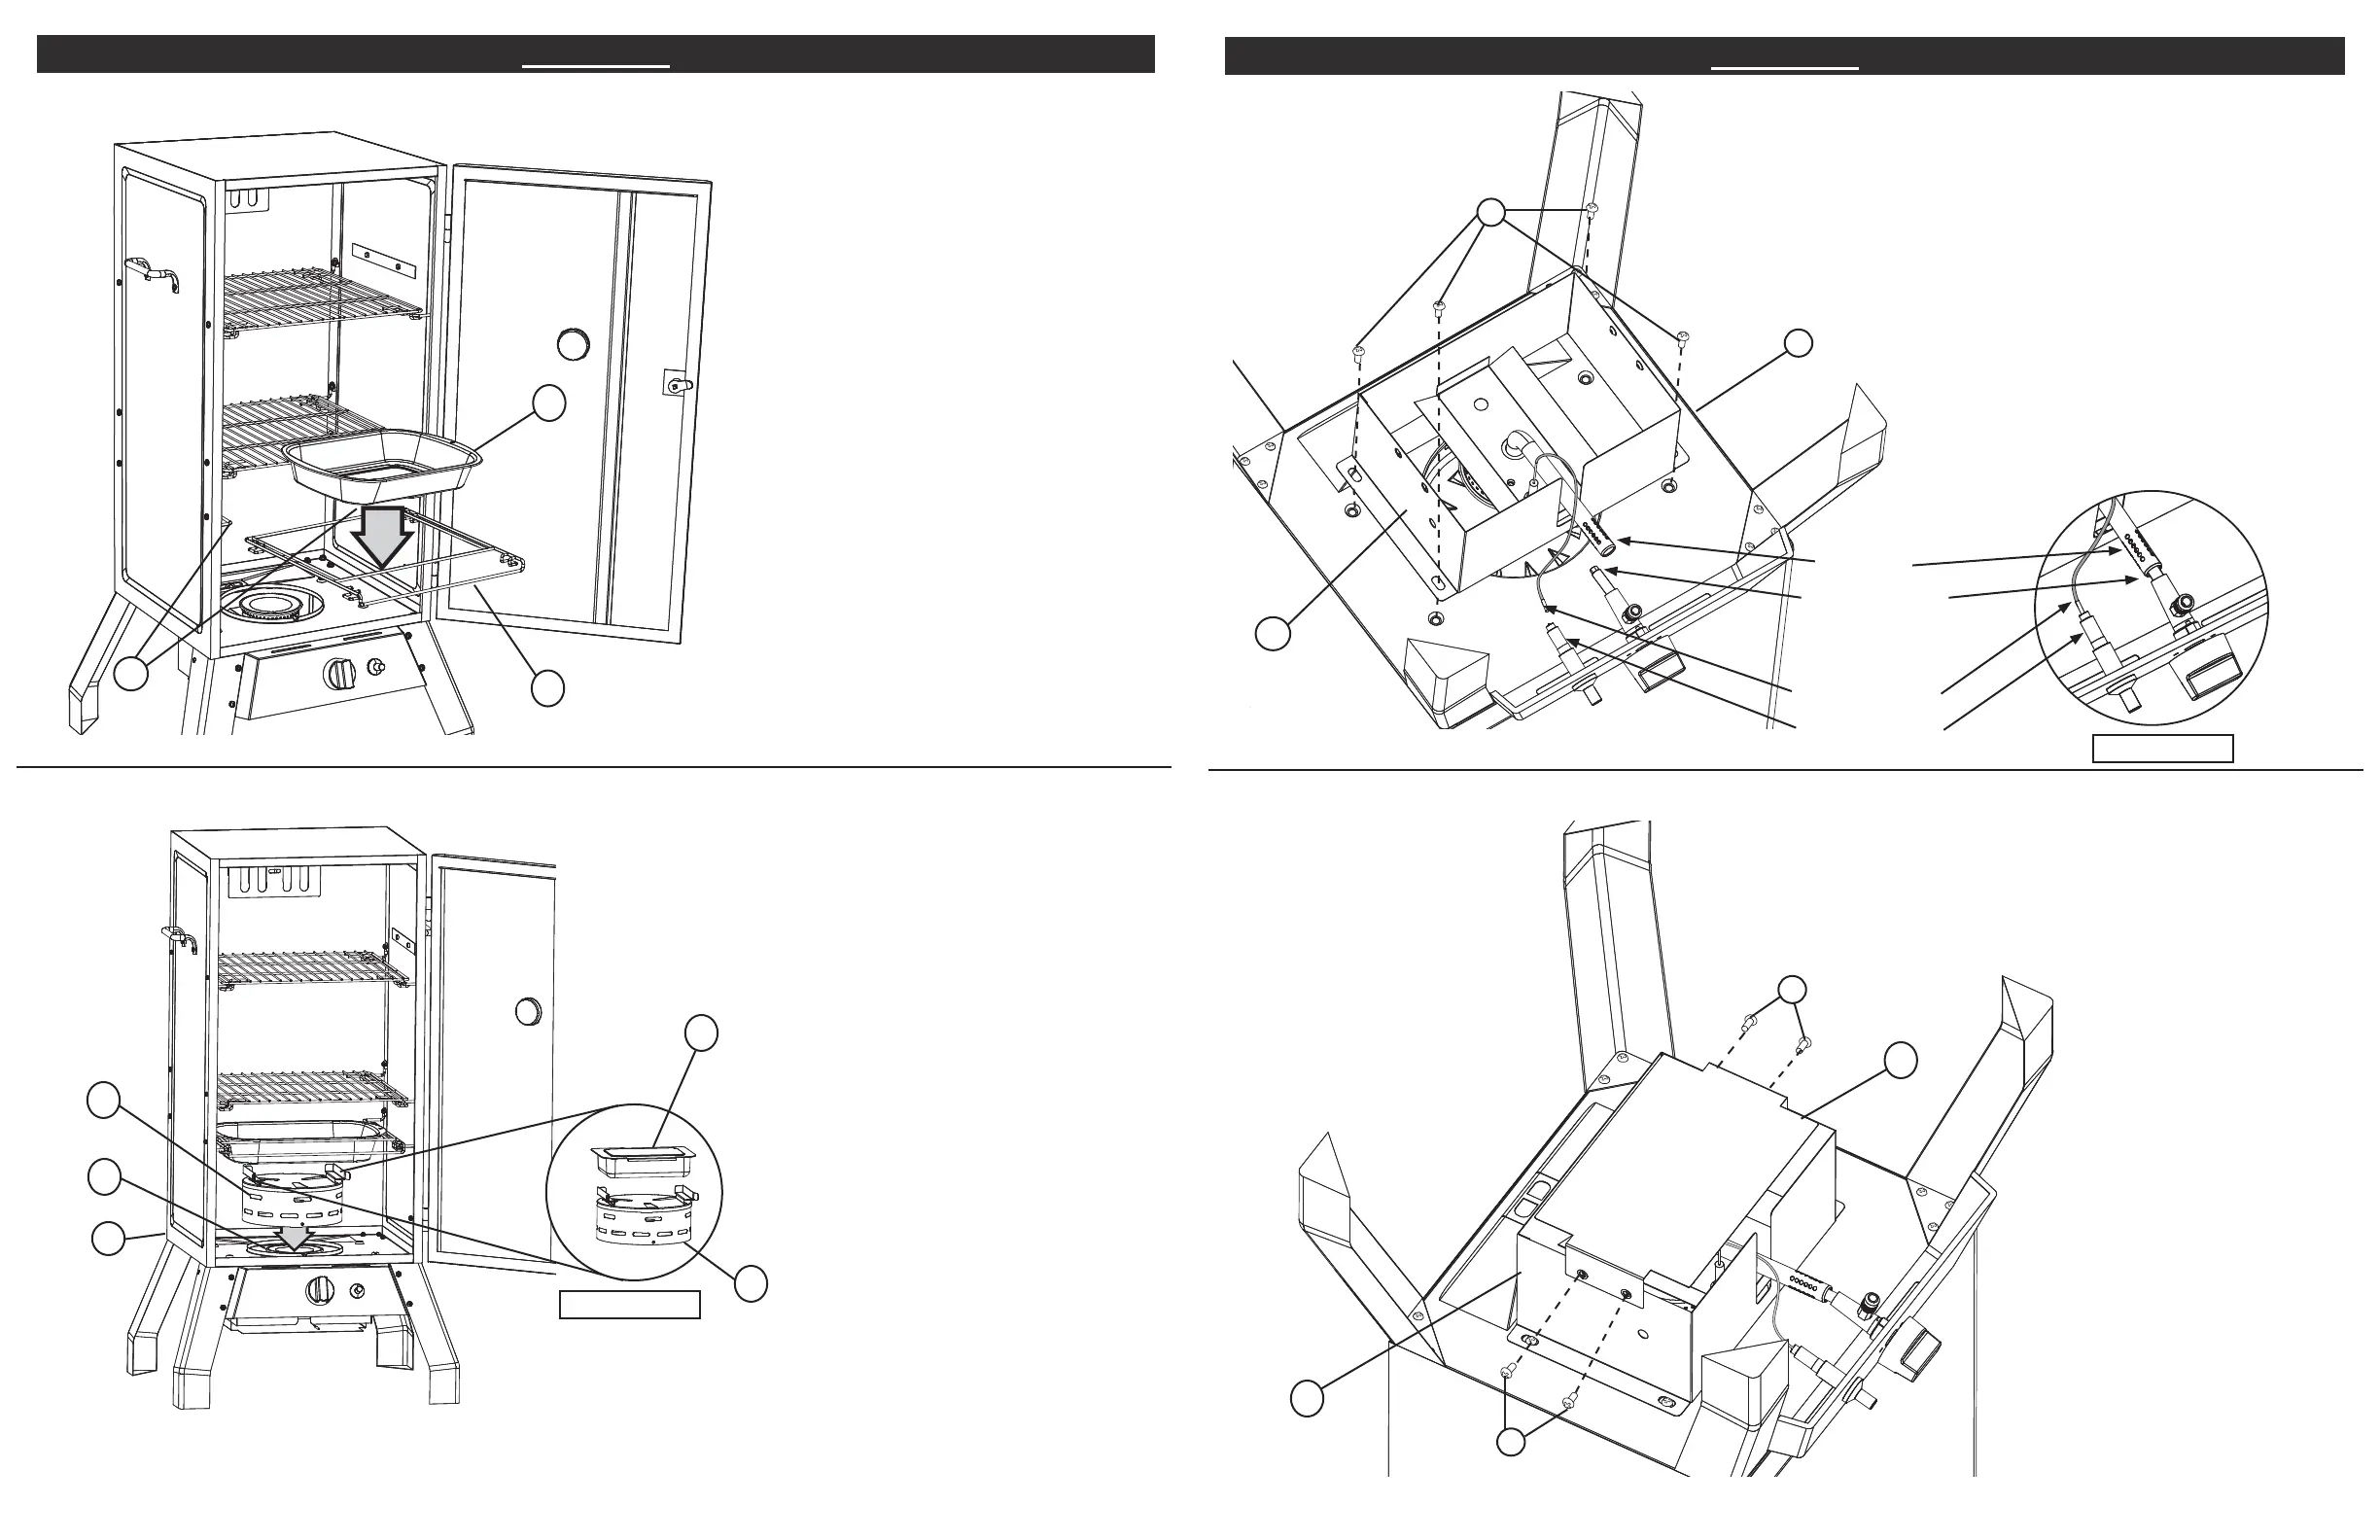
STEP 10
Place heat diffuser (20), onto
base of smoker (1) aligning directly
over burner (19).
Place wood chip tray (21) onto
slots of heat diffuser (20) as
illustrated in Figure C.
Note: Wood chip tray and water
pan MUST be in place when using
smoker. This minimizes the chance
of wood fl are ups.
20
21
20
19
1
Figure C
SOME PARTS NOT SHOWN FOR
CLARITY.
STEP 9
Set water pan (23) into water pan
rack (22) and slide onto rack
support (24) as shown.
23
22
24
8
ASSEMBLY
SOME PARTS NOT SHOWN FOR
CLARITY.
STEP 3
Position burner box (18) over center
hole in bottom of smoker body (1),
carefully aligning venturi over valve
orifi ce as shown. Attach burner box
(18) to smoker body (1) using phillips
head screw (A) and hex fl ange nut
(C).
Firmly attach ignition wire to piezo
ignitor on control panel as shown
in Figure B.
STEP 4
Attach heat shield (17) to burner
box (18) using self tapping screws
(B) as shown.
Tighten all hardware at this time.
B
B
17
18
A
18
1
Figure B
Venturi
Ignition Wire
Piezo Ignitor
Valve Orifi ce