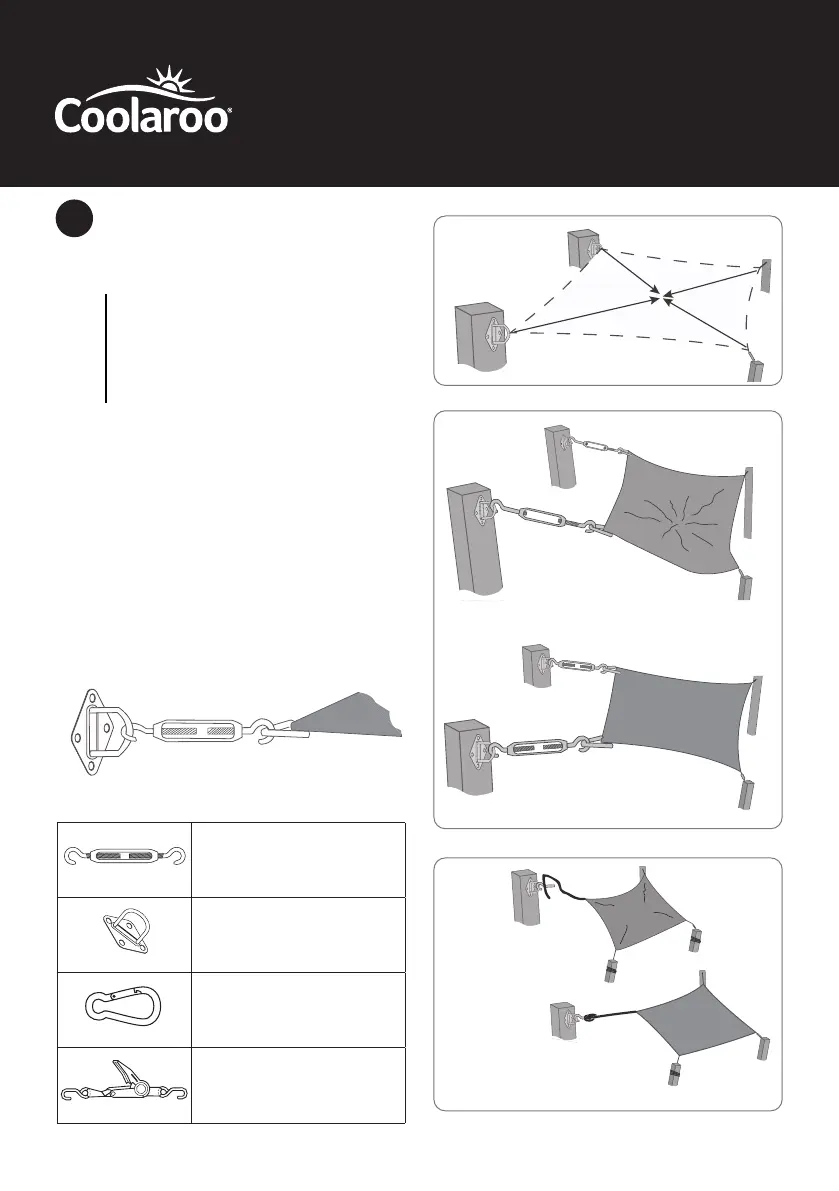
INSTALLING SHADE SAIL
A. Your Coolhaven Shade Sail Kit includes the xing
accessories needed for installation (Fig. 9).
IMPORTANT: Be sure to use the included
turnbuckles on two of the shade sail’s
attachment points for proper tensioning. A
rope or chain can be used to extend your shade
sail to a xing point if required. Additional
xing accessories may be purchased on www.
coolaroousa.com
B. Connect xing accessories to mounting points
as required. Ensure all accessories face towards
the middle of the shade sail and are tightly
secured (Fig. 10).
C. Connect all points, using the included strap
tensioning tool if necessary to gain increased
leverage (Fig. 11). Stop tensioning when the
shade sail is rigid with little or no creases and
does not sag. The tighter the shade sail the less
movement and less movement means longer
life of the shade sail (Fig. 12).
D. For Temporary Installations using rope (Fig. 13).
4
TURNBUCKLE: Used to attach
shade sail corner ring to a xing
point and provide tension on
the shade sail
PAD EYE: Used to attach shade
sail corner ring to a wall or post
in conjunction with a Snap Hook
SNAP HOOK: Used to link
shade sail corner to Pad Eye
STRAP TENSIONER: Used to
apply tension to shade sail
during installation
Fig. 9
2 Turnbuckles included
4 Pad Eyes included
2 Snap Hooks included
Turnbuckle
Pad Eye
Sail
Eye Bolt
“D” Shackle
Sail
Eye Bolt
“S” Hook
Sail
Tensioning Required
Tensioning Required
Tensioned Correctly
Fig. 13
Fig. 12
Fig. 11
Fig. 10
Tensioned Correctly
Tensioned
Correctly
Tensioning
Required
Tensioned
Correctly
Tensioning
Required