S225-12-1
47
!
SAFETY
FOR LIFE
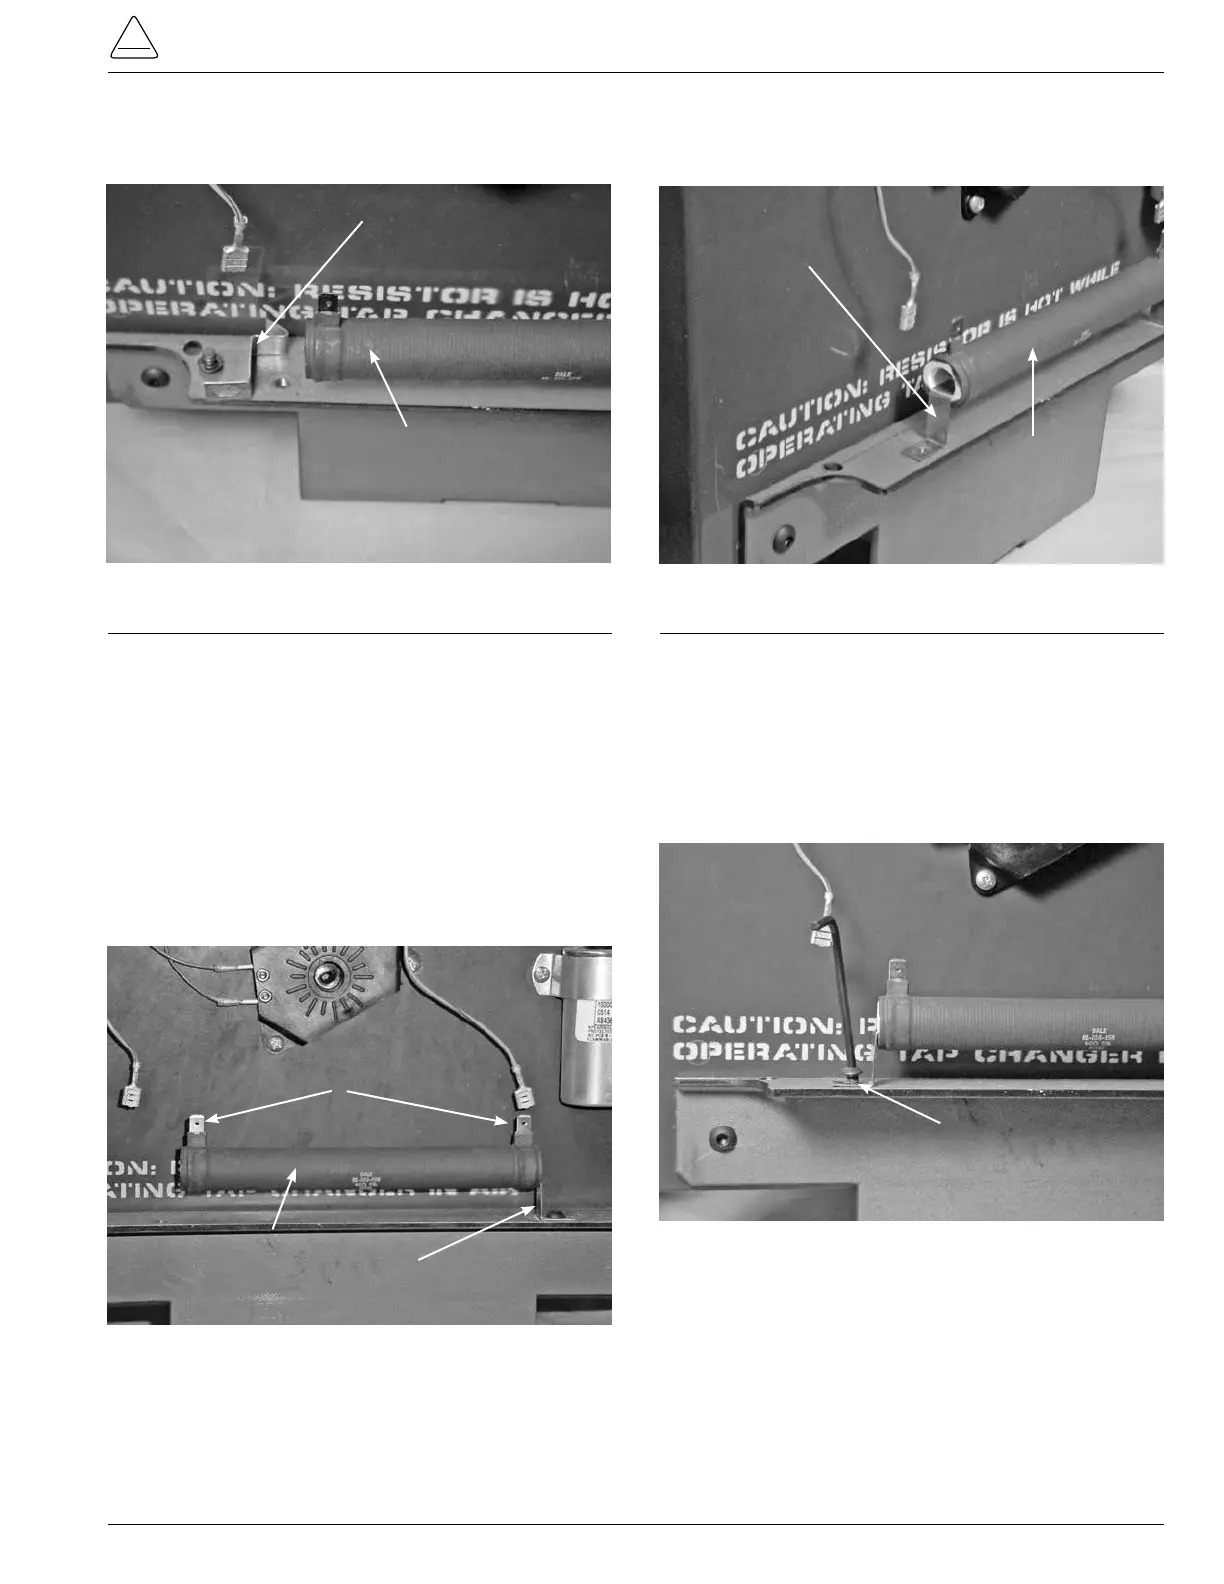
3. Remove the mounting clip from the resistor. (See Figure
135.)
4. Work the resistor off of the second mounting clip by
rotating the resistor clockwise and counter clockwise
while pulling on the resistor.
Resistor Installation
5. Push the new resistor onto the mounting clip that is
fastened to the lower tapchanger mounting bracket.
The resistor terminals must be pointing upward. (See
Figure 136.)
Resistor Mounting Clip
Motor Resistor
Figure 135.
Resistor clip removed.
Resistor Mounting Clip
Resistor Terminals
Resistor
Figure 136.
Installing new resistor.
6. Press the loose mounting clip into the open end of the
resistor. (See Figure 137.)
7. Align the mounting clip along the slotted mounting hole
up with the mounting hole in the tapchanger's lower
mounting bracket.
8. Fasten the resistor mounting clip with the button head
Allen screw after placing a drop of 243 Locktite on the
screw threads and tighten with a 1/8 inch Allen wrench.
(See Figure 138.)
Resistor Mounting Clip
Resistor
Figure 137.
Installing resistor clip.
Resistor Clip Fasten Screw
Figure 138.
Fastening resistor assembly.