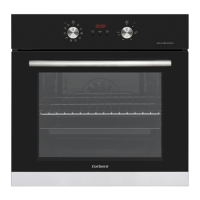
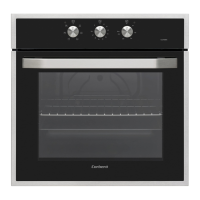
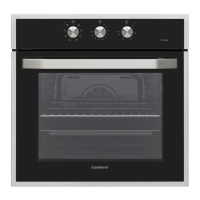
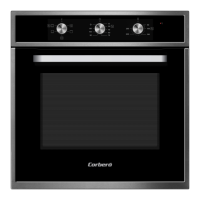
This document describes the Corberó CCH V 1065 HY MF D built-in oven, providing essential information on its functions, technical specifications, usage, and maintenance.
Function Description
The oven features various cooking functions, controlled by a function control knob and a thermostat knob. The thermostat knob sets the desired temperature, and its light illuminates when heating or maintaining temperature.
- Oven Light: Illuminates only the oven interior and remains on during any cooking function.
- Defrost Function: Activates the oven warning lights and the fan. Frozen food should be placed on a rack on the third slot from the bottom, with a tray below to catch melting ice. This function only defrosts, it does not cook.
- Static Cooking Function: Engages the oven thermostat, warning lights, and the lower and upper heating elements. It provides even heat for baking pastries, tarts, baked pasta, lasagnas, and pizzas. Preheating for 10 minutes is recommended, and it's best to use only one shelf at a time.
- Fan Function: Activates the oven thermostat, warning lights, upper and lower heating elements, and the fan. Ideal for baking cakes, it circulates air for a slight grilling effect. Preheating for 10 minutes is recommended.
- Turbo Function: Activates the oven thermostat, warning lights, ring heating element, and the fan. It distributes heat uniformly, ensuring all food on all racks cooks evenly. Preheating for 10 minutes is recommended.
- Pizza Function: Activates the oven thermostat, warning lights, ring heating element, lower heating element, and the fan. Ideal for baking pizzas quickly and evenly, with the fan distributing heat and the lower element baking the food.
- Grill Function: Activates the oven thermostat, warning lights, and the grill heating element. Used for grilling and toasting food on the upper shelves. Lightly brush the wire grid with oil to prevent sticking and place food in the center. Always place a tray below to catch drips. Preheating for 10 minutes is recommended.
- Faster Grilling Function: Activates the oven thermostat, warning lights, upper heating elements, and the grill. Used for faster grilling of thicker foods or large surface areas like meat. Use upper shelves, lightly oil the wire grid, and place a tray below. Preheating for 10 minutes is recommended.
- Double Grill and Fan Function: Activates the oven thermostat, warning lights, fan, upper heating elements, and the grill. Used for faster grilling of thicker foods or large surface areas. Both upper heating elements and grill are energized with the fan for even cooking. Use upper shelves, lightly oil the wire grid, and place a tray below. Preheating for 10 minutes is recommended.
- Vap Clean Function: Sets the oven function and thermostat to the Vap Clean symbol. Pour 200-250ml of water into a small tray on the oven base. This function runs for approximately 20 minutes to prepare the oven for easy cleaning.
Important Technical Specifications
- Model: CCH V 1065 HY MF D
- Oven Type: Electric
- Mass: 29.5 kg
- Energy Efficiency Index (Conventional): 103.6
- Energy Efficiency Index (Fan-forced): 94.1
- Energy Class: A
- Energy Consumption (Conventional): 0.87 kWh/cycle
- Energy Consumption (Fan-forced): 0.79 kWh/cycle
- Number of Cavities: 1
- Heat Source: Electric
- Volume: 69 L
- Compliance: EN 60350-1
Usage Features
The oven includes a digital timer with several functions:
- Time Adjustment: Set the current time (0:00 to 23:59) using the "+" and "-" buttons. The "A" symbol and "000" will flash upon power connection until the time is set.
- Audible Warning Time Adjustment: Set a warning time (0:00 to 23:59) that sounds an alarm but does not activate the oven. Press and hold "-" for 1-2 seconds to adjust the sound volume.
- Semi-automatic Time Adjustment (Cooking Period): Set a fixed cooking duration (0 to 10 hours). The oven will turn off and sound an alarm when the timer reaches zero.
- Semi-automatic Time Adjustment (Finishing Time): Set a desired finish time (up to 10 hours after the current time). The oven will automatically start to finish cooking at the set time.
- Fully Automatic Programming: Combine a cooking period and a finishing time to start cooking after a delay and for a specific duration.
Accessories:
- EasyFix Wire Rack: Can be placed on any level from 1 to 5. Ensure at least 1 cm space from the fan cover.
- Deep Tray: Best for stews, placed on any rack and pushed to the end.
- Small Tray: Best for baking pastry, placed in the center of a wire grid.
- Wire Grid: Used for grilling or processing food in oven-friendly containers. Place it correctly in the oven cavity and push to the end.
- Water Collector: Collects condensation that may appear on the inner glass of the oven door during cooking.
Maintenance Features
- General Cleaning: Switch off and cool the appliance before cleaning. Use liquid or cream cleaners without particles. Avoid caustic creams, abrasive powders, rough wire wool, hard tools, or steam cleaners, as these can damage surfaces. Clean spills immediately.
- Inside the Oven: Best cleaned when warm. Wipe with a soft cloth soaked in soapy water after each use, then with a wet cloth, and dry. Liquid cleaning material may be needed for thorough cleaning.
- Glass Parts: Clean regularly with glass cleaner, then rinse and dry.
- Stainless Steel Parts: Clean regularly with a soft cloth soaked in water, then dry. Do not clean when hot. Avoid leaving vinegar, coffee, milk, salt, water, lemon, or tomato juice on stainless steel for long periods.
- Oven Door Glass Removal:
- Push the glass in direction B to release it from location bracket (x), then pull it out in direction A.
- To replace, push the glass towards and under location bracket (y) in direction B, then place it under location bracket (x) in direction C.
- For triple-glass doors, the third layer is removed similarly to the second.
- Oven Door Removal:
- Open the oven door.
- Open the locking catch (a) with a screwdriver to the end position.
- Close the door until it almost reaches the fully closed position, then pull it towards you to remove.
- Wire Shelf Removal: Pull the wire rack as shown in the figure. After releasing it from clips (a), lift it up.
- Oven Lamp Replacement:
- Switch off and cool the appliance.
- Remove the glass lens, then the bulb.
- Insert a new bulb (resistant to 300 °C, 230 V, 15-25 Watt, Type E14).
- Replace the glass lens. The lamp is specifically designed for kitchen appliances, not household room illumination.
Safety Instructions
- Read the manual carefully before use and keep it for future reference.
- Children aged 8 and above, and persons with reduced capabilities, can use the appliance under supervision and after understanding the hazards. Children should not play with or clean the appliance unsupervised.
- The appliance and accessible parts become hot during use. Avoid touching heating elements. Keep children under 8 away unless continually supervised.
- Fire Hazard: Do not store items on cooking surfaces.
- Electric Shock Hazard: If the surface is cracked, switch off the appliance immediately. Ensure the appliance is switched off before replacing the lamp.
- Do not operate with an external timer or remote-control system.
- Do not use harsh abrasive cleaners or scourers on the oven door glass or other surfaces to avoid scratching or damage.
- Do not use steam cleaners.
- Maintenance and repair must be carried out by authorized service technicians. Unauthorized work is dangerous and voids the warranty.
- Ensure local distribution conditions (voltage, frequency) match appliance specifications before connection.
- The appliance is designed for domestic cooking only; other uses (e.g., heating a room) are improper.
- Do not use door handles to lift or move the appliance.
- Ensure the power cord is not trapped or damaged during installation. A damaged cord must be replaced by qualified personnel.
- Do not let children climb or sit on the open oven door.
- Keep children and animals away from the appliance.
- Do not use the appliance until fully installed by an authorized technician.
- Protect the appliance from atmospheric effects (sun, rain, snow, dust, humidity).
- Surrounding materials (cabinets) must withstand at least 100°C.
- Do not install behind a decorative door to avoid overheating.
- When using for the first time, a slight smell is normal due to insulation materials. Run the empty oven at maximum temperature for 45 minutes in a well-ventilated area.
- Be careful when opening the oven door during or after cooking, as hot steam can cause burns.
- Do not place flammable or combustible materials in or near the appliance.
- Always use oven gloves.
- Never line the oven with aluminum foil.
- Do not place dishes or baking trays directly on the oven base.
- Do not leave the oven unattended when cooking with oils. Never pour water on oil fires; instead, switch off the oven and cover the pan.
- Turn off the main control switch if not used for a long time.
- Ensure control knobs are in the "0" (stop) position when not in use.
- Trays incline when pulled out; be careful with hot food.
- Do not place anything on the open oven door.
- Do not hang towels or clothes on the appliance or its handles.
- Do not remove control knobs for cleaning.
- Use original spare parts and authorized service agents for efficiency and safety.
Troubleshooting
If problems persist after basic checks, contact an authorized service person or qualified technician.
- Oven not switching on: Check power supply and other kitchen appliances.
- No heat or oven not warming up: Check oven temperature control knob setting and ensure the door is closed.
- Oven light not operating: Replace the lamp. Check electrical supply to the wall socket.
- Uneven cooking: Check recommended temperatures and shelf positions. Avoid frequent door opening.
- Timer buttons not pressing properly: Remove foreign matter. For touch models, remove moisture. Check if key lock function is set.
- Noisy oven fan: Check if the oven is level. Ensure shelves and bakeware are not vibrating or touching the back panel.
Transport
- Use original packaging and follow transport signs. Tape all independent parts.
- If original packaging is unavailable, use a carriage box to protect external surfaces.